Clean Kitchen Surfaces
Why It’s Important to Keep Kitchen Surfaces Clean
- Hygiene: Crumbs, spills, and stains can harbor bacteria and attract pests. Regular cleaning prevents the spread of germs.
- Ease of Maintenance: Cleaning surfaces regularly avoids the buildup of stubborn grime, making future cleaning simpler.
- Aesthetic Appeal: A tidy kitchen looks welcoming and inspires better organization.
Step-by-Step Guide to Cleaning Kitchen Surfaces
- Microfiber cloths or sponges
- Non-toxic multi-surface cleaner (or vinegar-water solution for natural cleaning)
- Dish soap for sticky residue or grease spots
- Baking soda for tough stains
- Clear the Area:
Remove small appliances, cutting boards, or utensils from countertops so you can clean thoroughly. - Wipe Down Surfaces:
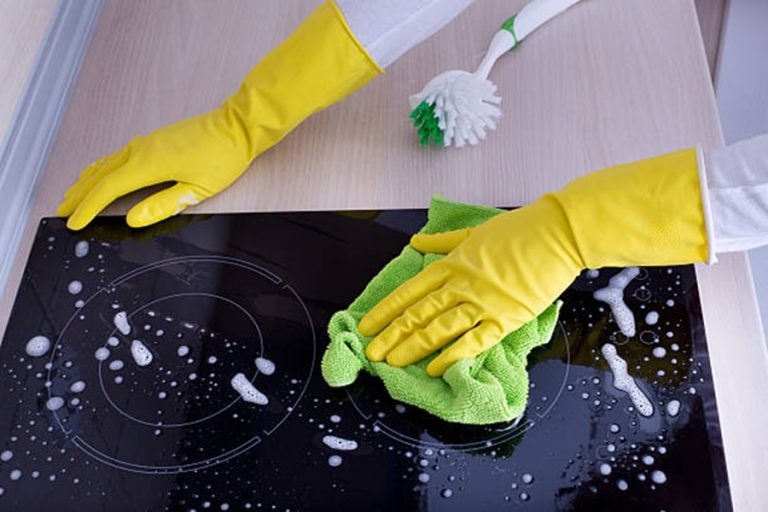
Use a damp microfiber cloth with gentle cleaner to wipe away dust, crumbs, and minor spills on countertops, tabletops, or islands. - For greasy spots (e.g., near the stove), apply dish soap directly to the area with a sponge.
- If dried-on food persists, sprinkle baking soda onto the stain before using your sponge or cloth.
- Clean Crevices:
Use an old toothbrush or small brush dipped in soapy water to scrub around faucet bases and in countertop seams. - Disinfect When Necessary:
After regular wiping down, use a food-safe disinfectant spray—especially if raw meat juices have touched any surface.
Preventative Maintenance Tips
- Daily Spot Cleaning: Wipe down areas immediately after preparing food to avoid buildup of grime or stains over time.
- Use Trivets & Cutting Boards: Protect countertops from heat damage and knife scratches by always using trivets under hot pans and cutting boards when chopping.
- Keep It Dry: After wiping with cleaner or water, use a dry microfiber cloth to prevent streaks on polished stone finishes such as granite or quartz.
Table: Recommended Cleaning Methods by Surface Material
| Surface Type | Cleaner | Notes |
| Granite/Quartz | pH-neutral stone cleaner | Avoid acidic solutions like vinegar |
| Stainless Steel | Vinegar-water mix | Wipe along the grain; use polish if needed |
| Laminated Wood | Mild dish soap + water | Dry immediately to prevent warping |
Additional Tips for Efficiency
- Keep cleaning supplies handy in a designated drawer or cabinet close to your work area.
- Consider setting up a quick “end-of-day wipe” routine where you spend just 5 minutes before bed tidying all surfaces.
- Encourage household members to follow simple habits like wiping spills as soon as they occur.
By incorporating these practical strategies into your daily life, maintaining clean kitchen surfaces becomes less daunting and more automatic over time.
Empty Waste Bins
Keeping waste bins clean and regularly emptied is a simple yet essential chore that contributes to a tidy, odor-free home. Neglecting this task can lead to unpleasant smells, pest issues, and a cluttered environment. Below is a guide to efficiently managing your waste bins with minimal effort.
Why Emptying Waste Bins Matters
- Reduces Odors: Regularly emptying bins prevents the accumulation of waste that can emit strong or unpleasant smells.
- Prevents Pests: Overflowing bins attract pests such as flies, ants, or rodents.
- Enhances Hygiene: Frequent emptying helps minimize the spread of bacteria and germs from decomposing organic matter.
- Improves Aesthetics: A full or overflowing bin detracts from the neatness of your space.
Practical Tips for Emptying Waste Bins
- Empty small indoor bins (e.g., in bedrooms or bathrooms) every 2–3 days.
- Kitchen or food-related bins should be emptied daily to prevent odors and bacteria buildup.
- Always line your bins with durable garbage bags to prevent leaks and make disposal straightforward.
- For wet waste (e.g., kitchen scraps), consider double-lining the bin for additional protection.
- Separate recyclables, food waste, and general trash into designated bins. This reduces the volume of non-recyclable material and supports eco-friendly practices.
- If you compost, use an appropriate container for organic scraps separate from regular trash.
- After emptying the bin, give it a quick clean with warm water and a disinfectant spray at least once a week.
- For outdoor trash cans, rinse them thoroughly monthly to remove sticky residues that attract pests.
- Consider using foot-pedal or touchless lids for kitchen waste bins as they help maintain hygiene by reducing direct contact.
- Use odor-neutralizing bin liners or place an activated charcoal packet at the bottom of your bin to absorb unwanted smells.
Table: Bin Management Schedule Example
| Location | Suggested Frequency | Notes |
| Kitchen | Daily | Line with strong bags; prioritize food waste |
| Bathroom | Every 2–3 days | Use smaller liners; avoid overstuffing |
| Outdoor/General | Weekly | Disinfect after emptying |
Benefits Beyond Cleanliness
By making it a habit to promptly empty your waste bins: – You’ll enjoy better air quality indoors without lingering odors. – Your space will feel more organized and inviting. – The risk of bacteria spreading throughout your home will decrease significantly.
Making this task part of your routine ensures it remains quick and effortless while maintaining cleanliness throughout your living spaces.
Squeegee Shower Walls
Keeping your shower walls clean and free of water spots and soap scum not only improves the appearance of your bathroom but also extends the life of your tiles, grout, and glass panels. Squeegeeing is a simple, efficient chore that prevents buildup and minimizes long-term cleaning efforts. With just a few minutes after each shower, you can maintain a fresh, polished look in your bathroom.
Benefits of Squeegeeing Shower Walls
Squeegeeing may seem like an optional task, but it offers several benefits that make it worth incorporating into your routine:
– Prevents Water Spots: Hard water often leaves mineral deposits behind when droplets dry on glass or tile. A quick squeegee removes excess moisture, preventing unsightly water stains.
– Minimizes Soap Scum: Soap residue left on wet surfaces hardens over time. Regular squeegeeing reduces this accumulation, saving you from deep scrubbing later.
– Protects Grout and Tiles: Excess moisture can seep into grout lines or behind tiles, fostering mold growth or causing structural damage over time. Removing water with a squeegee mitigates these risks.
– Improves Hygiene: A drier shower area discourages bacteria and mildew growth, ensuring a cleaner bathing environment for everyone in the house.
Tools You’ll Need
Investing in the right tools can make this task even easier and more effective:
1. Squeegee: Choose one with a comfortable grip and a wide blade for maximum coverage per swipe. 2. Mild Cleaning Solution (Optional): For occasional maintenance of particularly stubborn spots. 3. Towel or Microfiber Cloth: To dry areas that may be hard to reach with a squeegee.
How to Properly Squeegee Shower Walls
Following these steps ensures an efficient cleaning process that leaves your surfaces spotless: 1. Start at the top of the wall to prevent water from dripping onto already-cleaned sections. 2. Hold the squeegee at an angle (approximately 45 degrees) to ensure effective removal of water without streaks. 3. Move in straight lines either vertically or horizontally—avoid random movements for consistent results. 4. Overlap each stroke slightly to avoid missing small areas between swipes. 5. Focus on corners and edges where water tends to accumulate.
Tips for Making It Routine
The key to success with this chore is consistency—doing it every time someone showers means less buildup over time: – Mount a wall hook inside or near the shower to keep your squeegee easily accessible. – Encourage all household members who use the shower to adopt this habit by demonstrating how quick and simple it is. – If you’re short on time, focus primarily on glass panels or doors since they show streaks more prominently than tiled walls.
| Frequency | Task | Approx Time |
| After Every Shower | Squeegee all walls and glass doors | 1–2 minutes |
| Weekly | Check for missed spots; deep clean if needed | 5–10 minutes |
With such minimal effort required daily, squeegeeing shower walls is one of those small chores that pays off significantly in terms of cleanliness and maintenance—even reducing overall cleaning time during deeper bathroom scrubs later on.
By committing just a few moments each day to this habit, you’ll enjoy sparkling clean walls without investing hours into tedious deep-cleaning sessions down the road—a win-win for any busy household seeking easy ways to maintain their space!
Clean Your Bathroom Mirrors
Keeping bathroom mirrors clean is a simple yet impactful chore that enhances the overall appearance of your space. Sparkling mirrors not only make your bathroom look brighter, but they also promote a more hygienic and pleasant environment. Here’s how to efficiently clean your bathroom mirrors while avoiding common mistakes.
Why Clean Mirrors Regularly?
Bathroom mirrors can quickly accumulate smudges, fingerprints, toothpaste splatter, and streaks from water vapor or improper cleaning techniques. Regular maintenance ensures:
– A streak-free reflection for grooming or skincare routines.
– Prevention of long-term grime buildup.
– A polished, tidy appearance for guests and daily use.
Tools You’ll Need
- Microfiber cloth: Ideal for cleaning without leaving lint or streaks.
- Glass cleaner: Use a high-quality or DIY solution (explained below).
- Cotton swabs: For reaching corners or intricate designs on mirror edges.
- Optional: Squeegee for an ultra-smooth finish.
DIY Glass Cleaner Recipe
| Ingredient | Quantity |
| White vinegar | 1 cup |
| Distilled water | 1 cup |
| Rubbing alcohol | 1 tablespoon |
| Essential oil (optional) | A few drops (for scent) |
Pour the mixture into a spray bottle and shake well before use.
Step-by-Step Cleaning Process
- Remove dust from the mirror surface with a dry microfiber cloth.
- Ensure the room is well-lit to spot smudges easily.
- Lightly spray your chosen glass cleaner onto the microfiber cloth instead of directly on the mirror to prevent dripping and uneven distribution.
- Gently wipe the mirror with circular movements to lift dirt and oils.
- Focus on areas prone to buildup, such as near faucets or where hands touch most often.
- Use a dampened cotton swab to clean corners or detailed frames.
- Avoid using abrasive scrubbers that could scratch the surface.
- Use a dry section of your microfiber cloth or a squeegee to remove excess moisture.
- For extra shine, buff with long vertical strokes after drying.
Additional Tips
- Avoid cleaning mirrors when they are warm (e.g., after a hot shower), as this can lead to streaking due to rapid evaporation.
- Do not use paper towels; they tend to leave behind lint or cause scratches over time.
- Keep bathroom ventilation in check to reduce condensation that encourages streaks on mirrors.
With these tips and techniques, maintaining spotless bathroom mirrors becomes an easy yet rewarding chore that elevates the overall cleanliness of your home.
Look After Pets
Caring for pets is an essential responsibility, but it doesn’t have to be overwhelming. With a few easy-to-follow routines and a touch of organization, looking after your pets can become an enjoyable part of your daily life. This section covers practical tips and strategies for making pet care simple and efficient while ensuring their health and happiness.
Create a Pet Care Schedule
- Feed pets at the same time every day to establish a routine.
- Refill water bowls regularly, keeping them clean to avoid bacteria buildup.
- Take dogs out for walks or provide playtime for cats and smaller animals to meet their exercise needs.
- Groom your pet with brushing or bathing as needed for their breed or species.
- Check bedding, litter boxes, or cages for cleanliness, replacing materials as necessary.
- Schedule veterinary check-ups if required or administer preventive care (e.g., flea treatments).
- Deep clean toys, leashes, or carriers to remove bacteria or dirt buildup.
Consider creating a checklist or digital reminders to ensure no task is missed.
Organize Pet Supplies
| Item | Suggested Storage Idea | Notes |
| Food and Treats | Airtight containers | Prevents pests or spoilage |
| Leashes and Collars | Wall hooks by entryways | Convenient for dog walks |
| Grooming Tools | Drawer or labeled basket | Easy access when needed |
| Toys | Storage bin in living areas | Keeps space tidy yet playful |
This system ensures supplies are always within reach when required.
Make Time for Bonding
- Playing games such as fetch or tug-of-war with dogs.
- Using interactive toys like laser pointers for cats.
- Training sessions that reinforce good behavior while stimulating their minds.
- Quiet cuddling or just spending time near them as they relax.
These moments strengthen the relationship you share with your pets while also enriching their quality of life.
Quick Tips for Simplifying Pet Chores
- Use washable mats around food bowls to catch spills, minimizing cleanup.
- Invest in self-cleaning litter boxes or automated feeders if within budget.
- Rotate toys weekly to keep pets engaged without needing constant new purchases.
By developing these routines and staying organized, caring for your pets becomes an enjoyable habit rather than a chore, leaving more time to enjoy the companionship they bring into your life.
Look After Pets
Caring for pets is a rewarding but ongoing responsibility. Incorporating pet care into your routine as an easy chore ensures your furry (or feathered) friends remain healthy and happy while keeping their areas clean and organized. This section explores simple, actionable ways to look after your pets with minimal effort.
Daily Pet Care Tips
- Feeding Schedule:
Stick to a consistent feeding routine. Measure out portions to avoid overfeeding and streamline prep time by pre-portioning meals for the week in small containers. - Fresh Water:
Replace your pet’s water daily. For ease, consider using a pet water fountain, which keeps water fresh and reduces the need for constant refilling. - Quick Grooming:
Brush your pet’s coat or feathers daily, especially for breeds prone to shedding, to minimize fur accumulation indoors. Keep grooming tools like brushes or nail clippers in an accessible spot.
Cleaning Pet Areas
- Wash pet beds or blankets weekly to remove fur, dust, and odors. Use a lint roller beforehand if there is excessive shedding.
- Choose washable covers for easier maintenance.
- Wipe down food and water bowls daily with warm, soapy water.
- Lay a silicone mat under bowls for easy clean-up of spills.
- Scoop waste daily and do a full litter change weekly.
- Place a dedicated trash bag or small bin nearby for quicker scooping sessions.
Exercise Made Simple
- For dogs: A 15-minute walk around the neighborhood or a quick fetch session in the backyard can suffice on busy days.
- For cats: Interactive toys like laser pointers or feather wands can provide stimulating exercise indoors with minimal effort from you.
- For smaller animals like rabbits or hamsters: Rotate their toys regularly or create obstacle courses using household items to encourage play.
Keeping Track of Appointments
Staying on top of veterinary check-ups and grooming appointments ensures your pet stays healthy. To simplify this task: – Use digital calendars or pet care apps to set reminders for vaccinations, flea treatments, or grooming visits. – Store medical files and vaccination records in one folder for easy access when needed.
Streamlining Supplies
Organizing pet supplies ensures everything you need is easy to find: – Dedicate a small cabinet or box to items like grooming tools, medications, toys, and cleaning supplies. – Use labeled bins within the space so each item has its place (e.g., “treats,” “leashes,” “shampoos”).
By integrating these small yet effective practices into your routine, caring for pets becomes less overwhelming while ensuring their happiness and health remain top priority.
Sort Through Junk Mail
Sorting through junk mail is a simple yet impactful chore that can help maintain an organized and clutter-free home. This task often gets overlooked, but dedicating even a few minutes to handling unwanted mail can save time and reduce stress in the long run. Below is a practical guide on how to approach this task efficiently.
Benefits of Sorting Junk Mail
- Reduces Clutter: Piles of mail can quickly accumulate on countertops, desks, or entryway tables. Regularly sorting through it helps prevent unnecessary mess.
- Promotes Organization: Keeping only important documents ensures that you have easy access to bills, invitations, or other important correspondence.
- Saves Time: By developing a system for dealing with mail immediately, you’ll avoid spending hours sifting through weeks’ worth of papers later.
Step-by-Step Tips for Sorting Junk Mail
- Create a Dedicated Area for Mail
Choose a specific location in your home where all incoming mail is placed. This could be a small bin, basket, or tray near the entryway or kitchen. Keeping mail in one spot prevents it from being scattered throughout the house. - Sort Immediately Upon Receipt
As soon as new mail comes in, take a moment to separate it into categories: - Bills or financial documents
- Invitations or event-related mail
- Junk mail (advertisements, flyers, catalogs)
- Personal letters (if applicable)
- Recycle Unnecessary Items
Recycle anything you don’t need immediately. This includes unsolicited catalogs, credit card offers, and promotional flyers. Make sure to shred sensitive information before recycling. - Set Aside Actionable Mail
For items requiring your attention—like bills or RSVPs—place them in a specific folder or area where you’ll remember to address them later. - Unsubscribe from Unwanted Mailings
To reduce the amount of junk mail you receive: - Contact companies directly to request removal from mailing lists.
- Use services like DMAchoice.org or opt-out forms provided by credit bureaus for unsolicited financial offers.
- Schedule Weekly Reviews
Even with daily sorting practices, it’s helpful to dedicate 5–10 minutes once a week for a more thorough review of your folder or actionable items.
Tools for Efficient Sorting
| Tool | Purpose | Example Options |
| Shredder | Disposing of sensitive documents safely | Cross-cut paper shredder models |
| Recycling Bin | Collecting paper waste responsibly | Any sturdy bin for paper |
| File Organizer | Storing important documents | Accordion files |
| Digital Apps | Reducing physical clutter | PaperKarma, USPS Informed Delivery |
Maintaining the Routine
Once you’ve established a system for managing junk mail, consistency becomes key. Make it part of your daily or weekly routine so that it doesn’t pile up again. By integrating this habit into your schedule, you’ll enjoy a tidier space and spend less time searching for important papers.