Why Regular Garbage Disposal Cleaning Is Important
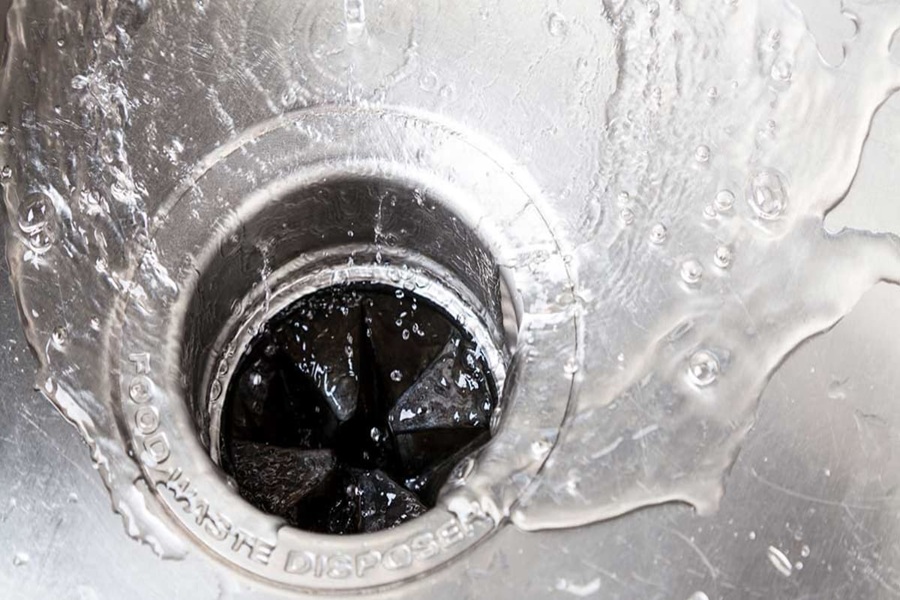
Garbage disposals are a convenient kitchen tool, but they can quickly become a source of unpleasant odors, blockages, and diminished performance if not regularly cleaned. Understanding why regular maintenance is necessary can help extend the lifespan of your disposal, ensure it remains efficient, and keep your kitchen smelling fresh.
Preventing Odors
Garbage disposals process food waste, which can leave behind residue in cracks and crevices. Over time, this residue decays and produces foul odors that spread throughout the kitchen. Regular cleaning helps remove trapped particles before they become a problem.
Avoiding Clogs
Food buildup inside the disposal or drainage pipes can lead to clogs that block water flow or render the unit ineffective. By cleaning regularly, you minimize the risk of these obstructions forming.
Enhancing Efficiency
A dirty garbage disposal may work harder than necessary to grind food scraps due to accumulated grime on its blades or interior walls. Cleaning ensures it operates at peak performance without unnecessary strain on its components.
Extending Lifespan
Routine maintenance protects your investment by reducing wear and tear. Food buildup that is left unaddressed can corrode components over time or cause mechanical issues that require expensive repairs or replacement.
Promoting Hygiene
Unclean disposals are prime environments for bacteria and mold growth due to their moist conditions and decaying organic matter. Regularly sanitizing the disposal improves sanitation in your kitchen and reduces the risk of cross-contamination while preparing meals.
Key Benefits at a Glance
| Benefit | Why It Matters |
| Odor control | Keeps unpleasant smells from spreading throughout your home |
| Reduced clogs | Prevents costly plumbing repairs |
| Improved performance | Helps maintain consistent grinding power |
| Prolonged appliance life | Saves money by delaying replacement costs |
| Better hygiene | Protects food safety by reducing bacterial growth |
Factors That May Require More Frequent Cleaning
- High usage: Larger households or avid cooks often use their garbage disposal more frequently, leading to faster accumulation of food debris.
- Type of waste: Fibrous foods like celery or starchy items like potato peels tend to leave behind more residue.
- Hard water buildup: Hard water can cause mineral deposits inside your disposal, reducing its efficiency over time.
By understanding these factors alongside the importance of regular cleaning, you can create a maintenance schedule tailored to your household’s needs. Taking small steps consistently ensures that this essential kitchen appliance remains in top condition without requiring major repairs down the line.
Signs Your Garbage Disposal Needs Cleaning
Identifying when your garbage disposal requires cleaning is crucial for maintaining its functionality and preventing unpleasant odors. Neglecting regular maintenance can lead to clogs, inefficiency, or even a breakdown of the appliance. Here are some common signs that indicate it’s time to give your garbage disposal some attention.
Persistent Odors
- Unpleasant smells coming from the sink area are one of the most obvious signs. These odors often result from food particles trapped inside the disposal or in hard-to-reach areas like the splash guard.
- Even after running water or grinding food waste, if bad smells linger, it’s likely due to buildup that needs to be addressed.
Slow Draining
- If water takes longer than usual to drain from your sink, there may be a clog caused by food debris or grease buildup inside the disposal or connecting pipes.
- Slow drainage might also indicate that certain components need a deeper clean to work efficiently.
Unusual Noises While Running
- A properly functioning garbage disposal typically produces consistent grinding noises. If you hear strange sounds like rattling, grinding without resistance, or loud humming, it could mean there’s foreign debris stuck inside or worn-out parts accumulating residue.
- Leftover materials can interfere with the blades or motor performance.
Inefficient Grinding of Food Waste
- When you notice that food waste isn’t being broken down properly and larger chunks remain after use, this could be a sign of dulled blades or obstructions within the appliance. Accumulated grime often impacts how effectively food is processed.
Water Backups in the Sink
- Water pooling in your sink while using the garbage disposal could point to a blockage either directly in the unit itself or further down in your plumbing system. Regular cleanings can help prevent these backups before they escalate into bigger problems.
Presence of Fruit Flies or Insects
- The buildup of food residue in and around your garbage disposal creates an inviting environment for pests like fruit flies and gnats. If you notice an increase in these insects near your sink, it’s time for a thorough cleaning session.
Checklist: Does Your Garbage Disposal Need Attention?
| Sign | Possible Cause | Action Needed |
| Persistent odors | Trapped food particles | Deep clean with baking soda & vinegar |
| Slow draining | Clogs from debris/grease buildup | Inspect and clear blockages |
| Unusual noises | Foreign object/debris | Turn off power; remove objects manually |
| Inefficient grinding | Buildup impacting blade performance | Clean interior thoroughly |
| Water backups | Blockage within pipes | Perform deep cleaning; check plumbing |
| Insects present | Food residue attracting pests | Scrub splash guard & hidden areas |
Understanding these early warning signs allows you to address issues promptly before they develop into costly repairs. By paying attention and following preventative maintenance practices regularly, you’ll ensure a long-lasting and efficient garbage disposal system while keeping your kitchen fresh and functional at all times.
Safety Steps to Take Before Cleaning
Turn Off the Power
- Unplug the Unit: If your garbage disposal is plugged into a power outlet, unplug it before starting any cleaning process.
- Shut Off Circuit Breaker (if applicable): For disposals directly wired into your home’s electrical system, locate the circuit breaker controlling it and switch it off. This eliminates any risk of accidental activation.
Gather Necessary Tools
Having the right tools on hand will streamline your cleaning process without compromising safety: – Rubber gloves for protecting your hands from sharp edges and grime. – A flashlight to inspect deep inside the disposal unit. – Long-handled brushes or bottle brushes for scrubbing hard-to-reach areas. – Tongs or pliers to safely remove blockages inside the disposal.
Never Use Your Bare Hands
Avoid placing your bare hands into the garbage disposal chamber, even if the power is turned off. The blades may still pose a significant hazard, and sharp debris could cause injuries. Use tools like tongs or pliers when removing items from inside.
Inspect for Visible Blockages
Shine a flashlight into the disposal opening to check for large food particles, utensils, or other objects that might be stuck. Removing debris at this stage prevents further clogging during cleaning.
Ventilate Your Area
If you suspect odors from built-up food waste, open windows or turn on a ventilation fan in your kitchen before starting. This helps disperse unpleasant smells and keeps your workspace comfortable while you clean.
Protect Yourself From Splashes
When using liquids like vinegar and baking soda later in the cleaning process (or ice cubes), some splashing may occur: – Wear protective eyewear if possible. – Ensure surrounding surfaces are covered with a towel or cloth to avoid accidental messes.
| Safety Step | Why It’s Important |
| Turn off power | Prevents accidents from sudden activation |
| Use gloves and tools | Protects hands from sharp edges |
| Inspect before cleaning | Identifies blockages that need removal |
| Avoid bare hands | Reduces risk of cuts or injuries |
| Ventilate | Minimizes discomfort from strong odors |
| Prepare protective measures | Keeps area clean and prevents splashing risks |
By following these safety steps carefully, you’ll create a secure environment for handling routine maintenance on your garbage disposal. This not only allows for effective deep-cleaning but also ensures that you can maintain functionality without unnecessary risks.
How to Remove Food Buildup and Odors
Over time, food particles can accumulate in your garbage disposal, leading to unpleasant odors and reduced efficiency. Removing food buildup not only eliminates bad smells but also ensures the smooth operation of your disposal system. Here’s how you can effectively tackle food residue and lingering odors.
Step 1: Turn Off the Power
- Unplug the unit or switch off the circuit breaker connected to your garbage disposal to eliminate any risk of accidents.
- Always ensure there’s no chance of the blades activating during cleaning.
Step 2: Inspect the Disposal for Visible Debris
- Use a flashlight to look inside the disposal for any visible pieces of food or debris.
- If you see large chunks of residue, use tongs or long-handled pliers to remove them safely. Avoid using your hands even if the power is off.
Step 3: Flush with Hot Water
- Run hot water through the drain for about 30 seconds. This will help soften grease and loosen up smaller food particles trapped in crevices.
Step 4: Scrub Inside with a Brush
- Use a long-handled brush or an old toothbrush designed for cleaning narrow spaces.
- Scrub along the walls and around the impellers (blades). Rotate gently to remove stuck-on grime without damaging components.
Step 5: Deodorize Naturally with Baking Soda and Vinegar
A natural combination of baking soda and vinegar can work wonders in breaking down buildup while neutralizing odors.
- Sprinkle half a cup of baking soda into your garbage disposal.
- Slowly pour one cup of white vinegar over it. The mixture will bubble as it works to dissolve grease and stubborn residue.
- Let it sit for about 10–15 minutes to maximize effectiveness.
- Flush with boiling water afterward to rinse away loosened debris.
Step 6: Use Ice Cubes for Stubborn Buildup
- Add a handful of ice cubes directly into the garbage disposal.
- Toss in a few tablespoons of coarse salt (e.g., kosher salt) for added abrasiveness.
- Turn on cold water at full flow, then run the disposal until all ice has been ground up.
This method not only removes tough buildup but also sharpens the blades slightly, helping improve their cutting efficiency.
Optional: Add Citrus Peels
To leave behind a fresh scent: – Drop small pieces of lemon, lime, or orange peels into your garbage disposal after cleaning. – Run cold water while turning on the motor briefly until peels are broken down completely.
| Natural Deodorizers | Purpose | Instructions |
| Baking Soda | Neutralizes odors | Sprinkle directly into drain; combine with vinegar |
| Vinegar | Dissolves residue | Pour slowly over baking soda; let sit before rinsing |
| Citrus Peels | Adds fresh scent | Grind small pieces while running cold water |
Notes on Cleaning Frequency
For optimal cleanliness: – Perform deep cleaning every two weeks if you use your garbage disposal daily. – Address minor odor issues immediately using quick fixes like citrus peels or baking soda flushes.
By following these steps, you’ll prevent foul smells, maintain hygiene, and extend the life of your kitchen appliance effectively—all without harsh chemicals that could damage its components over time.
Cleaning the Disposal with Ice, Baking Soda, and Vinegar
One of the most effective and eco-friendly methods to clean your garbage disposal involves using simple household items like ice, baking soda, and vinegar. These ingredients not only help eliminate odors but also remove buildup and improve the functionality of your disposal. Below is a detailed guide on how to effectively use these materials to clean your garbage disposal.
Why Use Ice, Baking Soda, and Vinegar?
- Ice: Ice helps dislodge debris stuck within the grinding chamber or blades of the garbage disposal. It also sharpens blades slightly while clearing out stubborn residue.
- Baking Soda: A natural, non-toxic cleaning agent that neutralizes odors and breaks down grease or grime.
- Vinegar: A mild acid that dissolves buildup like limescale or food particles while naturally deodorizing.
By combining these three items, you can achieve a thorough cleaning without relying on harsh chemicals.
Step-by-Step Cleaning Process
Step 1: Prepare Your Materials
You’ll need: – 1 cup of baking soda
– 1 cup of white vinegar
– 2 cups of ice cubes
– Optional: Coarse salt (for additional scrubbing power)
Step 2: Clear the Sink
Remove any dishes or other items from the sink area to avoid interference during the process.
Step 3: Use Ice Cubes and Salt for Grinding
- Turn off your garbage disposal for safety.
- Pour about two cups of ice cubes directly into the disposal.
- Sprinkle in a handful of coarse salt (optional but adds grit for scrubbing).
- Turn on cold water at a moderate flow rate.
- Switch on the garbage disposal and allow it to grind through the ice completely. This process helps scrape off stuck debris while sharpening internal components.
Step 4: Add Baking Soda and Vinegar
- Once finished with ice grinding, turn off both water and the unit.
- Pour one cup of baking soda into the disposal opening.
- Slowly add one cup of white vinegar over it; you’ll notice fizzing as they react together—this is normal.
- Allow this mixture to sit for 10–15 minutes without running water or turning on the unit as it works to dissolve grime inside hidden areas.
Step 5: Flush with Hot Water
After letting the baking soda-vinegar mixture sit: 1. Boil roughly two cups of water. 2. Slowly pour this hot water down the drain to flush out loosened debris and remaining cleaning agents.
Benefits of This Cleaning Method
| Material | Purpose | Additional Notes |
| Ice Cubes | Scrubs internal parts; removes residue | Non-abrasive yet effective tool |
| Baking Soda | Deodorizes; absorbs foul smells | Eco-friendly alternative to commercial cleaners |
| White Vinegar | Dissolves buildup; sanitizes | Mild acid safe for regular use |
This method is cost-effective, eco-friendly, and safe for regular maintenance.
Bonus Tip: Use This Method Monthly
To keep your garbage disposal functioning optimally: – Perform this cleaning routine once every four weeks or immediately when you notice unpleasant odors or reduced efficiency from your unit.
By adopting this approach regularly, you can extend your garbage disposal’s lifespan while maintaining a fresh-smelling kitchen sink environment without resorting to harsh chemicals or professional services every time an issue arises.
How to Clean the Splash Guard and Hidden Areas
The splash guard and hidden sections of your garbage disposal often get overlooked during cleaning but are critical areas to address. Food particles, grease, and grime can easily accumulate in these areas, leading to unpleasant odors and potential blockages. Here’s a step-by-step guide on how to thoroughly clean these often-neglected parts of your garbage disposal.
What Is the Splash Guard?
The splash guard is a rubber or silicone flange located at the opening of your garbage disposal. Its purpose is to prevent food particles and water from splashing back up while the disposal is running. However, due to its design with folds or crevices, it tends to trap debris over time.
Tools You’ll Need
- Dish soap: A mild liquid soap for cutting grease.
- Old toothbrush or dish brush: Helps reach into tight crevices.
- Sponge or cloth: For wiping surfaces clean.
- Baking soda (optional): Adds a mild abrasive effect for scrubbing tough buildup.
- Gloves: Protects hands from grime and odor.
Step-by-Step Cleaning Process
- Always ensure the garbage disposal is turned off before cleaning. If possible, unplug it from the power source for added safety.
- Remove the Splash Guard (if detachable)
- Some splash guards can be removed by gently pulling them out of their slot at the top of the disposal opening. Consult your appliance manual if you’re unsure whether yours can detach.
- Place a few drops of dish soap onto an old toothbrush or scrub brush.
- Clean both sides of the splash guard thoroughly, paying close attention to grooves where food bits may be hiding.
- Rinse with warm water until free of soap suds.
- With gloves on, use a damp cloth or sponge soaked in soapy water to clean just inside the neck of the disposal unit.
- Be cautious not to push your hand too far into the unit; focus only on reachable areas near the opening.
- Sprinkle a small amount of baking soda on tough residue trapped in crevices.
- Scrub gently with a toothbrush until all deposits loosen.
- Reattach Splash Guard (if applicable)
- Once cleaned thoroughly, dry it off with a towel before reinserting it securely into place.
Extra Tips for Cleaning Hard-to-See Areas
- Use a flashlight to inspect inside your garbage disposal after cleaning around its neck area.
- If there’s stubborn buildup deeper inside that cannot be reached by hand safely, consider using ice cubes combined with salt during operational cleaning cycles (referenced in earlier sections). This method helps dislodge buildup further down without requiring manual handling.
Why Clean These Areas Regularly?
Neglecting hidden areas like splash guards allows bacteria growth over time and contributes significantly to bad odors emanating from your sink area. Regular maintenance keeps these spaces hygienic while ensuring proper functionality of your unit over time.
By incorporating this simple yet thorough cleaning process into your routine every 2–4 weeks—or more frequently depending on usage—you’ll extend both cleanliness levels as well as longevity for one essential kitchen appliance many rely upon daily!
Tips to Keep Your Garbage Disposal Fresh and Working Properly
Maintaining your garbage disposal doesn’t just ensure its longevity but also keeps unpleasant odors and clogs at bay. By incorporating a few simple habits into your routine, you can keep your disposal functioning efficiently and smelling fresh. Below are some practical tips to help you extend the life of your garbage disposal and maintain its effectiveness.
Use Cold Water During Operation
- Always run cold water when using the garbage disposal.
- Cold water helps solidify fats and grease, preventing them from coating the blades or clogging the drain.
- Avoid using hot water while the disposal is running, as it can cause grease to liquefy and stick to the pipes.
Be Mindful of What You Put Into the Disposal
- Avoid disposing of stringy or fibrous materials like celery, onion skins, or corn husks, which can tangle around the blades.
- Never put hard items such as bones, fruit pits, or shells into the unit; these can damage the grinding components.
- Do not pour oils, fats, or grease down the disposal as they can cause buildup over time.
Clean Your Disposal Regularly
- Weekly Cleaning: Sprinkle baking soda into the disposal and follow with white vinegar for a natural deodorizer. Let it bubble for 5–10 minutes before rinsing with cold water.
- Monthly Deep Clean: Add ice cubes to your sink along with coarse salt for scrubbing action that sharpens blades while removing debris buildup.
- Splash Guard Maintenance: Remove and clean rubber splash guards regularly since this area often traps residue that causes bad smells (refer back to splash guard cleaning techniques).
Avoid Overloading The Disposal
- Feed food scraps gradually rather than all at once to prevent jamming.
- Cut larger pieces of waste into smaller portions before putting them into the unit.
Grind Citrus Peels for Freshness
To naturally freshen your garbage disposal after use: – Drop lemon, lime, or orange peels into it during grinding. – The natural oils in citrus fruits leave behind a pleasant scent while aiding in cleaning.
Run Water After Use
Once you’ve finished operating your garbage disposal: 1. Keep cold water running for an additional 15–20 seconds after turning off the unit. 2. This ensures all waste has been flushed through pipes completely without lingering residues.
| Proactive Habit | Benefit |
| Use citrus peels | Deodorizes naturally while assisting with grime removal |
| Coldwater flushing | Prevents clogs by ensuring complete waste removal |
| Regular baking soda use | Neutralizes odors effectively |
By adopting these preventative tips as part of everyday kitchen routine efficiency remains uninterrupted without risking damage-foul-smell.