What Is a Popcorn Ceiling and Why It Needs Special Care
Popcorn ceilings, also referred to as acoustic or stipple ceilings, were a popular design trend in mid-20th century homes, especially during the 1950s through the 1980s. They are characterized by their textured appearance, created by spraying a mixture of drywall or plaster and other materials onto the ceiling. This bumpy surface was initially favored for its ability to dampen noise, hide imperfections in the ceiling structure, and provide a relatively cost-effective finish.
Why Popcorn Ceilings Need Special Care:
- Fragile Texture
The textured material of popcorn ceilings is prone to flaking or breaking apart if handled roughly. Unlike flat or smooth ceilings that can be scrubbed or wiped down without much concern, popcorn surfaces can crumble under pressure. - Porous Surface
The porous nature of the material makes it more likely to trap dirt, dust particles, cobwebs, and airborne debris over time. This also makes cleaning more challenging because it’s easy for moisture or cleaning solutions to seep into crevices, potentially leading to damage. - Asbestos Concerns in Older Homes
Homes built before the late 1970s may have popcorn ceilings that contain asbestos fibers—materials once commonly used for insulation and fireproofing properties but later discovered to pose health risks when inhaled during removal or disturbance. For this reason alone, these ceilings must be approached with caution. - Painted vs. Unpainted Surfaces
Some popcorn ceilings are unpainted while others have been coated with paint over time. Unpainted ones can absorb moisture quickly and are significantly harder to clean without leaving stains or causing damage. - Potential for Discoloration Over Time
Due to its texture and exposure to contaminants like smoke residue (in homes with smokers) or cooking grease (if near kitchens), discoloration is common on popcorn ceilings over time.
Benefits of Proper Care
Cleaning a popcorn ceiling may seem daunting at first glance; however, neglecting proper maintenance can result in visible grime buildup and long-term damage that could require costly repairs or removal altogether.
By taking extra care during routine cleaning tasks: – You’ll preserve the aesthetic appearance of your ceiling. – You’ll maintain better indoor air quality by removing dust particles that might accumulate over time. – You’ll extend the lifespan of the textured surface without having to resort prematurely to expensive refinishing work.
Understanding what makes this type of ceiling unique allows you to choose appropriate cleaning methods that minimize risks while achieving effective results tailored specifically for its sensitive surface. Taking these considerations into account will set you up for success as you approach maintaining your home’s iconic yet delicate feature properly.
Safety Precautions Before Cleaning
1. Identify the Age of the Ceiling
Popcorn ceilings installed before the 1980s may contain asbestos, a hazardous material that can cause serious respiratory issues if disturbed.
– How to check: If you’re unsure about the age of your ceiling, consult a professional or send a sample for testing at a certified lab. Avoid scraping or cleaning aggressively until asbestos is ruled out.
– If asbestos is present, only licensed professionals should handle cleaning or removal.
2. Test for Lead-Based Paint
If your home is older, lead-based paint might have been used on the ceiling. Peeling or chipping paint can release harmful lead particles into the air during cleaning.
– Use an at-home lead test kit to check for paint safety or hire an expert for verification.
3. Protect Yourself with Personal Protective Equipment (PPE)
When working on any popcorn ceiling, safeguard yourself from dust and debris by wearing:
– A dust mask or respirator: Protects against inhaling fine particles (especially important in case of old finishes).
– Safety goggles: Keeps falling debris out of your eyes during cleaning processes. – Disposable gloves: Prevents skin irritation caused by dirt or cleaning agents.
4. Ventilate Your Workspace
Ensure proper ventilation in the room where you’ll be working: – Open windows and doors to allow air circulation. – Use fans to reduce airborne particles while keeping them directed away from you.
5. Protect Furniture and Floors
Popcorn ceilings tend to shed their texture when cleaned, creating messes that can be difficult to remove from furniture and flooring surfaces. – Cover all furniture with plastic sheets or drop cloths. – Spread tarps over floors to catch falling debris for easy cleanup later.
| Area | Recommended Protection | Notes |
| Furniture | Plastic sheets/drop cloths | Ensure full coverage |
| Flooring | Tarps/painter’s canvas | Secure edges with tape |
| Walls | Masking tape along edges if needed | For heavy-duty cleaning |
6. Turn Off HVAC Systems and Fans
Turning off fans and HVAC systems prevents dust from spreading into other parts of your home during cleaning.
7. Avoid Excessive Pressure on Fragile Textures
Popcorn ceilings are delicate; applying too much force could cause chunks of texture to fall off: – Use gentle tools (e.g., soft-bristle brushes). – Avoid leaning ladders directly against textured surfaces as this can leave marks.
By following these safety precautions, you ensure that both you and your home remain protected while preparing for popcorn ceiling maintenance tasks responsibly.
Spot Cleaning Stains Without Damaging Texture
Popcorn ceilings, with their unique and textured appearance, require special care when addressing stains. Harsh scrubbing or improper cleaning techniques can damage the delicate texture, leaving noticeable marks or even causing the material to flake off. Spot cleaning is an effective way to remove stains while preserving the ceiling’s integrity. Here’s a step-by-step guide to safely and efficiently tackle those pesky blemishes.
Assess the Type of Stain
Before you begin cleaning, identify the type of stain on your popcorn ceiling. Common culprits include:
– Water stains: Usually appear as dark rings or patches, caused by leaks or humidity issues.
– Grease stains: Often found in areas near kitchens or dining spaces.
– Scuff marks or dirt smudges: Caused by furniture movement or contact with high-touch areas like corners.
Knowing the stain type helps determine whether water, a mild cleaning solution, or dry methods are needed for removal.
Supplies You’ll Need for Spot Cleaning
To clean spots effectively without harming the popcorn texture, gather the following items:
– A soft-bristled brush (e.g., a paintbrush) for gentle scrubbing.
– A sponge or microfiber cloth for controlled application of moisture.
– Mild dish soap mixed with water (1–2 drops per cup of warm water).
– A spray bottle for light misting (optional).
– Dry towels and a step ladder or extension pole for easy access.
Avoid using abrasive sponges, hard brushes, or harsh chemical cleaners that can erode the textured surface.
Steps to Clean Stains Safely
- Test in an Inconspicuous Area: Before applying any cleaner directly to the stain, test it on a hidden part of your popcorn ceiling to ensure no discoloration occurs.
- For light dirt smudges or scuff marks, start by gently brushing the area with a soft-bristled brush.
- Avoid pressing too hard as it may loosen texture particles.
- Mix one drop of mild dish soap into warm water.
- Dampen (do not soak) your sponge and lightly dab at the grease spot.
- Use a blotting motion rather than scrubbing to protect the texture from erosion.
- Dry immediately using a clean towel.
- If water damage is fresh and has left behind residue rather than permanent discoloration:
- Spray a light mist of plain water over the stained area using a spray bottle.
- Blot gently with a microfiber cloth until clean.
- You may need to touch up with matching ceiling paint after spot cleaning.
- Repeat if Necessary: For stubborn spots like grease buildup, multiple rounds of dabbing may be required rather than attempting aggressive cleaning all at once.
Tips for Safe Spot Cleaning
- Always work gently; even small amounts of pressure can loosen popcorn ceiling material.
- Minimize moisture use; excessive dampness can weaken adhesive bonds holding up your textured finish.
- If stains persist despite spot cleaning efforts, consider consulting professionals who specialize in repairing delicate ceiling textures instead of over-cleaning yourself.
A well-executed spot cleaning strategy ensures that unsightly blemishes are removed while maintaining your popcorn ceiling’s unique charm—without compromising its structure or appearance over time!
How to Remove Dust and Cobwebs Gently
Cleaning dust and cobwebs from a popcorn ceiling requires a delicate touch to preserve the texture and prevent damage. The distinctive, bumpy surface of popcorn ceilings is prone to crumbling or flaking if handled too aggressively, so a careful approach is essential. Below are detailed steps and tips to help you safely remove dust and cobwebs without compromising the ceiling’s integrity.
Step-by-Step Guide for Gentle Cleaning
- Soft-bristle brush or duster with an extendable handle
- Microfiber cloth (optional)
- Vacuum cleaner with a soft brush attachment
- Protective eyewear
- Remove or cover furniture near the cleaning area to protect it from falling debris.
- Lay down plastic or a drop cloth on the floor for easy cleanup.
- Use a soft-bristle brush or an extendable duster specifically designed for delicate surfaces.
- Gently sweep across the ceiling in one direction. Avoid scrubbing or applying too much pressure as this could dislodge pieces of texture.
- Use a vacuum cleaner equipped with a soft brush attachment.
- Set the vacuum to its lowest suction setting if adjustable.
- Lightly hover over the surface, targeting visible cobwebs without dragging the attachment directly against the ceiling.
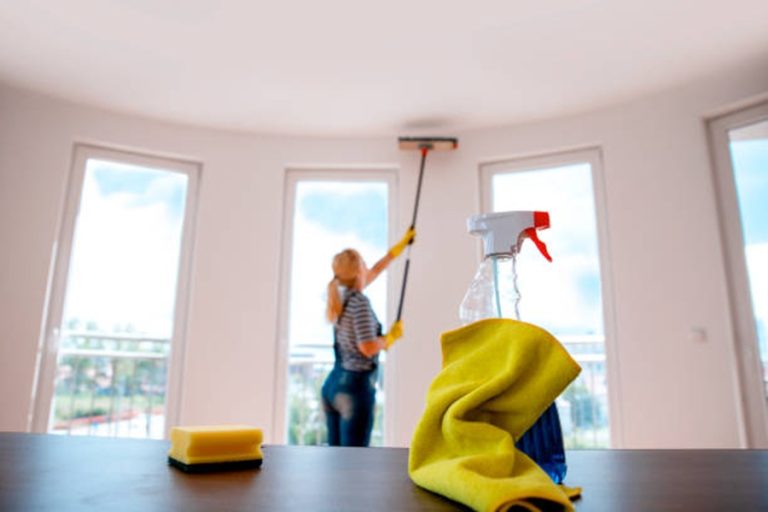
- Attach your cleaning tool (a microfiber cloth wrapped around a broomstick can work well) to an extendable pole for better reach.
- Move methodically across high corners where cobwebs tend to accumulate.
Tips for Best Results
- Avoid using excessive force as it may disturb or crumble the popcorn texture.
- Work in small sections at a time, ensuring thorough but gentle cleaning.
- If possible, clean during daylight hours with natural light so you can spot all dust and cobwebs easily.
What Not To Do
- Never use abrasive tools such as stiff brushes or scrubbing pads—they can destroy the ceiling’s unique texture.
- Avoid using water at this stage unless absolutely necessary, as moisture may weaken older popcorn ceilings that might contain asbestos (if built before 1978).
| Tool/Material | Purpose | Notes |
| Soft-bristle duster | Removes loose dust | Ideal for larger surfaces |
| Vacuum w/brush head | Picks up cobwebs gently | Ensure low suction setting |
| Microfiber cloth | Touch-up fine particles | Wrap around a pole for reach |
By following these steps and precautions, you’ll be able to keep your popcorn ceiling free from dust and cobwebs while maintaining its unique texture. Regular care ensures less buildup over time, keeping your home clean and fresh-looking year-round.
Spot Cleaning Stains Without Damaging Texture
Popcorn ceilings are known for their textured, bumpy appearance, which can be challenging to clean without compromising their integrity. Stains can easily mar the surface due to water leaks, smoke, or accidental spills. Spot cleaning is an effective way to address specific stains while preserving the ceiling’s unique texture. Below is a guide on how to tackle stains carefully and effectively.
Assess the Type of Stain
Before starting, identify the cause of the stain to choose the most appropriate cleaning method: – Water stains: Often caused by leaks or humidity. – Smoke stains: Resulting from candles, fireplaces, or cigarettes. – Dust or dirt buildup: Common in neglected areas. – Grease spots: Typically occur in kitchens near cooking areas.
Understanding the source of the stain helps prevent further damage and ensures you use safe cleaning products.
Gather Necessary Tools and Supplies
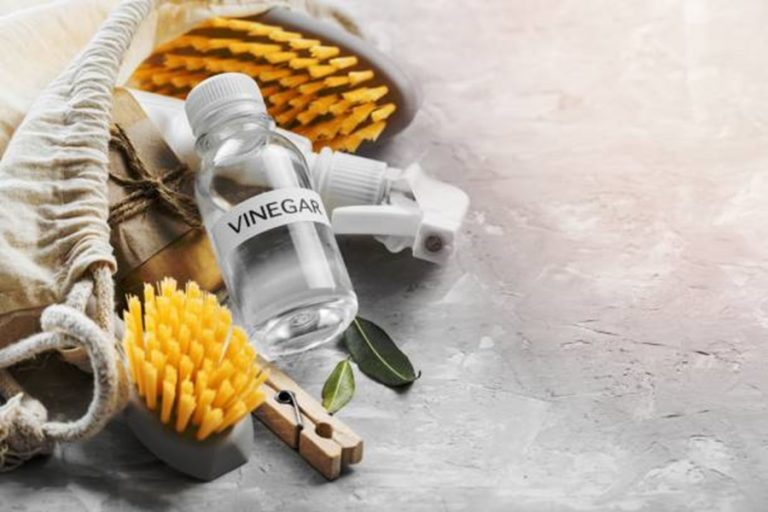
Spot cleaning requires specific tools that minimize disruption to the popcorn texture. Here’s what you’ll need: – Soft-bristle brush or dry sponge – Microfiber cloths – White vinegar solution (1 part vinegar to 3 parts water) – Dish soap (optional) – Spray bottle – Cotton swabs for precision work – Dry towel or rags
Avoid abrasive tools like scouring pads that can knock off particles of texture from the ceiling.
Spot Cleaning Process
- Before applying any solution, test it on a discreet section of your ceiling. This ensures that it won’t discolor or damage your specific popcorn material.
- Use a soft-bristle brush or dry sponge to gently lift dust and debris from around the stained area without scraping away texture.
- Mix a gentle cleaner like diluted white vinegar in a spray bottle. Lightly mist the stained area—avoid soaking as excessive moisture can weaken the material.
- For grease spots, add one drop of dish soap into your vinegar solution for extra cleaning power.
- Use a microfiber cloth or cotton swab to blot the stain softly until it fades. Scrubbing should be avoided as it may dislodge pieces of texture.
- Prevent lingering moisture by patting with a dry towel after cleaning.
Alternative Solutions for Tough Spots
For more stubborn stains where basic cleaning isn’t effective: – Baking Soda Paste: Mix baking soda with water into a paste and apply lightly using a soft cloth. – Commercial Ceiling Cleaners: Look for cleaners specifically designed for textured ceilings, ensuring they are non-abrasive and safe for acoustical finishes. – If dealing with older watermarks, consider using spray-on ceiling touch-up paint after removing surface residue.
Tips to Prevent Texture Damage During Cleaning
To avoid damaging your popcorn ceiling during spot cleaning: – Never over-saturate with water. – Avoid using bleach unless absolutely necessary (test on hidden areas first). – Work lightly; applying too much pressure risks flattening or dislodging portions of texture.
By following these careful steps, you can effectively remove unsightly stains without compromising your popcorn ceiling’s distinctive appearance.
When to Avoid Water or Deep Cleaning Methods
Popcorn ceilings are known for their unique textured appearance, but they also require special care due to their material composition. In some cases, using water or deep cleaning methods can cause more harm than good. Here’s how to determine when and why you should avoid water-based cleaning techniques for your popcorn ceiling and alternative approaches you can use.
Understanding the Risks of Water on Popcorn Ceilings
Popcorn ceilings are typically made from a mixture of paint, drywall compound, and sometimes older materials like asbestos (if installed before the 1980s). They are porous and fragile by nature, which makes them vulnerable to damage when exposed to excessive moisture.
- Water Damage: Water can cause the texture to soften or dissolve, leading to peeling or sagging sections.
- Staining: Even minor moisture exposure may create unsightly water stains that are difficult to remove.
- Mold and Mildew Growth: Moisture trapped in the ceiling material can foster mold growth, especially in humid environments.
Situations Where Water-Based Cleaning Should Be Avoided
- Presence of Asbestos
If your popcorn ceiling was installed before the mid-1980s, there is a chance it may contain asbestos. Testing is required before any cleaning or repair work begins. In such cases, avoid disturbing the surface as it could release hazardous fibers into the air. - Severely Damaged Ceiling
If your popcorn ceiling shows signs of extensive wear such as cracks, flaking texture, or previous water damage, introducing more moisture could exacerbate these issues. - Unsealed or Painted Ceilings
Unpainted popcorn ceilings tend to absorb water quickly and become even more vulnerable during cleaning processes. - High-Humidity Conditions
Attempting deep cleaning during times of high humidity or in damp areas (e.g., near bathrooms) increases the likelihood of moisture absorption and related problems.
Dry Alternatives for Cleaning Popcorn Ceilings
- Dusting with Microfiber Cloths
Use a long-handled microfiber duster designed for delicate surfaces. Gently sweep across the surface without applying pressure. - Vacuuming with a Soft Brush Attachment
A vacuum cleaner fitted with a soft-brush attachment works well for removing dust and cobwebs without damaging texture. - Spot Cleaning with Dry Sponges
For small areas with stains, use a dry chemical sponge designed for delicate surfaces instead of wet methods.
Creating an Optimal Environment
- Ensure proper ventilation in rooms with popcorn ceilings.
- Regularly dust surfaces with appropriate tools.
- Use an air purifier if possible to minimize airborne debris build-up over time.
By understanding when moisture poses risks and turning toward safe alternatives like dry cleaning methods, you can preserve both the appearance and durability of your popcorn ceiling while avoiding unintended damage caused by improper care practices.
When to Avoid Water or Deep Cleaning Methods
Popcorn ceilings, also known as acoustical or stippled ceilings, are delicate and can be easily damaged by improper cleaning methods. While deep cleaning might seem like a thorough approach, there are specific scenarios where water or wet cleaning methods should be avoided. Understanding when not to use water is key to preserving the texture and integrity of your popcorn ceiling.
Reasons to Avoid Water on Popcorn Ceilings
- Material Sensitivity: Many popcorn ceilings were created using gypsum-based material or stucco, which can dissolve, warp, or crumble when exposed to moisture.
- Asbestos Concerns: If your home was built before the 1980s, your popcorn ceiling may contain asbestos. Moisture can loosen asbestos fibers and make them airborne, posing significant health risks.
- Painted vs. Unpainted Ceilings: If the surface is unsealed or unpainted, it is highly porous and will absorb moisture quickly. This leads to stains and degradation of the texture.
- Risk of Mold Growth: Excess moisture from improper cleaning may lead to mold growth in your ceiling’s structure, particularly if there’s poor ventilation.
Situations Where Avoiding Water Is Best
- Unsealed Popcorn Ceilings
If the ceiling hasn’t been painted or sealed, any exposure to liquid will result in discoloration, flaking, and damage. - Ceilings With Existing Damage
Cracks or peeling areas make it easier for water to seep into the deeper layers of the material. - Suspected Asbestos Presence
Never attempt any wet cleaning methods if you believe asbestos is present. Consult a professional for safe handling. - Heavy Stains That Require Scrubbing
Aggressively scrubbing a damp popcorn ceiling often leads to texture disintegration.
Alternative Methods for Cleaning Without Water
- Use a soft-bristle brush attachment on a vacuum cleaner for gentle dust removal.
- For cobwebs in corners or edges, wrap a microfiber cloth around a long-handled tool (e.g., a broom) and lightly sweep them away.
- Spot-treat stains with dry sponge cleaners designed specifically for textured surfaces.
- Consider using specially designed ceiling-cleaning products that don’t require additional moisture.
| Scenario | Recommended Action | Avoid Using Water? |
| Dust buildup | Use vacuum with soft brush attachment | Yes |
| Cobweb removal | Gently use microfiber cloth on pole | Yes |
| Stubborn stains | Dry sponge cleaner | Yes |
| Mold/mildew presence | Professional remediation service | Yes |
Long-Term Impacts of Incorrect Wet Cleaning
- Loss of acoustic benefits due to compromised texture.
- Expensive repair costs if sections need reapplication after flaking off.
- Increased likelihood of health hazards due to mold growth or released toxins.
A methodical approach ensures that your popcorn ceiling remains intact while avoiding unnecessary risks associated with water application. Opt for dry techniques whenever possible and consult professionals when deeper issues arise.