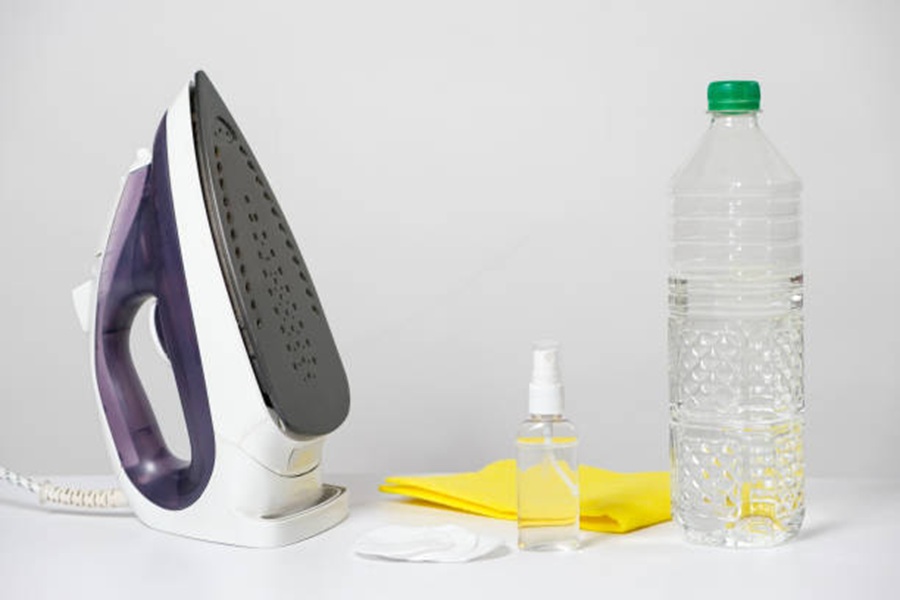
Considerations
1. Assess the Iron Type
- Non-stick soleplate: If your iron features a non-stick soleplate, avoid abrasive scrubbing or using harsh materials that could damage the surface.
- Stainless steel soleplate: While more durable, stainless steel can also scratch if handled improperly, so gentle cleaning is still crucial.
- Self-cleaning irons: Check the manufacturer’s guidelines. Some irons have built-in cleaning systems that may influence whether manual cleaning is needed.
2. Inspect for Damage
Before proceeding: – Check for cracks or exposed wiring on the iron. Cleaning an appliance in poor condition may cause further damage or pose safety risks. – Look for burnt-on residue or stains that need attention.
3. Safety Precautions
Cleaning an iron involves handling water and electrical components. Keep these safety tips in mind: – Always unplug the iron before cleaning. – Allow the soleplate to cool completely after use to prevent burns. – Avoid submerging the appliance in water as this can damage its internal components.
4. Know When Baking Soda is Effective
Baking soda works best for: – Removing stubborn stains on the soleplate caused by burnt fabric or mineral deposits. – Addressing light rust spots on metal surfaces.
However, avoid using baking soda on delicate coatings or vents without proper care, as residue may clog openings.
5. Gather Necessary Tools
Before starting, confirm you have all necessary supplies to ensure a smooth process: | Item | Purpose | |———————|—————————————————–| | Baking soda | Acts as a mild abrasive for lifting stains | | Water | Creates a paste when mixed with baking soda | | Microfiber cloth | To gently wipe away residue | | Cotton swabs | Cleans crevices like steam vents | | Soft sponge | For scrubbing without scratching |
Optional tools such as a small brush or toothpick may help clean tough-to-reach areas.
6. Consider Environmental Impact of Cleaning Choices
Using natural ingredients like baking soda minimizes reliance on harsh chemicals often found in commercial cleaners, making this method eco-friendly and safe for daily use around children and pets.
By taking these factors into account before starting your cleaning routine, you’ll not only protect your iron but also achieve better results without causing unnecessary wear and tear.
Essential Materials:
- Baking Soda: A natural cleaning agent that gently removes stains, buildup, and residue without damaging the surface of your iron.
- Water: Used to mix with baking soda to create a paste for effective cleaning.
- Soft Cloth or Microfiber Towel: Ideal for wiping down the iron’s surface without scratching it. Opt for lint-free cloths for a seamless finish.
- Cotton Swabs or Q-Tips: Perfect for accessing small crevices and steam vents where debris can accumulate.
- Old Toothbrush or Soft-Bristled Brush: Useful for scrubbing more stubborn residue off the soleplate or other areas.
- Plastic or Silicone Spatula (Optional): Can be used to gently scrape off hardened residue if necessary, ensuring no scratches are left behind on delicate metal surfaces.
Optional Materials:
- Distilled Water: While tap water works well for cleaning, distilled water is recommended if you plan on refilling your iron after cleaning, as it helps prevent mineral buildup over time.
- A Container or Bowl: To mix your baking soda paste easily without creating unnecessary mess.
- Dry Towel or Paper Towels: For drying the iron after cleaning.
| Material | Purpose | Notes |
| Baking Soda | Cleaning agent | Use fresh baking soda for best results |
| Water | Mixing with baking soda | Ensure it’s clean and cool |
| Soft Cloth/Microfiber | Wiping down surfaces | Avoid abrasive cloths |
| Cotton Swabs/Q-Tips | Cleaning hard-to-reach areas | Single-use – dispose after use |
| Toothbrush/Soft Brush | Removing buildup | Use gentle bristles |
Why These Materials Matter
Each material plays a crucial role in effectively cleaning your iron while preventing damage to important components. Baking soda is chosen due to its mildly abrasive properties, which can lift dirt and grime without scratching sensitive areas. Meanwhile, soft cloths ensure that you don’t leave streaks or cause any wear on the soleplate.
Cotton swabs are particularly useful when dealing with steam vents—these tiny openings often collect impurities from water over time. Using tools like toothbrushes allows you to apply extra pressure where needed while maintaining control over delicate parts.
Finally, incorporating optional items like distilled water into your routine can help prolong your iron’s lifespan by minimizing future maintenance needs.
By assembling these materials in advance, you’ll be prepared to efficiently clean your iron using this simple yet effective technique.
Steps
Cleaning your iron with baking soda and water is an easy, effective process that can help maintain the appliance’s performance. Follow these step-by-step instructions to safely and efficiently clean your iron.
Step 1: Gather Your Supplies
Before starting, assemble everything you will need to clean your iron. This ensures a smooth process without interruptions. You’ll need:
– 2 tablespoons of baking soda
– A small bowl for mixing
– Water (preferably lukewarm)
– A soft cloth or microfiber towel
– Cotton swabs (for hard-to-reach areas like steam holes)
– Toothbrush or soft-bristled brush (optional)
Step 2: Prepare the Baking Soda Paste
Create a cleaning paste by combining baking soda with water in a small bowl. Use the following ratio to achieve the correct consistency:
| Ingredient | Measurement | Notes |
|——————–|———————-|—————————————————–|
| Baking Soda | 2 tablespoons | Adjust quantity based on iron size |
| Water | 1 tablespoon | Add gradually until you form a thick paste |
Mix thoroughly until you achieve a smooth, spreadable paste. It should not be runny or overly dry.
Step 3: Apply the Paste to the Soleplate
Once your paste is ready, unplug and ensure your iron is completely cool before proceeding. Using a soft cloth or your fingers, apply a thin layer of the paste directly onto the soleplate (the flat bottom surface of the iron). Focus on any areas with visible stains or residue, especially around steam holes where buildup tends to occur. Avoid applying paste near electrical components or vents that are not part of the soleplate.
Step 4: Scrub Gently
Using a microfiber cloth or toothbrush, gently scrub away any residue from the coated surface. Work in circular motions for stubborn grime but avoid applying excessive pressure that could damage non-stick coatings on some irons.
For steam holes: – Dip cotton swabs into water. – Gently clean out debris from each hole. This detail-oriented approach helps maintain functionality while preventing blockages.
Step 5: Remove Paste Residue
With another clean cloth dampened slightly with water, wipe away all traces of baking soda from the soleplate. Check carefully for leftover particles that could transfer onto fabric during ironing.
If needed: 1. Use a damp cloth followed by a dry one to ensure no moisture remains. 2. Pay special attention to crevices around steam vents.
Step 6: Test Your Iron
Once cleaned thoroughly and wiped dry, plug in your iron and perform a quick test on an old piece of fabric: – Fill its reservoir with distilled water if necessary. – Heat it up and glide over fabric to ensure no residue transfers.
This final step confirms everything is cleaned properly while restoring optimal ironing performance.
By following these steps carefully, you’ll prolong your iron’s lifespan while ensuring it delivers consistently great results during use.
Maintenance
1. Regular Cleaning Routine
Even after you’ve cleaned your iron with baking soda and water, it’s important to adopt a consistent cleaning schedule to prevent debris or mineral deposits from building up again.
– Frequency: Clean the soleplate every 1-2 months if you use the iron regularly. If you use it less frequently, inspect the surface occasionally for residue or stains. – Spot Cleaning: Wipe the soleplate gently with a damp cloth immediately after each use while it’s cool to remove any fresh residue. – Steam Vents: Ensure steam vents remain free of clogs by occasionally running distilled water through the steam function.
2. Use Distilled Water
Hard water contains minerals that can accumulate inside your iron, affecting its steam output and causing sediment buildup.
– Always fill the water reservoir with distilled or demineralized water instead of tap water. – Empty any remaining water from the reservoir after each use to avoid stagnant moisture that can lead to mold growth or mineral deposits.
3. Proper Storage
Storing your iron correctly is just as important as cleaning it. Improper storage can lead to damage or dirt accumulation on the soleplate.
– Allow your iron to cool completely before putting it away. – Store it upright in a clean, dry space where dust and lint won’t settle on it. – Avoid wrapping the cord around the hot soleplate, as this may cause damage over time.
| Do’s | Don’ts |
| Allow cooling before storing | Leave water in the tank overnight |
| Use distilled water | Use abrasive scrubbing tools on soleplate |
| Keep stored upright | Store near sources of moisture |
4. Inspect for Wear and Tear
Regularly check your iron for signs of wear that may affect its efficiency:
– Look for scratches on the soleplate that might snag delicate fabrics during ironing. – If steam flow is reduced even after cleaning, inspect vents for clogs caused by hard-water deposits. – Check power cords for fraying or other visible damage.
5. Preventative Tips
A little extra care during everyday use can reduce the need for extensive cleaning in the future:
– Avoid using starch directly on fabrics unless necessary; starch particles often contribute to residue buildup on irons. – Iron at appropriate temperatures based on fabric type – using settings too high may cause scorch marks or baked-on residue. – Place a protective ironing pad under garments when ironing heavily embellished fabrics (e.g., sequins) to protect both garment and soleplate.
Maintaining an iron doesn’t require significant time investment but does call for consistency and attention to detail. These practices will help ensure every press delivers crisp results while keeping your appliance in great shape over time.
Maintenance
Proper maintenance is key to ensuring your iron remains in excellent condition after cleaning it with baking soda and water. Regular upkeep not only extends the lifespan of your appliance but also keeps it functioning efficiently and prevents future buildup of dirt or residue. Below are some essential tips to maintain your iron after cleaning.
1. Regular Cleaning Routine
- Frequency: Make it a habit to clean your iron at least once every few months, especially if you use it frequently. For heavy users, consider cleaning monthly.
- Light Maintenance: After each use, wipe the soleplate with a soft cloth to remove any fresh residue before it hardens.
2. Prevent Mineral Build-Up
Mineral deposits from tap water can clog steam vents and affect performance over time. Use these tips to avoid this issue: – Use Distilled Water: Always fill your iron’s water reservoir with distilled or demineralized water rather than tap water. – Empty the Reservoir: After ironing, empty any leftover water from the tank to prevent standing water from causing deposits.
| Water Type | Effect on Iron |
| Distilled Water | Prevents limescale build-up |
| Tap Water | Can lead to mineral deposits |
3. Protecting the Soleplate
The soleplate is one of the most important parts of an iron and requires careful handling: – Avoid dragging the iron over metal items like zippers, buttons, or pins as these can scratch the surface. – If your soleplate has a nonstick coating, do not use abrasive materials for cleaning.
4. Steam Vent Care
Blocked steam vents can reduce ironing efficiency. Keep them clear by: – Checking the vents periodically for blockages such as mineral build-up or lint. – Using a cotton swab dipped in vinegar to gently clean each vent opening when needed.
5. Proper Storage
Store your iron correctly to minimize wear and tear: – Ensure the appliance is completely cool and dry before storing. – Always keep cords untangled and avoid wrapping them tightly around the base, which could weaken internal wiring over time. – Store in an upright position or in a dedicated storage case if available.
6. Inspect for Damage
Routine inspections help catch issues early: – Look for signs of fraying cords or loose connections, which may indicate repair needs. – If steam output decreases significantly despite regular cleaning, consult the manufacturer’s manual or seek professional servicing.
By following these maintenance practices consistently, you’ll preserve your iron’s quality and functionality while minimizing potential frustrations during future use. Through care and attention, you can keep ironing smooth and efficient without unnecessary interruptions caused by neglect or improper handling.
Maintenance
Proper maintenance of your iron ensures it remains in excellent working condition, prolonging its lifespan and delivering consistently smooth results. Regular cleaning and routine care prevent the buildup of residue, limescale, and dirt that can affect performance. Here are some tips to keep your iron in optimal shape after cleaning it with baking soda and water.
Store the Iron Appropriately
- Allow the iron to cool completely before storing.
- Keep it upright to prevent water from leaking out of the reservoir.
- Store it in a dry place to avoid moisture damage.
Clean the Iron Plate Regularly
Even after a thorough cleaning with baking soda and water, it’s essential to maintain the soleplate: – Wipe down after every few uses with a soft, damp cloth to remove fresh residue or minor buildup. – Avoid using abrasive pads or harsh chemicals that could scratch or damage the plate.
Prevent Limescale Build-Up
Hard water can lead to mineral deposits inside your iron, which may eventually clog steam holes or cause uneven heating. To avoid this: – Use distilled or demineralized water instead of tap water. – Empty any leftover water from the reservoir after each use.
Check Steam Holes for Blockages
Over time, debris can get lodged in steam holes. To keep them clear: – Use a cotton swab dipped in vinegar or clean water to gently clean individual steam holes. – Ensure no residue remains that could clog these small openings.
| Steam Hole Maintenance Tips | Frequency |
| Inspect for blockages | Monthly |
| Clear with cotton swab | As needed |
Take Care of Electric Components
The cord and electrical components should also be prioritized during maintenance: – Check for frayed wires or damage regularly. – Always unplug the iron when not in use to avoid wear on internal components.
Avoid Common Mistakes
To extend your iron’s life and prevent unnecessary issues: – Never leave a hot iron face down on fabric, as this can cause scorch marks. – Do not overfill the reservoir beyond the marked limit—this could lead to leaks.
By integrating consistent maintenance practices into your routine care, you’ll ensure your iron stays dependable while reducing future cleaning efforts. These proactive steps also help maintain its efficiency over time.
Maintenance
Proper maintenance of your iron after cleaning is essential to extend its lifespan, ensure optimal performance, and prevent damage or residue buildup. By incorporating a few simple practices into your routine, you’ll keep your iron in excellent condition over time.
Tips for Maintaining Your Iron
- Empty the Water Reservoir After Each Use
Always empty the water tank of your steam iron when you’re done using it. Standing water can lead to mineral deposits and scaling inside the reservoir, which eventually clog steam vents. - Use Distilled Water for Steam Irons
Hard water contains minerals that can accumulate inside your iron and on its soleplate. Using distilled or demineralized water minimizes scaling and reduces the risk of blockages in steam vents. - Wipe the Soleplate Regularly
Residue from fabrics, starch sprays, or other materials can adhere to the soleplate during ironing. After each use:- Let the iron cool completely.
- Use a damp cloth (or one lightly soaked with vinegar for tough spots) to wipe down the soleplate.
- Avoid abrasive scrubbers that could scratch or damage its surface.
- Avoid Overheating
Match the temperature settings on your iron to the fabric you’re pressing. Overheating not only risks damaging delicate fabrics but also leads to burnt residue accumulating on the soleplate.
Preventative Measures
To reduce wear and tear on your iron: 1. Iron on a Clean Surface: Ensure there’s no dirt or debris on your ironing board cover. 2. Store Properly: Place your iron upright after it cools down completely to avoid damaging its soleplate. 3. Perform Regular Deep Cleans: Clean both internal components (such as steam vents) and external parts (like the soleplate) every couple of months using a gentle solution of baking soda and water.
Common Mistakes to Avoid
Here are frequent errors that might unintentionally harm your iron:
| Mistake | Why It’s Harmful | Alternative Practice | |———————–|———————————————————-|———————————————–| | Leaving water inside | Encourages scaling and mold growth | Empty reservoir completely after every use | | Using tap water | Can leave mineral deposits in steam vents | Stick with distilled/demineralized water | | Scrubbing harshly | Scratches soleplate surface | Use soft cloths or non-abrasive cleaning pads | | Ignoring stains | Residue buildup worsens over time | Wipe stains promptly after ironing |
When to Seek Professional Help
If you notice persistent issues like leaking, poor heating, or excessive residue despite regular cleaning and maintenance, consult a professional repair service rather than attempting complex repairs yourself. Addressing problems early ensures minor malfunctions don’t turn into costly replacements.
By following these maintenance practices consistently, you’ll ensure that your iron operates efficiently while prolonging its overall durability.