Why Cleaning Microwave Filters Is Important
Microwave filters play a crucial role in ensuring your microwave functions efficiently and safely. Over time, these filters collect grease, food particles, and odors generated during cooking. Neglecting to clean or replace them not only affects the performance of your appliance but can also create potential safety hazards. Understanding the significance of maintaining these components is key to prolonging the lifespan of your microwave and keeping your kitchen environment clean.
Benefits of Cleaning Microwave Filters Regularly
- Improved Air Quality
Filters, especially grease and charcoal ones, are designed to trap fumes, smoke, and grease from cooking. When left uncleaned, they can no longer effectively filter out pollutants, leading to poor air quality in your kitchen. - Enhanced Microwave Efficiency
Dirty filters restrict airflow and force the microwave’s venting system to work harder than necessary. This additional strain can reduce overall efficiency and increase energy consumption. - Reduced Fire Risks
Grease accumulation in filters can become a fire hazard when exposed to high heat or flames during cooking. Regular cleaning minimizes this risk by removing flammable buildups. - Prolonged Appliance Lifespan
A well-maintained filter ensures that the microwave’s ventilation system operates smoothly without putting undue pressure on its internal components. - Better Cooking Experience
Clean filters help eliminate unpleasant odors that might otherwise linger after preparing meals, contributing to a fresher kitchen environment.
Potential Consequences of Ignoring Filter Maintenance
- Clogged Ventilation System: A clogged filter forces hot air back into the appliance instead of venting it out properly.
- Increased Energy Usage: Strained systems consume more power while delivering suboptimal performance.
- Damaged Components: Overheating caused by restricted airflow may damage sensitive electronic parts within the microwave.
- Health Hazards: Bacteria and mold can grow on dirty surfaces, posing health risks over time.
Indicators That Your Filter Needs Attention
- Noticeable buildup of grease or debris on the filter surface.
- Unusual smells coming from the microwave even after cleaning it internally.
- Reduced heating efficiency or uneven cooking results.
- Excessive noise from the ventilation fan due to restricted airflow.
By recognizing these signs early and integrating regular maintenance into your routine, you not only save yourself costly repairs but also ensure smoother operation for years to come.
This section highlights why cleaning microwave filters should never be overlooked—keeping both functionality and safety at their peak levels while maintaining a comfortable kitchen environment for you and your family.
How Often Should You Clean or Replace Filters
Microwave filters play a crucial role in maintaining the functionality, hygiene, and efficiency of your microwave. Knowing how frequently you should clean or replace these filters is essential to ensure optimal performance and a safe cooking environment. Below, we will cover the recommended timelines for both grease and charcoal filters, as they require different care routines.
Grease Filters: Cleaning Frequency
Grease filters trap grease and oil particles produced during cooking. Over time, these filters can become clogged with residue, which reduces their efficiency and may lead to unpleasant odors or even create a fire hazard.
- Clean grease filters every one to three months, depending on how often you use your microwave.
- If you frequently cook foods that produce a lot of grease (e.g., fried or oily dishes), consider cleaning them more often.
- A buildup of visible grease or dirt on the filter surface.
- Reduced ventilation or lingering cooking smells in your kitchen after using the microwave.
Charcoal Filters: Replacement Guidelines
Charcoal filters are designed to absorb odors but are not washable. Instead, they need regular replacement to continue working effectively. These filters are typically found in over-the-range microwaves that recirculate air rather than vent it outside.
- Replace charcoal filters every 6 months to 1 year, depending on usage.
- For heavy use, replacing closer to the six-month mark is advised.
- Persistent odors that do not go away after cooking.
- Noticeable discoloration or wear on the filter material.
| Filter Type | Maintenance Type | Frequency | Indicators for Action |
| Grease Filter | Cleaning | Every 1–3 months | Visible residue, reduced ventilation |
| Charcoal Filter | Replacement | Every 6–12 months | Lingering odors, discoloration |
Factors That Affect Frequency
- Regular preparation of greasy foods increases the need for frequent maintenance.
- Heavy daily usage means more frequent cleaning/replacement compared to occasional use.
- If your kitchen experiences high humidity levels or poor ventilation, this could impact filter efficiency and longevity.
Practical Maintenance Tips
- Set reminders on your phone or calendar for scheduled cleaning or replacement.
- Check your microwave’s user manual for brand-specific recommendations regarding filter maintenance.
- When purchasing replacement charcoal filters, ensure compatibility with your microwave model by checking part numbers in the manual.
Regular attention to these schedules will not only maintain proper airflow but also prolong your microwave’s lifespan while keeping it safe and odor-free.
How Often Should You Clean or Replace Filters
Maintaining your microwave filters is crucial for optimal performance, preventing unpleasant odors, and extending the lifespan of your appliance. Knowing how often to clean or replace these filters depends on the type of filter and your cooking habits. Below is a practical guide to help you determine the right timeline for maintenance.
Grease Filters
Grease filters are typically made from aluminum or stainless steel mesh and are designed to trap grease particles from cooking vapors. Over time, these filters become clogged with grease, reducing their efficiency. Regular cleaning is essential for both hygiene and proper airflow.
- Light Cooking: If you rarely fry foods or cook meals that produce grease, clean the grease filter every 1–2 months.
- Frequent Cooking: For households that use the microwave often or prepare greasy meals, clean the filter every 2–4 weeks.
- Visible buildup of grease or debris.
- Reduced airflow from the microwave vent.
- Lingering odors after cooking.
Charcoal Filters
Charcoal filters are typically installed in ductless (recirculating) microwaves to absorb odors and improve air quality. Unlike grease filters, charcoal filters cannot be cleaned; they must be replaced when they lose effectiveness.
- Most manufacturers recommend replacing charcoal filters every 6–12 months, depending on usage.
- Heavy cooking routines (especially frying or grilling) may require replacement closer to the 6-month mark.
- Persistent cooking smells in your kitchen long after use.
- A noticeable decline in the microwave’s ventilation efficiency.
Factors That Influence Cleaning/Replacement Schedules
- Cooking Habits: Frequent frying or grilling emits more grease and odors, requiring more frequent maintenance.
- Microwave Usage: Using your microwave daily versus occasionally impacts how quickly the filters clog.
- Manufacturer Guidelines: Always consult your appliance manual for specific recommendations tailored to your microwave model.
| Filter Type | Maintenance Action | Frequency | Key Indicators |
| Grease Filter | Clean | Every 2–8 weeks | Grease buildup, reduced airflow |
| Charcoal Filter | Replace | Every 6–12 months | Lingering odors, poor ventilation |
Additional Tips
- Set reminders on your phone or calendar to keep track of cleaning/replacement schedules.
- Check your user manual for location-specific details about accessing and maintaining both types of filters.
- Avoid using harsh chemicals when cleaning grease filters; warm water and dish soap are usually sufficient.
By adhering to these guidelines, you’ll ensure that your microwave continues running efficiently while maintaining a cleaner kitchen environment.
Step-by-Step Guide to Cleaning Grease Filters
Cleaning grease filters in your microwave is a straightforward process, but doing it properly ensures better microwave performance, improved air quality, and longer filter life. Grease filters are typically made of metal mesh and are designed to capture airborne grease particles from cooking. Over time, they can accumulate a significant amount of residue, which can affect their efficiency. Here’s a step-by-step guide to cleaning them effectively.
What You’ll Need
Before beginning, gather the following supplies: – Dish soap or degreasing dishwashing liquid – Warm water – Baking soda (optional for tough stains) – A soft brush or sponge – A sink or large basin – Clean microfiber cloth or paper towels
Step 1: Remove the Grease Filter
- Unplug your microwave to ensure safety during the cleaning process.
- Locate the grease filter(s). They are usually found underneath an over-the-range microwave or near the venting area.
- Gently detach the filter by sliding or popping it out, depending on your model. Refer to the user manual if you’re unsure about how to remove it.
Step 2: Prepare a Cleaning Solution
- Fill your sink or basin with warm water.
- Add a few drops of dish soap (preferably one with degreasing properties) into the water.
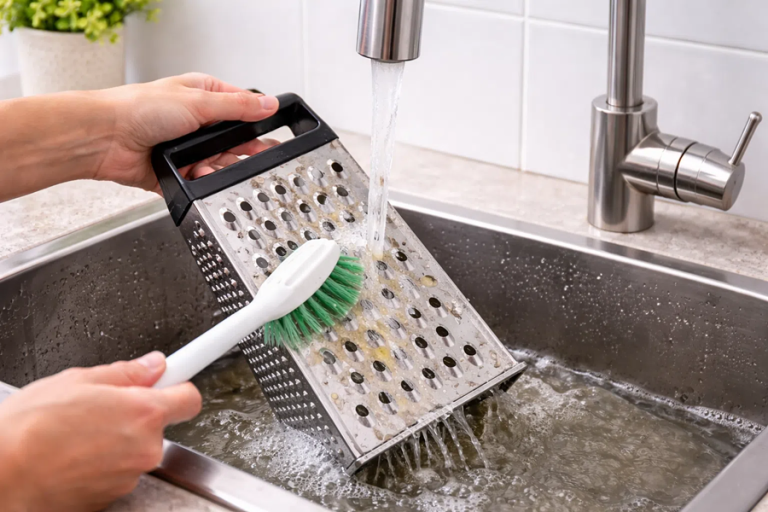
- For extra cleaning power, mix in a tablespoon of baking soda.
Step 3: Soak the Filter
- Submerge the grease filter completely in the cleaning solution.
- Let it soak for 10–15 minutes to loosen stubborn grease and food particles.
Step 4: Scrub Gently
- After soaking, use a soft brush or sponge to scrub away any remaining debris.
- Avoid using abrasive materials that could damage or scratch the mesh surface.
- Pay extra attention to corners or tightly woven areas where grease tends to build up.
- If needed, rinse your sponge periodically and apply more soap during scrubbing.
Step 5: Rinse Thoroughly and Dry
- Rinse the filter under running warm water until all soap residue is gone.
- Shake off any excess water gently.
- Place the filter on a clean towel or drying rack and allow it to air-dry completely before reinstalling it back into your microwave.
Note: Do not reinsert a wet filter as moisture can interfere with proper ventilation and potentially damage your appliance.
Additional Tips for Deep Cleaning
For particularly greasy filters: – Boil water in a large pot and add baking soda gradually while stirring (be careful as boiling water can bubble up). – Dip sections of your filter into this solution for deeper cleaning before scrubbing them gently.
For dishwashers: – If your microwave’s user manual indicates that your grease filters are dishwasher-safe, you can place them in the top rack and run them through a standard cycle with hot water.
Troubleshooting Persistent Issues
If despite thorough cleaning your filter remains clogged with grease buildup: – Consider replacing it rather than continuing ineffective deep cleans. – Check for signs like warped mesh material or an inability to maintain airflow—these indicate that replacement is due.
By following this guide routinely (every few months depending on usage), you’ll maintain cleaner kitchen air quality and enjoy an efficiently operating microwave for years to come!
When and How to Replace Charcoal Filters
Charcoal filters are an essential component in over-the-range microwaves, particularly those that function as ventless or recirculating units. Unlike grease filters, charcoal filters are designed to capture and neutralize odors, smoke, and other airborne particles. Over time, these filters become saturated with impurities, significantly reducing their effectiveness. Knowing when and how to replace your charcoal filter is crucial for maintaining the performance of both your microwave and kitchen environment.
When to Replace Charcoal Filters
- Manufacturer’s Guidelines: Most manufacturers recommend replacing charcoal filters every 6-12 months.
- Cooking Frequency: If you use your microwave frequently for cooking strong-smelling foods or frying, the filter may need replacing more often.
- Reduced Efficiency: If odors linger longer than usual or you notice diminished ventilation performance, it’s a sign the charcoal filter needs replacement.
It’s a good idea to check your appliance manual for specific recommendations tailored to your microwave model.
Tools You’ll Need for Replacement
- A new charcoal filter compatible with your microwave model
- A screwdriver (if required)
- Soft cloth or paper towels
- Manufacturer’s instructions
Step-by-Step Process for Replacing Charcoal Filters
- Turn Off and Unplug Your Microwave
To ensure safety during the replacement process, always unplug the microwave from its power source. - Reference your appliance manual to find where the charcoal filter is housed.
- For most over-the-range microwaves, this compartment is located behind the vent grille at the top of the unit.
- Use a screwdriver to loosen screws securing the vent grille in place.
- Carefully remove the grille without applying excessive force.
- Slide or lift out the used charcoal filter from its slot.
- Inspect it for visible signs of saturation (discoloration or strong odors). Even if it looks clean but has been in place for over 12 months, replace it.
- Align the new charcoal filter with its designated slot.
- Push gently until it fits securely into position.
- Place the vent grille back onto its mount and tighten screws securely.
- Ensure there are no gaps between components before completing this step.
- Test Your Microwave Functionality
Plug in your microwave and run it briefly without food to confirm proper airflow through vents with the new filter installed.
Key Considerations for Replacing Charcoal Filters
- Only purchase filters designed specifically for your microwave model; using incompatible parts can lead to inefficient filtration or damage.
- Regularly inspect both grease and charcoal filters at least once every three months as part of overall maintenance.
- If you live in an area with higher air pollution or cook heavily spiced foods regularly, consider replacing them every six months instead of annually.
By understanding when and how to replace your microwave’s charcoal filter properly, you ensure clean air circulation in your kitchen while extending your appliance’s lifespan. This small but essential task can make a big difference in maintaining overall kitchen hygiene and functionality over time.
Common Mistakes to Avoid When Cleaning Filters
Cleaning microwave filters is essential for maintaining the efficiency and longevity of your appliance. However, many people unknowingly make mistakes during the cleaning process, which can reduce the effectiveness of their efforts or even damage the filters. Here are some common mistakes to avoid when cleaning microwave filters, along with tips to ensure you’re doing it correctly.
1. Using Harsh Chemicals
One of the most frequent mistakes is using strong chemicals or abrasive cleaners on microwave filters, particularly grease filters. These cleaners can damage delicate components or leave harmful residues behind.
– Avoid: Bleach, ammonia-based cleaners, or scouring powders.
– Use Instead: Mild dish soap mixed with warm water is sufficient for tackling grease and grime.
2. Not Checking if Filters Are Dishwasher-Safe
Some grease filters are dishwasher-friendly, while others are not designed to withstand high temperatures or harsh dishwasher detergents. Placing a non-dishwasher-safe filter in your dishwasher can warp or damage it beyond repair. – What to Do: Always refer to your microwave’s user manual before attempting to clean a filter in the dishwasher. – Alternative Option: If unsure, stick to handwashing with a soft sponge and gentle detergent.
3. Cleaning Charcoal Filters Instead of Replacing Them
Charcoal filters are designed to trap odors and impurities but cannot be cleaned effectively. Once clogged or saturated with debris, they lose their functionality entirely. – Mistake: Trying to rinse or wash charcoal filters in water can make them unusable faster. – What’s Correct: Replace charcoal filters based on manufacturer guidelines (typically every 3–6 months) instead of attempting cleaning.
4. Skipping Regular Maintenance
Allowing grease and residue to accumulate over time makes cleaning more difficult and less effective on both grease and charcoal filters. – Common Error: Only cleaning filters when visible buildup appears. – Recommended Schedule: | Filter Type | Cleaning/Replacement Frequency | |——————|—————————————–| | Grease Filters | Every month (or more often if needed) | | Charcoal Filters | Replace every 3–6 months |
5. Forgetting To Dry Filters Completely Before Reinstallation
After washing grease filters by hand or in a dishwasher, failing to let them dry completely before reinstalling can lead to issues like mold growth or poor air circulation within the microwave. – Mistake: Reinstalling damp grease filters directly after washing. – Correct Practice: – Pat dry with a clean kitchen towel after washing. – Air dry for at least an hour until no moisture remains.
6. Ignoring Manufacturer Instructions
Every microwave model has specific requirements regarding its maintenance components like filters. A common mistake is assuming all microwaves have universally similar parts and cleaning processes. – Problem: Using improper methods that may void warranties or damage components. – Solution: Always review your appliance’s manual before embarking on any maintenance activity.
By avoiding these common errors during filter maintenance, you’ll extend both the life of your microwave and its ability to operate at peak performance levels while ensuring better air quality in your kitchen environment. Small adjustments in how you approach filter care can make a significant difference over time, saving you costly repairs down the road while keeping your appliance running smoothly longer than expected.
Tips to Keep Your Microwave Running Efficiently
Proper microwave maintenance not only ensures optimal performance but also extends its lifespan. Beyond cleaning and replacing filters, there are several practical measures you can take to keep your microwave running efficiently. These simple yet effective steps will save energy, preserve your appliance’s functionality, and reduce the need for repairs.
Regular Cleaning
- Wipe Down Interior and Exterior Surfaces
Food splatters and grease can accumulate quickly. Use a damp microfiber cloth with mild dish soap to clean the inside walls, ceiling, and door of the microwave. Avoid abrasive cleaners that may damage surfaces. - Clean the Turntable
Remove the turntable plate regularly for washing. Most plates are dishwasher-safe but can also be hand-washed with warm soapy water. - Inspect Door Seals
Check the rubber gasket or seals around the door for food debris or damage. A tight seal is essential to prevent energy loss during operation.
Maintain Proper Ventilation
- Ensure there’s at least 2–3 inches of space on all sides of an over-the-counter or countertop unit.
- For built-in models, verify that ventilation pathways remain unobstructed. Dust off vents periodically.
Use Microwave-Safe Containers
| Material | Safe for Microwave? | Notes |
| Glass (non-metallic) | Yes | Ideal for heating or cooking |
| Ceramic | Yes | Look for “microwave-safe” labels |
| Plastic | Sometimes | Only use BPA-free, microwave-safe plastics |
| Metal/Aluminum | No | Can cause sparks or fire |
Avoid heating sealed containers as they may explode due to pressure buildup.
Avoid Overloading
Placing too many items in the microwave at once reduces efficiency and unevenly cooks food. If reheating multiple dishes, arrange them with space between each item so heat circulates evenly.
Protect Filters from Excess Grease Build-Up
Filters play a critical role in keeping air circulation clear:
– Wipe down areas surrounding grease filters weekly to prevent excess accumulation. – Keep exhaust fans running when cooking greasy foods on a stovetop beneath an over-the-range microwave.
Perform Routine Inspections
Schedule monthly maintenance checks:
1. Inspect power cords for wear or exposed wiring. 2. Test buttons, display panels, and lights for proper function. 3. Listen for unusual noises during operation—these could indicate a mechanical issue requiring professional assistance.
Energy-Saving Tips
To reduce energy consumption:
– Heat smaller portions whenever possible instead of using maximum capacity. – Use preset cooking functions like “defrost” rather than guessing times manually; presets optimize time and power usage. – Unplug the microwave when not in use if it has no standby function (though most modern units are energy-efficient).
By following these guidelines consistently alongside regular filter maintenance, you’ll ensure your microwave remains efficient while maintaining its reliability over time.