Check the Label
Before you begin cleaning your curtains or drapes, it is essential to check the care label attached to the fabric. The care label often contains vital information about the material, recommended cleaning methods, and any specific precautions you should take. Ignoring this step could damage your curtains or shorten their lifespan.
Why Checking the Label Matters
- Curtains and drapes are made from a variety of materials such as cotton, polyester, silk, velvet, linen, and blends. Each material requires different cleaning techniques.
- Cotton and polyester: Generally machine-washable.
- Silk and velvet: Often need professional cleaning or gentle hand washing.
- Some fabrics are “dry clean only” while others can handle machine washing or even hand washing at home.
- Ideal water temperature (e.g., cold water wash).
- Whether bleach should be avoided.
- If tumble drying is safe or if air-drying is recommended.
- Avoiding Shrinkage
Following improper washing methods can lead to shrinkage or distortion of your curtains’ shape—especially with delicate materials like linen or wool.
Key Information on Care Labels
| Symbol | What It Means | Example |
| 🌀 | Machine washable | Use a gentle cycle |
| ✋ | Hand wash only | Avoid machines |
| 🌡️ | Indicates max temperature for water | Cold/30°C |
| 🔺 | Bleaching allowed | Chlorine-safe use |
| ❌🔺 | No bleaching | Use mild detergent |
| ⚫ | Dry clean only | Professional help |
Practical Advice for Dealing with Missing Labels
If your curtains do not have a label:
– Look online for care information based on the fabric type.
– Perform a spot test on an inconspicuous area before using any cleaning method (explained further in its dedicated section).
– When in doubt with delicate or high-value fabrics, consult with a professional cleaner.
By taking the time to review the care label first, you’ll save effort later by avoiding mistakes that could ruin your drapes entirely. A small detail like this ensures durability and keeps your home looking fresh without unnecessary replacements.
Do a Spot Test
Before diving into cleaning your curtains or drapes, it is essential to perform a spot test. Fabrics used for window treatments can vary greatly in terms of their composition and reactions to different cleaning solutions. A spot test ensures that your chosen method or product won’t damage the fabric, cause discoloration, or alter its texture.
Why Is a Spot Test Important?
- Prevents Damage: Some fabrics are delicate and may shrink, fade, or lose their texture when exposed to certain cleaning agents.
- Identifies Safe Methods: Testing helps determine whether water, detergent, or specific cleaning solvents are appropriate for the material.
- Saves Money: Avoid costly mistakes such as replacing curtains that were ruined due to improper cleaning methods.
How to Perform a Spot Test
- Choose an Inconspicuous Area:
Look for a hidden section of the curtain or drape—such as behind a hemline, along the side edge, or near a corner where it won’t be visible when hung. - Prepare Your Cleaning Solution:
Dilute any liquid detergent with water before testing. For store-bought cleaners, read the instructions carefully to ensure proper dilution. - Apply the Solution:
Use a cotton swab or soft cloth dipped in the solution and apply it lightly to the test area without soaking the fabric. - Blot Gently:
Use another clean cloth or paper towel to blot away excess solution without rubbing harshly. - Wait for Results:
Allow at least 15-30 minutes for any reaction to occur. Observe if there’s discoloration, bleeding of dyes, shrinkage, or changes in texture. - Rinse If Needed:
If you applied a soapy solution during the test phase, rinse off with clean water using another damp cloth and check again once dry.
What to Watch Out For During Testing
| Reaction Observed | Recommendation |
| No change | Safe to proceed with this method |
| Fabric discoloration | Avoid using this solution; consider professional advice |
| Texture alteration | Skip this method; try gentle alternatives like vacuuming |
| Dye bleeding | Use extra caution—hand wash only in cold water |
Additional Tips for Spot Testing
- If your curtains are made from blended fabrics (e.g., polyester-cotton), both materials might react differently during cleaning; always err on the side of caution.
- For heavily patterned curtains with printed designs, focus your testing on areas where patterns overlap darker backgrounds—these areas are more prone to dye bleeding.
- Always use lukewarm water unless stated otherwise on care labels.
A thorough spot test is an invaluable step in ensuring that your cleaning efforts will leave your drapes looking fresh rather than damaged. Skipping this process could lead to irreversible harm that even professional cleaners might not be able to fix later on!
Assess the Fabric Type
Before beginning, determine whether your curtains are machine-washable or require more delicate care. Common curtain fabrics include:
– Cotton or Linen: Typically machine washable but may shrink if not pre-treated. – Velvet or Heavy Drapes: Often require hand washing or dry-cleaning to avoid fabric damage. – Silk or Delicate Materials: Should be cleaned with gentle methods to prevent fiber weakening.
Preparing Curtains for Cleaning
- Remove all hooks, rings, and other hardware from the curtains.
- Shake them outdoors to remove loose dust and debris before washing.
- Read the care label carefully for specific cleaning recommendations (e.g., water temperature, detergent type).
Machine Washing Curtains
- Use Gentle Detergent: Opt for a mild detergent that won’t harm delicate fabrics.
- Choose Appropriate Settings: Use a gentle cycle with cold water to prevent shrinking or color bleeding.
- Avoid Overloading: Wash lighter fabrics alone or with similar garments to ensure proper agitation and cleaning.
After washing, hang lightweight curtains on a line immediately while they’re damp to reduce wrinkles. For heavier drapes, use extra support while drying to avoid stretching.
Hand Washing Curtains
- Fill a bathtub or large basin with lukewarm water and add a small amount of mild detergent.
- Submerge the curtains completely and gently agitate them with your hands.
- Rinse thoroughly until all soap residue is gone.
- Press out excess water (avoid wringing) by laying them flat on a towel and rolling it up.
Once cleaned, allow the fabric to air dry naturally on flat surfaces or by hanging them evenly.
Drying Tips for All Fabrics
| Fabric Type | Recommended Drying Method | Additional Tips |
| Cotton/Linen | Air dry; tumble dry low if permitted | Remove promptly from dryer to minimize wrinkles |
| Velvet/Heavy Drapes | Flat drying preferred; avoid direct heat | Support weight evenly during drying |
| Silk/Delicate | Air dry only | Keep out of direct sunlight |
By following these steps carefully, you’ll extend the life of your window treatments while keeping them fresh and clean without professional intervention.
Steam Your Drapes Clean
Steaming is an effective and gentle way to clean your drapes, especially for delicate fabrics and curtains that can’t be washed in a machine. It’s also a convenient option for removing wrinkles, dust, and allergens without taking the curtains down. If you’ve never steamed your drapes before, follow these steps to get professional-looking results at home.
Benefits of Using a Steamer
- Delicate Fabric Preservation: Unlike washers or dryers, steamers are less likely to damage fragile materials like silk or lace.
- Chemical-Free Cleaning: Steam cleaning uses water vapor instead of harsh cleaning agents, making it eco-friendly and safe for households with children or pets.
- Reduces Dust and Allergens: The heat from the steam can kill dust mites and neutralize allergens embedded in fabric fibers.
- Wrinkle Removal: Steam quickly smooths out creases caused by folding or hanging.
Tools Needed
To steam your drapes effectively, you’ll need: – A fabric steamer (handheld or standing model) – Access to a power outlet near the curtains – A stable step stool if the drapes are tall – Clean distilled water (to prevent mineral buildup in the steamer)
Step-by-Step Guide to Steaming Drapes
- Ensure adequate room around the drapes so you can move freely with the steamer.
- Remove any furniture directly beneath the window to avoid accidental spills.
- Fill the steamer’s reservoir with distilled water and let it heat up according to the manufacturer’s instructions.
- Test a small area of steam output on an inconspicuous part of your curtain (e.g., a corner) to ensure there is no discoloration.
- Begin steaming from the top edge of your drape and work your way downward using smooth vertical strokes. Avoid pressing too hard against the fabric; let the steam do most of the work.
- Hold the steamer head 6–12 inches away from thicker materials and about 3–6 inches away from lighter fabrics like voile or sheer curtains.
- Focus extra time on sections with visible creases or dirt but avoid over-saturating any single spot as this could leave watermarks.
- After steaming, allow your drapes to air dry completely before adjusting how they hang. This prevents any lingering dampness that could lead to mildew growth.
Common Mistakes to Avoid
- Using tap water instead of distilled water; minerals can clog your steamer over time.
- Oversteaming one section of fabric, which may cause distortion or damage.
- Ignoring care labels—some fabrics may not tolerate high heat well even when steaming.
When Not To Use Steam Cleaning
While steaming is versatile, certain situations may call for alternative cleaning methods: | Fabric Type | Alternative Methods | |——————-|———————| | Heavy velvet | Professional dry cleaning | | Fabrics prone to shrinking | Cold hand-washing where applicable |
Final Thoughts on Steaming Curtains
Regularly steaming your drapes not only keeps them looking fresh but also extends their lifespan by reducing wear caused by traditional washing methods. With proper care and attention during this process, you can achieve spotless results while maintaining delicate materials’ integrity over time.
Dry Clean Curtains at Home
Dry cleaning curtains at home can be a practical and cost-effective way to maintain their appearance, especially for heavier fabrics or delicate materials like silk or velvet. However, this requires careful attention to minimize the risk of damage. With the right approach and tools, you can refresh your curtains safely without taking them to the dry cleaner.
Why Choose Dry Cleaning at Home?
Dry cleaning at home is especially useful if: – Your curtains are labeled as “dry clean only.” – They are made of sensitive fabrics that may shrink or distort when wet cleaned. – You want a more convenient and affordable option than professional services.
Before starting, always check the care label on your curtains to ensure they are suitable for home dry cleaning.
Supplies You’ll Need
Gather the following tools and products: – Home dry-cleaning kits: These are available in many stores and include stain removal agents, pre-moistened cleaning cloths, and a reusable fabric bag. – Lint roller or soft cloth: For removing dust and debris before cleaning. – Steamer (optional): Helps smooth wrinkles after cleaning. – Spot-cleaning solution: For addressing tough stains before starting the full process.
Step-by-Step Guide to Dry Cleaning Curtains at Home
- Remove any hardware such as curtain hooks or rings.
- Shake out loose dust or dirt outdoors or vacuum lightly with a brush attachment.
- Identify any visible spots or stains. Pre-treat these areas using a spot-cleaning solution designed for delicate fabrics. Test on an inconspicuous area first to ensure it does not discolor the fabric.
- Place one panel (or two if small) inside the provided fabric bag.
- Add one of the pre-moistened cloths included in the kit into the bag.
- Tumble in your dryer on low heat for 20–30 minutes depending on your fabric’s weight.
- Once done, carefully take out each curtain panel from the bag while still warm to prevent wrinkling.
- Hang them immediately to allow any remaining creases to relax naturally.
- Touch-Up with a Steamer (Optional)
- If wrinkles persist after drying, gently steam them while they hang. This step is particularly beneficial for thicker materials like velvet.
Benefits of Home Dry Cleaning
| Advantages | Details |
| Cost Savings | Eliminates expensive trips to professional cleaners. |
| Convenience | Can be done anytime without leaving your home. |
| Fabric Longevity | Maintains fibers without harsh chemicals used by some commercial cleaners. |
When Not to Dry Clean Curtains at Home
There are situations when professional help is safer: – If curtains have intricate embellishments like beads or embroidery that could dislodge during tumbling. – If your fabric label explicitly states “Professional Dry Clean Only.” For these cases, contacting an expert ensures no compromise on quality or safety while cleaning.
By carefully following these steps and evaluating your curtain type beforehand, you can successfully refresh them at home while extending their lifespan through proper care techniques tailored specifically for dry-clean-only textiles.
Vacuum Window Treatments
Vacuuming your curtains and drapes is one of the most effective ways to maintain their cleanliness between deep washes or professional treatments. Dust, pet hair, and airborne particles can accumulate over time, dulling the fabric and potentially affecting indoor air quality. Regular vacuuming helps extend the life of your window treatments while keeping them fresh and allergen-free.
Why Vacuuming is Important
- Prevents Dust Build-Up: Curtains act as natural filters for your home, trapping dust and airborne debris. Without regular cleaning, this buildup can become noticeable and harder to remove.
- Minimizes Allergens: For households with allergy sufferers, vacuuming curtains helps remove pollen, pet dander, and dust mites.
- Preserves Fabric Quality: Dust particles can cause fabric to appear faded or worn over time. Gentle vacuuming protects the material from wear.
Tools You’ll Need
To effectively vacuum your window treatments without causing damage, use the right tools: – Vacuum Cleaner with Attachments: Look for a model that includes a soft brush attachment or an upholstery tool. – Step Ladder (if needed): To safely reach taller drapes or curtains.
How to Vacuum Curtains and Drapes
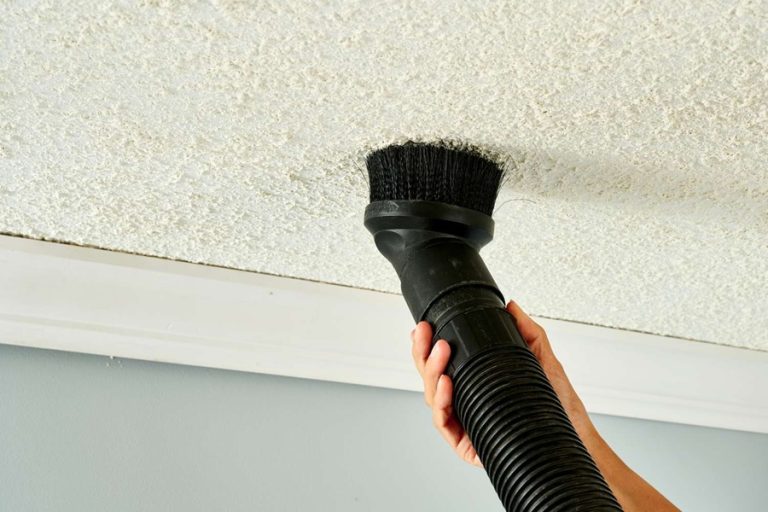
- If possible, fully extend or unhook the curtains so they’re easier to access. If they’re delicate or heavy, leave them hanging to avoid damage during removal.
- Set your vacuum cleaner to its lowest suction setting.
- Attach the soft brush or upholstery tool for delicate fabrics.
- Use smooth strokes as you move downward along each panel.
- Pay close attention to edges where dust tends to collect more heavily.
- Examine folds, pleats, and hems where dirt tends to settle.
- For stubborn spots like lint or hair clinging to the surface, use a lint roller after vacuuming for added precision.
- Dust can gather on curtain rods and valances too; gently clean these areas using a microfiber cloth or soft attachment.
Tips for Different Fabrics
| Fabric Type | Vacuuming Tips |
| Heavy Fabrics | Use slower strokes with firm but gentle pressure |
| Sheer/Delicate | Keep suction low; avoid excessive brushing |
| Textured Fabrics | Adjust angle of brush head slightly for deeper cleaning |
| Blackout Curtains | Ensure no tears in lining before applying even light suction |
Frequency of Vacuuming
- For most homes: Aim to vacuum curtains once every 2–4 weeks.
- For high-traffic areas or homes with pets: Consider weekly maintenance.
Taking care of your window treatments through consistent vacuuming ensures their longevity while keeping your home clean and inviting. By integrating this step into your routine care practices, you’ll reduce long-term wear while maintaining an elegant look that complements your space perfectly.
Call a Professional
While many curtain and drape cleaning tasks can be handled at home, there are situations where hiring a professional is the best course of action. Whether it’s due to the material’s delicacy, stubborn stains, or simply time constraints, calling in experts ensures your window treatments are cleaned thoroughly and safely. Below is a guide to help you determine when professional cleaning might be necessary and what to expect from the process.
When to Call a Professional
- Delicate Fabrics: Curtains made from fabrics like silk, lace, or velvet often require specialized care that isn’t possible with DIY methods.
- Heavy Staining: Stains caused by oils, smoke, or other persistent substances may need advanced cleaning techniques.
- Large or Bulky Drapes: Oversized drapes can be difficult to clean at home due to their weight and size. Professionals have equipment designed for these larger items.
- Age of Curtains: Older fabrics can become fragile and prone to damage during cleaning. Specialists know how to handle such materials gently.
- Custom or Lined Drapes: Curtains with linings or custom designs often require tailored care that goes beyond standard machine washing.
Benefits of Professional Curtain Cleaning
- Expert Knowledge: Professionals understand fabric types and choose appropriate cleaning methods—be it dry cleaning, steam cleaning, or hand washing.
- Specialized Equipment: Many providers have industrial-grade machines capable of safely removing dirt, allergens, and odors without damaging the material.
- Stain Removal Expertise: They use industry-tested techniques to effectively remove tough stains while preserving fabric quality.
- Convenience: With pickup and delivery options often available, you save effort while ensuring your curtains look refreshed.
What to Expect from a Professional Service
- The provider will evaluate your curtains’ fabric type, condition, and any specific concerns (e.g., stains).
- They’ll recommend an appropriate cleaning method based on this assessment.
- Dry Cleaning: Suitable for delicate materials such as silk or lined curtains.
- Steam Cleaning: Ideal for removing dust mites and allergens without using harsh chemicals.
- Advanced Treatments: Many services offer additional treatments like deodorizing or stain protection.
- Typical turnaround times range from 1–5 days depending on service volume and fabric type.
- Costs vary based on factors such as curtain size, material intricacy, and extra services requested.
| Service Type | Best For | Estimated Cost Range |
| Dry Cleaning | Delicate fabrics | $15–$40 per panel |
| Steam Cleaning | General maintenance | $10–$25 per panel |
| Specialty Services | Stain removal/protection | Additional fee |
Tips for Choosing the Right Professional
- Research local providers with strong customer reviews.
- Ask about their experience working with similar fabric types.
- Request a detailed price breakdown before agreeing to services.
- Confirm any guarantees they offer regarding damage liability.
By relying on skilled professionals when necessary, you protect your investment in beautiful window treatments while maintaining their longevity.