Why Baseboards Collect Dust and Scuff Marks
Baseboards are an often-overlooked part of a home’s interior, yet they play a crucial role in tying together the room’s aesthetic. Unfortunately, their placement at the base of walls makes them particularly prone to collecting dust, dirt, and scuff marks. Understanding why this happens can help you address the problem more effectively.
Location Matters
Baseboards are positioned at a height that exposes them to constant contact with both airborne particles and physical wear. Here’s why they tend to attract dirt:
– Proximity to Floors: Floors naturally collect dust, pet hair, and debris through daily activity. This buildup is easily swept or blown onto baseboards during cleaning or movement in the home.
– Foot Traffic: Shoes, socks, and even vacuum cleaners are likely to brush against baseboards unintentionally. Over time, this leads to scuff marks and grime accumulation.
– Air Circulation: HVAC systems or open windows stir up dust particles that often settle on horizontal surfaces like baseboard ledges.
Materials Make a Difference
The material of the baseboard can also determine how easily it attracts scuffs or collects dust:
– Painted Baseboards: Glossy finishes may resist absorption of dirt but are prone to visible smudges and streaks from shoes or cleaning tools.
– Wooden Baseboards: These can absorb oils from skin contact or cleaning products if untreated, causing discoloration over time. – Vinyl or Composite Baseboards: Though durable, these materials may show scratches more prominently if not cleaned carefully.
Everyday Activities That Lead to Scuffs
Scuff marks typically result from interactions with items in your home such as furniture legs, toys being pushed around by children, or even pets brushing against them as they move through rooms.
Key contributors include: – Moving furniture without proper padding. – Using shoes with hard soles indoors. – Frequent use of spaces with high activity like hallways or kitchens.
| Cause | Resulting Issue |
| Foot traffic | Scuffs near floor edges |
| Furniture movement | Deeper scratches |
| Pet activity | Hair buildup & smudges |
| Airflow/Dust settling | Dust accumulation |
Why Regular Maintenance is Important
Because baseboards act as both a functional boundary and decorative element in your home, neglecting their upkeep can affect the overall cleanliness of your space. Dust buildup not only looks unattractive but can also contribute to allergens in your environment. Meanwhile, scuff marks left untreated may become permanent if allowed to stain certain materials over time.
By understanding these root causes—location vulnerabilities, material properties, and everyday activities—you’ll be better equipped to prevent further issues while maintaining clean and polished baseboards throughout your home.
Supplies You’ll Need to Clean Baseboards
Cleaning Tools
- Microfiber Cloths: These are soft, reusable, and excellent for trapping dust, dirt, and debris without scratching surfaces.
- Vacuum with Brush Attachment: A vacuum with a soft-bristled brush attachment can quickly remove loose dirt and allergens from the baseboards and surrounding areas.
- Soft-Bristled Cleaning Brush: Ideal for scrubbing out intricate grooves or trim details that cloths may miss.
- Magic Erasers or Melamine Sponges: Perfect for tackling scuff marks without being overly abrasive.
- Old Toothbrush: Handy for precision work in hard-to-reach spots like corners or decorative molding.
Cleaning Solutions
- Mild Dish Soap: A small amount diluted in water makes an excellent all-purpose cleaner that’s safe for most surfaces.
- White Vinegar Solution (1:1 with Water): Great for cutting grease and grime, especially in kitchens or areas prone to stains.
- Wood-Safe Cleaner: If your baseboards are wooden or have a wood finish, ensure you use a product specifically designed to clean wood safely.
- All-Purpose Cleaner (Non-Abrasive): For painted surfaces or vinyl baseboards, this can be used to remove tougher marks.
Additional Items
- Bucket of Warm Water: Useful for rinsing cloths during the cleaning process.
- Dry Towels: Helps to dry the surface after cleaning to avoid water damage or streaks.
- Knee Pads or Cushion: Since you’ll likely spend time kneeling while cleaning, these can make the process more comfortable.
Optional Supplies (Based on Specific Needs)
| Supply | Purpose |
| Cotton Swabs | For cleaning tight corners or crevices in detailed trim. |
| Painter’s Tape | Useful if you’re worried about accidentally smudging walls while cleaning. |
| Dusting Wand with Handle | Ideal for reaching high baseboards without bending too much. |
By gathering these supplies ahead of time, you’ll save yourself from interrupting the task midway. Moreover, having specialized tools like microfiber cloths and gentle cleaning solutions ensures thorough cleaning while protecting your baseboards from wear and tear. Select materials suited to your specific type of baseboard—whether painted, wooden, or vinyl—to achieve optimal results.
When everything is ready, start by laying out your supplies in an accessible spot near your workspace. This preparation step will set the tone for an efficient and satisfying cleanup session.
Start by Removing Dust and Loose Dirt
Cleaning your baseboards is a process that should always begin with the removal of loose dirt, dust, and debris. This foundational step ensures that any cleaning solutions you use later will be more effective and won’t mix with or spread excess dirt. Neglecting this step can result in a messy cleaning process or scratched surfaces, especially on painted or wooden baseboards.
Why Dust First?
- Prevents Scratches: Dust particles can act as abrasives if mixed with cleaning solutions or rubbed directly onto the surface.
- Improves Cleaning Efficiency: Removing loose dirt allows your chosen cleaning method to target deeper grime and scuff marks without interference.
- Health Benefits: Eliminating dust first reduces allergens that might get stirred up during the cleaning process.
Tools You’ll Need for Dust Removal
- Soft-bristled vacuum attachment: Ideal for removing dust without scratching surfaces.
- Microfiber cloth or duster: A microfiber cloth is gentle on baseboards while effectively trapping dust particles. Avoid feather dusters as they tend to scatter dust instead of lifting it away.
- Dry sponge: Great for delicate finishes like stained wood.
- Paintbrush (optional): A small paintbrush can help dislodge dust from intricate grooves or molding details.
| Tool | Best Use Case | Pros |
| Vacuum Attachment | For large areas and edges | Quick, effective, minimizes flying dust |
| Microfiber Cloth | General surface wiping | Traps fine particles; reusable |
| Dry Sponge | Delicate wood or painted surfaces | Gentle, non-abrasive |
| Paintbrush | Intricate moldings and corners | Precise reach in detailed areas |
Step-by-Step Guide to Dust Removal
- Prepare the Area: Move furniture away from walls where possible to provide easier access to baseboards. Lay down a drop cloth if needed to catch falling debris.
- Vacuum First: Use your soft-bristled vacuum attachment to gently suction along the top edge of the baseboard and its lower edges where it meets the floor.
- Wipe with a Microfiber Cloth: Dampen (not soak) your microfiber cloth with a little water if there’s stubborn dirt sticking to the surface. Wipe in long strokes along each section of the board.
- Tackle Detailed Areas: For grooves, carvings, or molding details, use a paintbrush to brush out tightly packed dirt or dust.
- Inspect Your Progress: Once complete, check thoroughly for missed spots—especially corners where debris tends to collect—and repeat as necessary.
Pro Tips for Effective Dusting
- Avoid using paper towels as they can leave lint behind and are less eco-friendly than reusable options like microfiber cloths.
- Work in small sections so you don’t miss any areas before moving on.
- If you’re dealing with particularly dusty surfaces (e.g., if it’s been months since cleaning), wear a mask during this step to avoid inhaling fine particles.
Starting with proper dust removal lays the groundwork for an efficient deep clean while protecting delicate finishes on your baseboards from unnecessary damage caused by improper handling of dirt buildup.
How to Remove Stubborn Scuff Marks
Stubborn scuff marks can ruin the look of your baseboards, especially if they’ve been there for a while or appear in high-traffic areas. Removing these marks may seem challenging, but with the right techniques and cleaning tools, it’s a straightforward process. Here’s a step-by-step guide to effectively tackle those tough scuff marks without damaging your baseboards.
Step 1: Assess the Material and Finish
Before jumping into cleaning, identify the material of your baseboards and their finish. Painted wooden baseboards, stained wood, or vinyl may react differently to cleaning solutions. For example:
– Glossy finishes are more resistant to moisture but may show streaks if wiped carelessly. – Matte finishes can absorb certain products and are more prone to damage from abrasive tools. – Natural wood stains require gentler methods compared to painted surfaces.
Step 2: Gather Materials
Here’s what you’ll need:
– Soft microfiber cloths: For gentle wiping without causing scratches.
– Melamine sponge (e.g., Magic Eraser): Ideal for tackling marks caused by shoes or furniture contact.
– Mild dish soap: Useful for general grime or dirt buildup around scuffs.
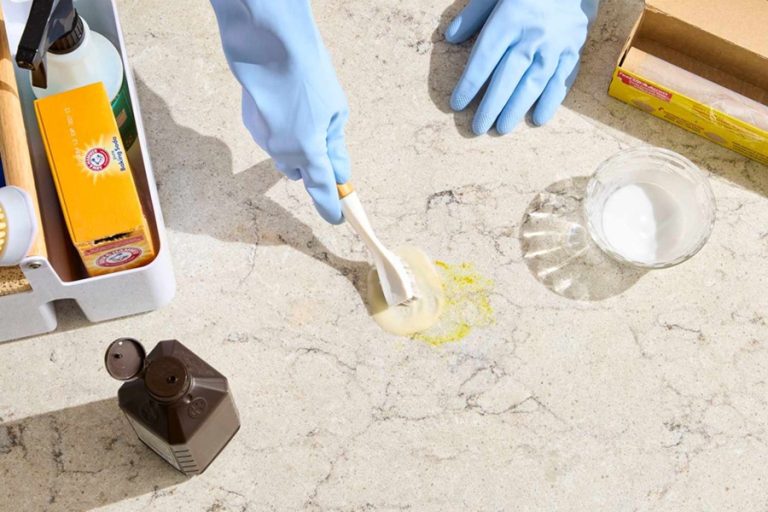
– Baking soda paste: A natural yet effective option for deeper stains or scuffs. – White vinegar (diluted): Works well on painted surfaces with tough discolorations. – Cotton swabs: For detailing edges and corners.
Step 3: Test in an Inconspicuous Area
Always test any cleaning solution on a discreet section of the baseboard before applying it widely. This helps ensure that the material won’t discolor or degrade.
Step 4: Cleaning Techniques Based on Scuff Severity
| Type of Scuff Mark | Recommended Solution | Tips for Best Results |
| Light surface-level scuffs | Damp microfiber cloth | Simply rub gently in circular motions until gone |
| Shoe marks or furniture scrapes | Melamine sponge dampened with water | Avoid excessive pressure; focus on just the mark |
| Persistent black streaks | Baking soda paste (mix baking soda with water) | Apply paste directly on area; scrub lightly with a soft cloth |
| Greasy smudges | Mild dish soap mixed with warm water | Use sparingly; avoid soaking painted wood |
| Dark stains on light-colored baseboards | Diluted white vinegar (50% vinegar, 50% water) | Dab gently using cotton swabs for precision work |
Step 5: Address Tight Corners
For tight edges where scuffs might accumulate, use cotton swabs dipped in your preferred cleaning solution. These allow you to clean detailed areas without risking oversaturation.
Step 6: Avoid Over-Cleansing
Over-scrubbing can wear down paint finishes or varnishes over time. Stick to small, controlled strokes rather than vigorous movements.
Preventing Future Stains
Once you’ve eliminated stubborn marks, consider applying a protective layer such as furniture polish or wax specifically designed for baseboards. This creates a barrier against new dirt buildup and makes future clean-ups easier.
By following this systematic approach, you’ll have spotless baseboards free of unsightly scuff marks while preserving their original condition.
Tips to Avoid Damaging Painted or Wooden Baseboards
Proper care when cleaning baseboards is essential to avoid damage, especially if they are painted or made of delicate materials like wood. Using the wrong tools or techniques can lead to scratches, peeling paint, or water damage. Below are some tips and methods to ensure your baseboards remain intact and in great condition while you clean them.
Understand Your Baseboard Material
Different materials require different cleaning approaches. Before you begin, identify whether your baseboards are:
– Painted (Glossy, Semi-gloss, or Matte): Glossy finishes are more durable but still susceptible to scratching with abrasive cleaners. Matte paint is more porous and prone to absorbing moisture.
– Wooden (Natural, Stained, or Sealed): Wood can warp if exposed to too much moisture and may discolor when cleaned with harsh chemicals.
Use Gentle Cleaning Tools
Avoid abrasive tools that could scratch surfaces or strip finishes. Recommended supplies include:
– Soft Microfiber Cloths: Perfect for wiping without leaving streaks behind.
– Small Soft-Bristle Brush: Ideal for detailed work in grooves or intricate designs on wooden baseboards.
– Vacuum with a Brush Attachment: Minimizes direct contact while effectively removing dirt and dust buildup from crevices.
Opt for Mild Cleaning Solutions
Aggressive chemicals can strip paint finishes or damage wood surfaces over time. Opt for safer alternatives such as:
– A mix of warm water and dish soap for routine cleaning tasks.
– A solution of white vinegar diluted with water (1:10 ratio) for deeper cleaning on painted surfaces (avoid vinegar on natural wood).
– For wooden baseboards, a few drops of a mild wood-specific cleaner added to warm water works best.
| Surface Type | Recommended Cleaner | Avoid |
| Painted | Mild dish soap + warm water | Abrasive sponges |
| Wooden | Wood-safe cleaner + water | Harsh scrubbing brushes |
Avoid Over-Saturation With Water
Excess moisture can cause wooden baseboards to swell or warp and may lead to peeling paint on painted ones. When damp cleaning is required: 1. Lightly dampen your cloth instead of soaking it. 2. Dry the surface immediately after wiping by using a dry microfiber towel.
Test Cleaning Products Before Full Use
Always test any new product on an inconspicuous area before applying it across the entire baseboard surface: 1. Apply a small amount of cleaner in an area hidden from view. 2. Wait 15 minutes. 3. Check for discoloration, streaking, bubbling paint, or residue.
By testing first, you minimize the risk of long-term damage.
Protective Measures During Cleaning
When dealing with detailed areas like corners: – Do not scrape scuff marks with hard objects; use a gentle eraser made specifically for marks instead. – If stuck-on dirt persists, wrap a damp cloth around your finger for precision rubbing instead of reaching for sharp tools.
By combining these mindful practices and proper technique, you’ll protect the finish on both painted and wooden baseboards while leaving them spotless after every clean-up session!
Tips to Avoid Damaging Painted or Wooden Baseboards
Proper care is essential when cleaning baseboards to ensure they remain in good condition over time. Painted and wooden baseboards are particularly susceptible to scratches, discoloration, and damage when cleaned improperly. Follow these tips to effectively clean your baseboards without harming their finish or structural integrity.
Understand Your Baseboard Material
- Painted Baseboards: Typically have a protective coating but can chip or wear down with abrasive tools or harsh chemicals.
- Wooden Baseboards: Often stained or varnished; susceptible to water damage and warping if too much moisture is applied.
- Vinyl/Synthetic Baseboards: More durable but can still scratch with rough scrubbing tools.
Use the Right Tools
- Soft microfiber cloths: Ideal for wiping down surfaces without scratching them.
- Non-abrasive sponges: For tougher grime without risking damage.
- Vacuum cleaner with soft brush attachment: Perfect for removing dust from corners and grooves.
- Small detailing brushes (like a toothbrush): Useful for intricate details on decorative trims.
Avoid steel wool, scrub brushes with hard bristles, or any tool that could leave marks behind.
Opt for Gentle Cleaning Solutions
| Material | Cleaning Solution |
| Painted | Mild dish soap diluted in warm water |
| Wooden | A mix of white vinegar and water (50/50 ratio) followed by a dry cloth |
| Vinyl/Synthetic | All-purpose cleaner diluted as per label instructions |
Avoid harsh chemicals such as bleach or ammonia-based cleaners unless specifically recommended by the manufacturer.
Limit Exposure to Moisture
- Dampen your cloth slightly instead of soaking it completely.
- Wipe off any excess moisture immediately after cleaning.
- Work in sections so water doesn’t sit on the surface too long.
For wooden baseboards, consider applying a small amount of furniture polish after cleaning to restore sheen and add a protective layer.
Test Before You Clean
Before applying any new cleaner, always test it on an inconspicuous area of the baseboard (e.g., behind furniture). This ensures that no discoloration, peeling paint, or other unwanted effects occur on visible parts of the trim.
Preventative Care Tips
- Install felt pads under furniture legs near walls to prevent scuffing during movement.
- Use rugs and mats in high-traffic areas close to walls.
- Dust regularly with a soft microfiber duster to avoid buildup that requires more intense scrubbing later.
- Repaint chipped areas promptly to maintain an even appearance and reduce vulnerability to further damage.
By following these guidelines carefully, you’ll protect your painted or wooden baseboards while keeping them clean and attractive for years to come.
How to Keep Your Baseboards Clean Longer
After putting in the effort to clean your baseboards, the last thing you want is for them to accumulate dust and scuff marks again. With some simple strategies and regular maintenance, you can keep your baseboards looking spotless for longer, saving yourself time and effort in the future. Here are practical tips to maintain that freshly cleaned look.
Establish a Regular Cleaning Routine
One of the easiest ways to preserve clean baseboards is by incorporating them into your regular cleaning schedule. Dust and dirt can accumulate quickly, so periodic upkeep minimizes buildup.
- Weekly dusting: Use a microfiber cloth, duster, or vacuum attachment at least once a week to remove dust before it settles.
- Monthly wipe-downs: Every month, wipe your baseboards with a damp cloth or gentle cleaning solution tailored for their material (painted vs. wooden).
Consistent maintenance prevents heavy buildup that requires deep cleaning later.
Use Anti-Dust Products
- Furniture polish: Apply a small amount of polish suitable for wood or painted surfaces.
- Anti-static spray: Lightly spray an anti-static product designed for home surfaces.
These treatments create a barrier that slows down dust accumulation.
Address Scuffs Immediately
Scuff marks are easier to remove when tackled promptly rather than allowing them to set in over time. Keep supplies on hand (such as melamine sponges) so you can quickly address scuffs as soon as they appear.
- For light scuffs: Use a damp microfiber cloth.
- For stubborn marks: Gently rub with a melamine sponge or apply mild dish soap diluted in water.
By addressing these issues early, your baseboards will remain pristine longer.
Protect High-Traffic Areas
| Problem | Preventive Solution |
| Shoe scuffs | Add area rugs or runners near walls |
| Pet scratches | Install protective trims at pet-level height |
| Dirt tracking | Place mats near doors to reduce dirt brought indoors |
Small adjustments can dramatically extend the cleanliness of your baseboards in these vulnerable spaces.
Maintain Proper Indoor Air Quality
Poor air quality contributes significantly to dust buildup on baseboards and other surfaces. Keeping indoor air clean reduces how frequently you need to dust.
- Change HVAC filters regularly.
- Use an air purifier in rooms prone to heavy dust circulation.
- Avoid leaving windows open during windy days if possible.
Cleaner air means less settling of airborne particles on your baseboards.
Consider Touch-Up Paints
- Match the paint color with leftover paint from when the room was last painted.
- Use a small brush for precision application over scratched or worn spots.
- Let it dry thoroughly before applying another coat if needed.
This quick step ensures consistent aesthetics without extensive work later on.
By adopting these preventative measures and habits into your cleaning routine, your baseboards will stay cleaner for longer while maintaining their appearance year-round.