Why Your Hairbrush Builds Up Dirt and Product Residue
Hairbrushes are an essential part of any haircare routine, but over time, they accumulate a layer of dirt, oils, and styling product residue. Understanding the underlying causes of this buildup can help you maintain cleaner hair tools and healthier hair.
Reasons Behind Hairbrush Buildup
- Natural Oils from Your Scalp:
Every time you brush your hair, sebum (the natural oil produced by your scalp) transfers to the bristles. While sebum helps moisturize your hair naturally, it can collect on your brush over time. - Styling Product Residue:
Hairsprays, gels, dry shampoos, and serums commonly leave behind a sticky or powdery film. When you use your brush after applying these products, the residue clings to the bristles or base. - Environmental Pollutants:
Dust particles and pollution from the air settle on your hair throughout the day. These contaminants stick to your brush as you use it. - Loose Hair Strands:
Every time you brush your hair, strands naturally shed into the bristles. These loose hairs tangle with other debris, creating clumps that make it harder for the bristles to function properly. - Dead Skin Cells:
Brushing not only detangles but also exfoliates your scalp lightly. Dead skin cells from this process build up on the brush along with other residue.
What Happens if You Don’t Clean Your Brush?
A dirty hairbrush is more than just unpleasant to look at; it can also harm your scalp and overall hair health.
- Redistribution of Dirt and Oils: Brushing with a dirty tool spreads old oils and residues back onto freshly washed hair.
- Reduced Brush Effectiveness: Tangled debris can block bristles from properly detangling or smoothing strands.
- Scalp Irritation: Built-up grime can attract bacteria or fungi over time, leading to potential irritation or even infections.
- Damaged Hair Quality: Constantly reintroducing pollutants into clean hair may result in dullness or dryness over time.
Preventing Excessive Build-Up
- Avoid brushing immediately after applying heavy styling products.
- Rinse excess product out of your hair before brushing whenever possible.
- For individuals using dry shampoos frequently, consider cleaning brushes more often as powder tends to cling heavily.
By understanding why dirt collects in your brush in the first place, you’ll be better equipped to care for it effectively—and keep both your tool and your tresses in optimal condition!
Signs It’s Time to Clean Your Hairbrush
Visible Build-Up
- Layer of Gunk: If you notice a grayish or white film on the base of your brush (often a mix of oils, product residue, and dead skin cells), this is a clear indicator that your brush needs attention.
- Embedded Hair: A buildup of hair strands caught between the bristles not only looks messy but can also trap more dirt and bacteria over time.
Reduced Functionality
- Tugging or Snagging: When your brush pulls at your hair or doesn’t glide smoothly through it anymore, debris build-up could be affecting its functionality.
- Loss of Shine: If brushing no longer gives your hair its usual polished look, trapped residue in the bristles may be redistributing old oils back into your locks.
Odor or Discoloration
- Unpleasant Smell: A musty or sour odor coming from your brush signals bacterial growth caused by moisture and build-up.
- Discoloration: Bristles that appear darker or discolored compared to their original state indicate accumulated grime.
Irritated Scalp
If you’ve been experiencing scalp irritation or itchiness after brushing, residue from an unclean brush could be transferring bacteria onto the skin.
Why Regular Cleaning Matters
Cleaning isn’t just about aesthetics; it directly impacts the health of both your scalp and hairbrush. Brushes loaded with dirt and oil can reintroduce impurities into freshly washed hair and even lead to clogged pores on the scalp. Plus, regular maintenance prolongs the life of your tool.
By recognizing these signs early on, you can incorporate cleaning into your routine before build-up becomes harder to tackle—keeping both your hairbrush and scalp in optimal condition.
Tools You’ll Need to Clean Your Hairbrush
Cleaning your hairbrush effectively starts with having the right tools on hand. Using the proper equipment ensures that you can remove debris, buildup, and residue without damaging the brush or wasting time. Below is a list of essential items and why each one is important for the process.
Essential Cleaning Tools
- Wide-Tooth Comb
A sturdy wide-tooth comb helps remove tangles of hair trapped between the bristles. Its teeth are spaced far apart, making it easier to pull out stubborn strands caught deep in your brush. - Scissors or Nail Clippers
If hair has wrapped tightly around the base of your brush, scissors or nail clippers can help you cut through tangled sections. Opt for small, precise tools like embroidery scissors to avoid damaging the bristles. - Soft-Bristle Toothbrush
A soft-bristle toothbrush is perfect for scrubbing between closely spaced bristles or cleaning areas where residue has built up. It’s gentle enough to use on delicate materials such as boar bristles but effective at scrubbing away grime. - Mild Shampoo or Dish Soap
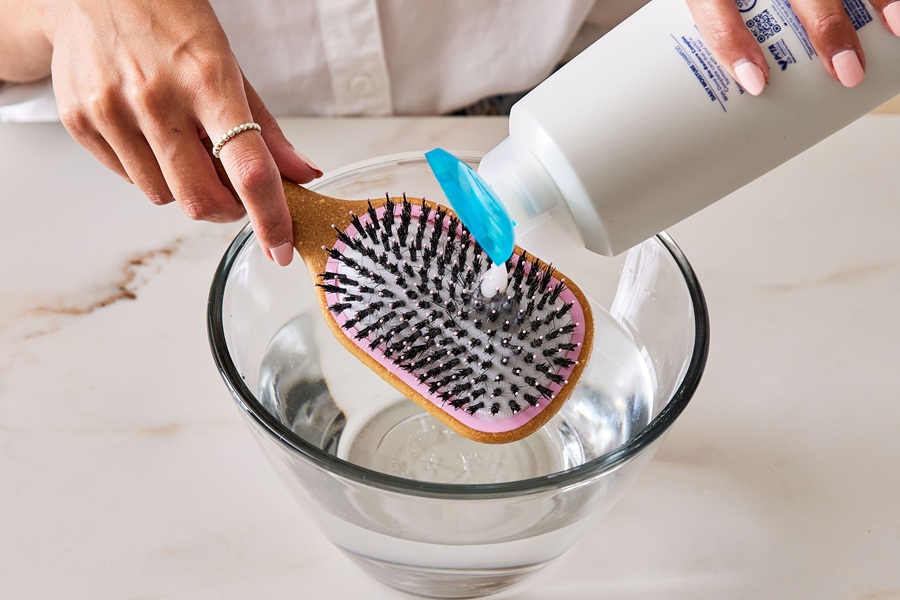
A gentle cleanser like shampoo works well for removing oils, styling product residue, and dirt from your hairbrush. Dish soap can be an alternative if you’re dealing with heavy grease or tougher buildup. - Bowl of Warm Water
A bowl filled with warm (not hot) water is necessary for soaking and washing your brush without risking deformation caused by excessive heat. - Cotton Swabs or Toothpicks
For brushes with tight spaces or intricate designs, cotton swabs and toothpicks provide extra precision when cleaning hard-to-reach areas.
Optional Tools Based on Brush Type
| Tool | Purpose | Best Suited For |
| Microfiber Cloth | Wiping down wooden handles or metal components | Wooden-handled brushes |
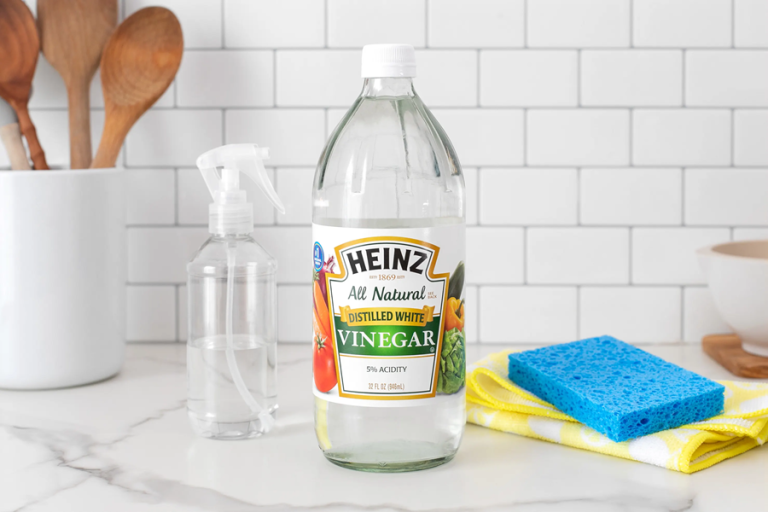
| Vinegar | Natural disinfectant to eliminate bacteria | Plastic brushes with high build-up |
| Detangling Spray | Loosens stubborn knots before removing hair | Brushes with close-set nylon bristles |
Organizing Your Cleaning Kit
Creating a dedicated space for these tools makes it easier to clean your brushes regularly. Consider storing them in a small container near your vanity or bathroom sink so they’re always accessible when needed.
By assembling these tools beforehand, you’ll ensure a smoother and more effective cleaning process that keeps your hairbrush in top condition while extending its lifespan. Make sure to choose products that align with your specific brush type—whether it’s wooden, plastic, boar bristle, or paddle-style—to prevent accidental damage during cleaning.
How to Remove Hair and Debris From the Brush
Properly removing hair and debris from your hairbrush is essential for maintaining its effectiveness and hygiene. Over time, hair, dirt, natural oils, product residue, and other particles accumulate on the bristles and base of the brush. This buildup can make your brush less effective at detangling hair or distributing oils evenly across your strands. Below is a step-by-step guide to efficiently remove hair and debris from your brush.
Step 1: Gather Your Tools
Before starting, ensure you have the following tools on hand to make the process easier: – A comb or a tail comb – Ideal for lifting tangles of hair out of the bristles. – Scissors – Useful for cutting through stubborn knots of hair wrapped around bristles. – Tweezers – Handy for picking out small bits of lint or debris stuck in tight spots. – A trash bag or small bowl – To collect all removed hair and debris during cleaning.
Having these tools ready will save time throughout the process.
Step 2: Loosen Embedded Hair
Start by loosening any embedded strands of hair: 1. Use a comb or the pointed end of a tail comb to lift sections of tangled-up hair away from the base. Work slowly so you don’t pull or damage any bristles. 2. For round brushes or heavily used brushes with stubborn knots of hair around their core, use scissors to carefully snip through the tangled areas before pulling out loose strands.
Step 3: Remove Small Debris
After removing larger clumps of trapped hair, there may still be smaller pieces of lint, product residue, or dust clinging to your brush. Follow these tips: – Use tweezers to carefully pluck out visible debris in hard-to-reach areas. – Tap the handle lightly against a countertop over a trash bin to dislodge loose particles.
Step 4: Inspect Closely
Once most visible dirt has been removed: – Look at hidden spots on your brush (e.g., between densely packed bristles) for any remaining residue. – Gently repeat steps above until no additional debris is noticeable.
Tips for Easier Hair Removal Next Time
To minimize buildup and simplify future cleaning tasks: 1. Regularly remove loose hairs after every few uses instead of letting them accumulate over weeks. 2. Avoid brushing wet or damp hair if possible—wet strands are more likely to clump together and bind tightly around bristles. 3. If using styling products like gels or sprays regularly, clean your brush more frequently as these can lead to faster residue accumulation.
By following this methodical process regularly, you’ll not only maintain cleaner brushes but also enjoy better styling results when using them!
The Best Way to Wash and Disinfect Your Hairbrush
Cleaning your hairbrush involves more than just removing tangled hair or visible debris—washing and disinfecting it regularly is crucial for maintaining hygiene and prolonging its lifespan. Follow these detailed steps to clean your hairbrush thoroughly while ensuring it is free from bacteria, oils, and product buildup.
Step 1: Gather Cleaning Supplies
- A bowl or sink filled with warm water
- Gentle shampoo, mild soap, or dishwashing liquid
- Baking soda (optional, for extra cleansing power)
- An old toothbrush or small cleaning brush
- White vinegar (for disinfection)
- A towel for drying
Step 2: Prepare the Cleaning Solution
| Cleaning Solution | Ingredients | Purpose |
| Gentle Shampoo Solution | 1 teaspoon of gentle shampoo + warm water | Removes oils and product residue without damaging delicate bristles. |
| Vinegar Solution | 1 part white vinegar + 4 parts warm water | Disinfects by killing bacteria and eliminating odors. |
| Baking Soda Mix (Optional) | 2 tablespoons baking soda dissolved in warm water | Excellent for stubborn buildup or heavy grime. |
Step 3: Soak the Brush (If Appropriate)
For hairbrushes made of plastic or metal, submerge only the bristle side into the cleaning solution. Avoid soaking brushes with wooden handles or cushioned bases as it may damage them over time. Let the brush soak for about 5–10 minutes to loosen dirt. During this time, you can gently agitate the water by swirling the brush around.
Note: If you use natural materials like boar bristle brushes or delicate handles, skip this soaking step and instead move directly to scrubbing with minimal moisture.
Step 4: Scrub With Precision
After soaking (or if skipping soaking), use an old toothbrush to scrub between the bristles carefully. Focus on areas where product residue tends to accumulate, such as near the base of the bristles. Use circular motions for stubborn spots but avoid excessive force that could damage soft bristles or cushion padding.
For cushioned brushes, tilt them downward while scrubbing to prevent water from seeping into non-waterproof components.
Step 5: Rinse Thoroughly
Rinse off all soap, vinegar, or baking soda residue under running lukewarm water. Make sure no cleaning agents remain on the brush because they could transfer onto your hair during future use.
If you’re using a wooden-handled brush where rinsing isn’t ideal, wipe down both bristles and handle using a damp cloth soaked in clean water instead.
Step 6: Disinfect Safely
To prevent bacterial growth after washing: – Dip plastic brushes briefly in diluted white vinegar. – Let wooden brushes dry completely after wiping them with an antibacterial spray applied sparingly to avoid excess moisture exposure.
Disinfection ensures that every part of your brush is hygienic without causing damage from prolonged wetness.
This process will help keep your hairbrush clean while extending its functionality—making it safer for daily use against dirt buildup over time.
How to Dry Your Hairbrush Properly
Once you’ve gone through the process of removing hair, debris, and cleaning your hairbrush thoroughly, drying it properly is a key step that should not be overlooked. Correct drying ensures the longevity of your brush and prevents unwanted issues like mold growth or warping. Below are clear, detailed steps to dry your hairbrush effectively based on its material.
Why Proper Drying Is Essential
- Prevents Damage: Excess water left in or on the brush can weaken adhesive bonds or warp materials like wood or plastic.
- Avoids Mold and Mildew: Leftover moisture can foster mold and mildew growth, especially in brushes with tightly packed bristles or cushion pads.
- Maintains Functionality: Wet bristles can lose shape over time, reducing their effectiveness in detangling or styling.
1. Plastic Brushes
Plastic brushes are typically easier to care for because they are not as vulnerable to water damage.
- After rinsing off any soapy residue during cleaning, shake the brush gently to remove excess water.
- Use a clean, dry towel and pat all sides of the brush thoroughly.
- Place the brush on a flat surface with the bristles facing down. This allows residual water to drip away without pooling at the base of the bristles.
2. Wooden Brushes
Wooden brushes require extra care since prolonged exposure to water can lead to cracking or warping.
- Immediately after rinsing, use a soft towel to dab away all visible moisture from both the wooden handle and bristle base.
- Avoid squeezing too hard—gentle pressure is sufficient.
- Never let wooden brushes air dry upside down (bristles down) as this may cause water to seep into crevices at the base of the handle. Instead, rest them horizontally on a towel in a well-ventilated area with indirect sunlight.
3. Cushioned Brushes
Brushes with cushioned bases (often used for added comfort) require careful attention during drying.
- Turn the brush upside down and tap it gently against your palm to shake out trapped water from under the cushion.
- Use a towel wrapped around your fingers to absorb moisture from both the cushion pad and surrounding areas under the bristles.
- Allow these brushes to air dry completely by laying them face-down on an absorbent surface such as a microfiber cloth.
Tips for Efficient Drying
- Avoid Hairdryers: Using heat directly on wet brushes can damage materials such as plastic tips, rubber cushions, or natural wood finishes.
- Use Absorbent Towels: Microfiber towels work exceptionally well for soaking up moisture quickly without leaving lint behind.
- Choose Ventilated Spaces: Place your brush somewhere airy but away from direct heat sources like radiators or heaters that could distort its shape.
Common Mistakes To Avoid
| Mistake | Why It’s Problematic | Alternative Approach |
| Leaving it soaking wet | Encourages mold/mildew growth | Gently shake off water before letting it air dry |
| Placing near direct heat | Warps plastic parts or dries out wooden handles | Air-dry in moderate temperatures |
| Not patting with towel first | Prolongs drying time unnecessarily | Towel-dry before laying out |
Taking just a few extra minutes after cleaning your hairbrush ensures it stays fresh, functional, and ready for use whenever you need it again.
How Often You Should Clean Your Hairbrush
Maintaining a clean hairbrush is essential for both the health of your hair and the longevity of the tool itself. But how frequently should you clean it? The answer depends on factors like how often you use your brush, your hair type, and the products you apply to your hair. Below, we’ll explore these considerations in detail and provide guidance to establish a routine that works for you.
General Guidelines for Cleaning Frequency
- Weekly Cleaning: For most people, thoroughly cleaning a hairbrush once a week is a good rule of thumb. This routine helps prevent buildup of oils, dirt, and product residue while minimizing bacteria.
- Every Two Weeks: If you rarely use styling products or live in an area with less pollution or dust, cleaning every two weeks may suffice. However, keep an eye on visible debris as it can accumulate faster than expected.
- Daily Maintenance: Removing loose hairs from your brush after every use is advised. This simple step can reduce how often deeper cleanings are necessary.
Factors That Affect How Often You Should Clean
- Oily Hair: If you have oily or greasy hair, it’s best to clean your brush more frequently (once a week or even every few days). Excess oils transfer to the bristles and can contribute to scalp irritation if not removed.
- Dry Hair: Those with dry or brittle hair may not need to clean their brushes as often since oil buildup is less of an issue.
- If you’re someone who uses styling products like hairspray, gels, mousses, or creams regularly, residue can build up quickly on your brush. Weekly cleaning is essential in this case.
- Minimal product users may find they can go longer between washes.
- Living in dusty or polluted environments can lead to faster accumulation of debris within the bristles.
- Seasonal shedding during fall or spring might also require more frequent cleaning.
- Natural bristle brushes (e.g., boar bristle) tend to attract oils and dirt more than synthetic brushes and therefore require more attention.
- Brushes with open-back designs are easier to clean but might need washing less often compared to densely packed models.
Maintaining a Routine
To make cleaning less tedious while staying consistent: – Set reminders on your phone or calendar for weekly deep cleans. – Incorporate quick maintenance habits like removing loose hairs daily—this takes just seconds but makes proper cleaning easier later on. – Keep necessary tools (like a comb and mild shampoo) accessible near where you store your brushes.
| Hairbrush Cleaning Frequency Recommendations |
| Oily/Greasy Hair: Weekly or Every Few Days |
| Dry/Brittle Hair: Every 1–2 Weeks |
| High Product Use: Weekly |
| Low Product Use/Minimal Styling: Biweekly |
By tailoring your schedule based on these guidelines, you’ll ensure that your hairbrush remains hygienic while supporting healthy scalp care.