Why Grease Builds Up on Kitchen Floors
Grease buildup on kitchen floors is a common challenge in households, especially in areas where cooking is frequent. Understanding the causes can help you tackle and prevent this issue effectively. Below, we break down why grease accumulates and how it spreads.
Causes of Grease Buildup
- Frying, sautéing, grilling, or any high-heat cooking often releases tiny grease particles into the air. These particles settle not only on countertops and stovetops but also on your floors over time.
- Spills from cooking oils or other fatty substances can seep into porous surfaces or dry into sticky residues.
- Walking through the kitchen with grease or oil on your shoes (from spills or nearby areas) spreads these substances across the floor. Over time, this creates a layer that’s increasingly difficult to remove.
- Using improper cleaning methods or skipping regular cleaning allows grease to build up in layers, making it progressively harder to eliminate.
- Using mops without changing the water frequently can redistribute grease instead of removing it entirely.
- Inadequate ventilation in kitchens prevents airborne grease from being filtered out effectively. This allows more particles to settle onto surfaces, including floors.
- Some flooring types, such as tile with textured grout lines or porous stone materials, tend to trap grease more easily than smooth surfaces like sealed hardwood or vinyl.
How Grease Spreads
Grease doesn’t just stay confined to one area; it has a sneaky ability to spread if untreated: – Liquid Spills: If not cleaned immediately, liquid spills can spread outward as they seep into cracks and crevices. – Dust and Dirt Combination: Grease attracts dirt particles from foot traffic and dust in the air, creating a sticky residue that hardens over time. – Cooking Steam: Steam carries grease vapors which eventually condense onto cooler surfaces like floors.
Common Misconceptions
- “It’s just stains”: Many believe greasy spots are mere surface stains when they’re actually layers of grime that require deeper cleaning techniques.
- “Hot water alone works”: While hot water can help loosen grease, it often fails to fully dissolve built-up layers without proper cleaning agents.
Understanding these underlying causes is essential for tackling grease accumulation at its source rather than repeatedly addressing surface-level symptoms. Identifying habits that contribute to buildup will make future maintenance far easier while ensuring a cleaner kitchen environment for everyone at home.
The Best Degreasing Solutions for Floors
When it comes to tackling grease buildup on floors, choosing the right cleaning solutions is critical. Not all degreasers are created equal, and using an inappropriate cleaner can lead to wasted effort or even damage your flooring. Here’s a guide to selecting the most effective degreasers for different floor types and levels of grime.
Understanding Degreasing Solutions
Degreasers are designed to break down oils and fats, making them easier to lift from surfaces. They work through a combination of surfactants (to loosen grease), emulsifiers (to disperse grease in water), and solvents (to dissolve oils). When choosing a solution, consider the following factors:
– Floor Type: Some products are harsh and may damage wood or laminate floors while being suitable for durable surfaces like tile or concrete.
– Grease Severity: For light daily maintenance, mild cleaners may suffice. Heavy grease buildup may require specialized industrial-strength degreasers.
– Eco-Friendliness: Look for biodegradable options if you prioritize sustainability.
Recommended Degreasing Solutions by Floor Type
| Floor Type | Degreaser Recommendation | Notes |
| Tile | pH-neutral cleaners with grease-fighting agents | Avoid acidic products that can erode grout over time. |
| Hardwood | Gentle solutions like castile soap diluted in water | Test in an inconspicuous area first; avoid water pooling that could warp wood planks. |
| Vinyl/Laminate | Commercial laminate-safe degreasers | Avoid overly abrasive cleaners that could strip protective coatings. |
| Concrete | Heavy-duty degreasers designed for porous surfaces | Ensure thorough rinsing to prevent residue buildup on unsealed concrete. |
DIY Degreasing Solutions
- Vinegar Solution: Mix equal parts white vinegar and warm water for a simple yet potent cleaning solution, ideal for tiles but not recommended for natural stone surfaces like marble or granite due to vinegar’s acidity.
- Baking Soda Paste: Combine baking soda with a little water into a paste; this method works well on sticky spots but may need extra rinsing.
- Dish Soap Mixture: A few drops of dish soap in warm water can lift surface-level greasy residue across most floor types.
Use caution when trying DIY methods—always spot-test these mixtures in hidden areas before applying them widely.
What to Avoid
While many products claim to tackle stubborn kitchen grease effectively, steer clear of these potentially problematic choices: – Abrasive powders or scouring pads that might scratch delicate flooring. – Ammonia-based cleaners on hardwood as they can strip finishes. – Overly soapy solutions that leave behind slippery residues requiring additional rinsing.
Final Thoughts
Taking the time to choose the appropriate degreaser ensures effective cleaning without compromising your floor’s longevity or appearance. Whether using commercial products or crafting your own DIY cleaner, tailor your choice based on your specific floors and needs to achieve professional-quality results every time you clean.
The Best Degreasing Solutions for Floors
When it comes to tackling greasy floors, using the right cleaning solutions is key to cutting through built-up grime effectively and safely. Not all degreasers are created equal, so understanding which options work best for your specific flooring type can save you time and prevent damage. Below, we’ll explore some of the top degreasing solutions recommended by cleaning professionals.
Commercial Degreasers
- Heavy-duty degreasers: These are specifically formulated to break down grease on hard surfaces like tile, laminate, or concrete. Look for products labeled non-corrosive and safe for your floor type.
- pH-neutral cleaners: For delicate flooring materials such as natural stone or sealed wood, opt for a pH-neutral degreaser. This ensures the floor’s finish remains intact while effectively removing grease.
DIY Degreasing Solutions
Homemade solutions can be just as effective as store-bought products and often use items found in your pantry. Here are some tried-and-true mixtures:
1. White vinegar and water: Mix 1 cup of white vinegar with 1 gallon of warm water to create a natural cleaner that dissolves grease without leaving residue.
2. Baking soda paste: For stubborn spots, combine baking soda with water to form a thick paste. Apply it directly to the greasy area and let it sit for 5–10 minutes before scrubbing gently with a soft brush.
3. Dish soap and warm water: Add a few drops of dish soap to warm water for an easy solution that cuts through grease while being gentle on most floor types.
| DIY Solution | Ingredients | Best For | Notes |
| White vinegar & water | Vinegar + Warm Water | Tiles, Linoleum | Avoid on unsealed wood |
| Baking soda paste | Baking Soda + Small Water Amount | Spot cleaning tough stains | Rinse thoroughly |
| Dish soap solution | Dish Soap + Warm Water | Multipurpose | Use sparingly on wood floors |
Natural Oils and Enzymatic Cleaners
For those seeking eco-friendly options: – Citrus-based degreasers: Derived from orange or lemon oils, these cleaners are biodegradable yet effective at breaking down tough grease layers. – Enzymatic cleaners: These use natural enzymes to digest grease molecules without harsh chemicals—a great choice if you want something gentle but powerful.
Important Tips When Choosing Degreasers
- Always test any cleaner (whether store-bought or homemade) in an inconspicuous area first to ensure compatibility with your flooring material.
- Avoid abrasive powders or scouring agents that could scratch sensitive surfaces like hardwood or vinyl.
- Be cautious with high-acidity solutions like pure vinegar when dealing with stone floors; over time, they can erode the finish.
Using the right degreasing solution not only makes the task easier but also protects your floors from unnecessary wear or damage during cleaning efforts. Make sure to pair these solutions with proper tools like microfiber mops or non-abrasive scrub brushes for optimal results!
How to Scrub Away Stubborn Grease Safely
When dealing with stubborn grease buildup on floors, scrubbing is an essential step to restore cleanliness and shine. However, it’s important to approach the task safely to prevent damage to your flooring or injury to yourself. Here’s a step-by-step guide on how to effectively and safely scrub away grease, along with tips for doing so efficiently.
Step 1: Choose the Right Scrubbing Tool
Before you start, ensure you’re using a tool that’s both effective and safe for your specific type of flooring.
- Soft-bristle brushes: Ideal for delicate surfaces like hardwood or tile.
- Non-scratch scrubbing pads: Great for tougher surfaces like ceramic tile or vinyl.
- Microfiber mop heads: Useful for light scrubbing on sealed floors.
- Avoid anything with hard metal bristles as it can leave permanent scratches or damage coatings.
Step 2: Use a Suitable Degreasing Product
| Type of Flooring | Recommended Degreasers | Notes |
| Tile | pH-neutral degreasers or vinegar-water mix | Protects grout and prevents etching |
| Hardwood | Wood-safe cleaners without harsh chemicals | Maintain finish without stripping layers |
| Vinyl/Laminate | Mild dish soap diluted in warm water | Avoid using ammonia-based solutions |
Always test any product in an inconspicuous area before full application.
Step 3: Prepare Your Workspace
To ensure safety during the scrubbing process: – Remove furniture or obstacles that might get in your way. – Wear rubber gloves to protect your skin from cleaning agents. – If using chemical-based degreasers, ventilate the area by opening windows or turning on fans.
Step 4: Apply Pressure Strategically
When scrubbing greasy areas: 1. Apply moderate pressure—too much force can damage the floor’s surface. 2. Work in small sections, focusing on visible grease spots first. 3. Use circular motions when tackling stubborn stains; this helps lift grease more effectively than back-and-forth movements.
Step 5: Be Gentle With Your Technique
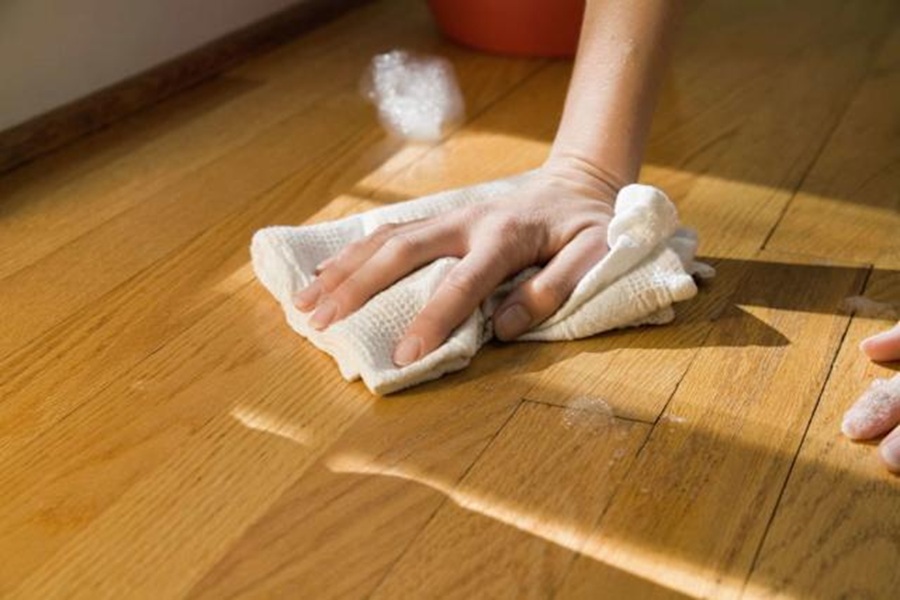
Over-scrubbing can lead to damaged finishes or worn areas over time. Stick to practical yet gentle approaches: – Start lightly and increase pressure only if needed. – For older, set-in stains, consider applying a damp microfiber cloth soaked in a degreaser over the stain for five minutes before scrubbing again.
Step 6: Rinse Frequently While Scrubbing
Dirt and grease tend to redeposit onto your cleaning tools as you scrub. Periodically rinse your scrubber (or mop head) in clean water while working through each section of the floor.
By following these steps carefully, you can remove even stubborn grease without compromising safety or causing unnecessary wear-and-tear on your floors. Remember that patience is key—working methodically will yield better results while maintaining the integrity of your flooring material.
Rinsing and Drying Your Floors Properly
When it comes to cleaning floors, rinsing and drying are often treated as afterthoughts. However, these steps are crucial for not only achieving a sparkling finish but also maintaining the longevity of your flooring. If grease residue or cleaning solution is left behind, it can create a sticky surface that attracts dirt or even becomes a slip hazard. Here’s how to rinse and dry your floors properly for the best results.
Why Proper Rinsing Matters
After scrubbing away grease, leftover cleaning agents can leave streaks or dull spots if not removed completely. Rinsing ensures that no soap film or degreaser remains on the surface, which is especially important for certain types of flooring like tile, laminate, or hardwood. Additionally: – It prevents stickiness caused by incomplete removal of cleaning products. – It helps maintain the natural shine of your floor material. – It eliminates traces of grease that may remain after scrubbing.
How to Rinse Effectively
Follow these steps to ensure all residues are removed: 1. Prepare Fresh Water: Use a clean bucket filled with warm water. Avoid reusing dirty water from the cleaning process; this can redeposit grease and dirt onto your floors. 2. Use a Mop or Microfiber Cloth: Choose a mop suited to your flooring type (e.g., sponge mop for tiles, flat microfiber mop for hardwood). 3. Work in Sections: Dip your mop into the clean water, wring it out lightly (to avoid excessive moisture), and wipe down small sections at a time. 4. Change Water Frequently: Replace the water as soon as it becomes cloudy to prevent spreading residue back onto the floor.
For particularly delicate surfaces like sealed wood flooring, consider using damp microfiber cloths instead of mops soaked in water. Too much moisture can damage certain types of floors over time.
The Importance of Drying Thoroughly
Drying isn’t just about avoiding wet footprints; it’s essential for preventing watermarks and ensuring safety in high-traffic areas where slips and falls could occur.
Effective Drying Tips: – Use Absorbent Materials: A dry microfiber mop or soft towel works well to absorb remaining moisture without scratching your floor. – Work Quickly Yet Gently: Move systematically across the floor to avoid missing spots while keeping pressure light. – For Hard-to-Reach Areas: Use handheld towels around corners, baseboards, or beneath furniture legs where mops may not reach effectively.
Additional Benefits of Proper Drying
Beyond aesthetics and safety, drying helps protect certain types of flooring from warping (common with wood) or grout decay (in tiled surfaces). This small step ensures that all your hard work in removing grease pays off with long-lasting results.
By dedicating time to both rinsing and drying properly after tackling greasy messes on your floors, you’ll prevent future buildup and restore their original luster—leaving them fresh, clean, and ready for daily use without any lingering residue.
Start With a Thorough Sweep or Vacuum
Before tackling the grease buildup on your floors, it’s crucial to prep the surface properly. Starting with a thorough sweep or vacuum ensures you’re not grinding dirt, dust, or crumbs further into the floor as you clean. This preliminary step not only makes degreasing more effective but also protects your flooring from unnecessary scratches and wear caused by abrasive particles.
Why Sweeping and Vacuuming Matter
Skipping this step can make your cleaning efforts less efficient and might even lead to damage over time. Grease often traps small particles like food crumbs and dirt, creating a mixture that’s harder to remove than grease alone. By removing debris first:
– You create a clean surface for degreasing agents to work effectively.
– You reduce the chances of spreading grime during scrubbing.
– You protect delicate floor finishes from scratches caused by trapped particles.
Deciding Between Sweeping and Vacuuming
The choice between sweeping and vacuuming depends on your flooring type:
| Floor Type | Recommended Method | Why |
|———————-|——————————-|————————————————————————————————–|
| Tile | Vacuum with hard-floor setting or sweep | Vacuums can pick up fine dust from grout lines that brooms may miss. |
| Hardwood or Laminate | Soft broom or dry microfiber vacuum attachment | Avoid harsh bristles or high suction that could damage or strip the finish. |
| Vinyl | Either sweeping or vacuuming works well | Both methods effectively remove debris without damaging the surface. |
Pro Tips for Effective Cleaning Prep
- Use a Dustpan With a Rubber Edge: This allows you to collect all debris without leaving behind traces of fine dirt that can adhere to greasy spots later on.
- Opt for Microfiber Brooms: These attract finer dust particles more efficiently than traditional brooms, reducing airborne contaminants.
- Vacuum Attachments Matter: Use soft-brush attachments if you’re working with sensitive surfaces like wood, laminate, or vinyl planks.
- Corners and Edges Count: Pay extra attention to baseboards, corners, and under appliances where grease tends to accumulate unnoticed.
What About Pre-Sweeping Products?
For households with pets or heavy traffic areas prone to stubborn hair and dust cling, consider pre-sweeping sprays designed for hardwood floors (avoid oil-based ones). These sprays help loosen stuck debris while reducing static electricity that attracts more dirt.
By starting with this foundational step, you’ll set yourself up for success in removing even the most stubborn grease stains while protecting your floors in the long term.
Tips to Prevent Grease Buildup in the Future
Preventing grease buildup on your floors doesn’t just keep them cleaner—it also extends their lifespan and reduces the time you’ll need to spend scrubbing them later. By implementing a few practical strategies, you can maintain a fresh, grease-free kitchen floor with minimal effort.
Adopt a “Clean-As-You-Cook” Routine
One of the easiest ways to prevent grease buildup is by cleaning regularly as you cook. Grease splatters from frying pans or spills from cooking oils can settle on your floor if not cleaned promptly. Here’s how to stay ahead:
– Wipe down surfaces: Use a damp microfiber cloth or a grease-cutting spray on counters and stovetops after each meal prep session. This prevents grease from dripping onto the floor when transferred by foot traffic.
– Place absorbent mats: Add washable, non-slip mats near your stove and sink to catch accidental spills before they hit the floor.
Use Proper Ventilation
Cooking without proper ventilation can lead to airborne grease particles settling not only on your floors but throughout the kitchen. To combat this:
– Always turn on your range hood or exhaust fan while using the stovetop or oven.
– Open nearby windows for better airflow if possible, especially when frying foods.
Establish a Weekly Deep Clean Schedule
Even with daily maintenance, some oil residue will inevitably reach your floors over time. A consistent cleaning schedule ensures it doesn’t have time to build up:
1. Sweep/vacuum first to remove loose dirt and debris. 2. Mop weekly using a mild degreasing solution specially designed for floors (avoid harsh chemicals that may damage finishes).
Proper Floor Mats in High-Traffic Areas
Strategically placing durable floor mats in areas where cooking regularly occurs can help minimize direct contact between oil spills and flooring. Opt for materials that are easy to clean and resistant to staining.
| Recommended Mats Feature | Why Are They Helpful? | Example Placement |
| Non-slip backing | Reduces accidents | Near stove/sink |
| Machine washable | Easy maintenance | Under prep counters |
| Oil-resistant surface |