Understanding the Source of Oil Stains on Walls
Oil stains on walls can originate from a variety of sources, and understanding these sources is crucial for effective removal and prevention. Walls are vulnerable to oil accumulation due to their exposure to daily activities, airborne particles, and environmental factors. By identifying the root cause of these stains, you’ll be better equipped to address them properly.
Common Causes of Oil Stains on Walls
- Cooking and Kitchen Grease: In kitchens, cooking oils and grease particles can escape into the air and settle onto nearby surfaces, including walls.
- Skin Contact: Frequent touching of walls—whether intentional or accidental—can transfer natural oils from our skin onto painted surfaces.
- Leaking Appliances or HVAC Systems: Malfunctioning kitchen appliances like stoves or ovens, as well as air conditioning units or vents, may emit small amounts of oil that get deposited on nearby walls.
- Candles and Indoor Pollutants: Burning candles, especially scented ones with added oils, can release residue that clings to surfaces over time.
- Residue from Cleaning Products: Some cleaning sprays designed for furniture may contain oil-based ingredients. If these products are used near walls, they can leave behind an oily sheen or streaks.
Factors Contributing to Stain Visibility
The visibility of oil stains can depend on several variables: – Wall Paint Type: Glossy or semi-gloss paints tend to repel stains more effectively compared to matte finishes, where oil particles can absorb more easily. – Wall Material: Drywall or plaster may absorb oil differently than tiled walls or metal paneling. – Lighting Conditions: Certain lighting setups (e.g., bright natural light) can emphasize discoloration caused by oil spots.
Why It’s Important to Determine the Source
Knowing the source of an oil stain isn’t just about cleaning—it helps you prevent recurrence in the future. For example: – If cooking grease is responsible for frequent stains in your kitchen area, installing a range hood may help reduce airborne grease buildup. – When skin contact is a factor (e.g., along stairway railings), consider placing protective covers or encouraging minimal wall contact.
By identifying what caused the stain in the first place, you’ll not only tackle the immediate issue but also save yourself additional work down the road.
How to Identify the Source of Oil Spots on Walls
Common Sources of Oil Spots
- Cooking Activities: If your kitchen walls are affected, it’s likely due to cooking oils or grease splatters. Frying foods like bacon or using oil sprays can generate airborne particles that cling to nearby walls.
- Handprints and Skin Oils: Areas near light switches, door frames, or frequently touched surfaces might have oil buildup from skin contact over time.
- Furniture Placement: Furniture that touches the wall may transfer oils from upholstery or wooden surfaces, especially if waxes or polishes have been applied.
- Nearby Machinery or Appliances: Equipment such as air fryers, toasters, or other small appliances located close to walls can cause grease buildup during use.
- Smoke Residue: If smoking occurs indoors, nicotine and smoke particles can settle on walls and leave behind a greasy film.
Steps for Identifying the Source
- Look around switches, handles, and areas where people tend to touch frequently.
- Note any discoloration patterns—handprints will often have visible outlines once they collect dirt over time.
- Check if your kitchen exhaust fan is fully functional. Poor ventilation can allow grease particles from cooking steam to settle on nearby surfaces.
- Inspect air conditioning vents for residue buildup that may accumulate on adjacent walls.
- Grease spots concentrated around stoves or ovens often indicate cooking as the culprit.
- Pay attention to the height of stains; splatters tend to concentrate at lower levels near countertops.
- Look behind sofas, chairs, or desks for any streaks caused by consistent contact with treated wood surfaces or polished furniture legs.
- Take note if there’s a history of cigarette smoking indoors that could contribute oily deposits over time.
- Humidity combined with oils from different sources (e.g., human skin) can create sticky grime layers on walls in poorly ventilated rooms.
When You Can’t Identify the Cause
If no clear source emerges after carefully assessing potential contributors, consider these possibilities: – Walls recently painted with low-quality paint can develop patchy stains when exposed to moisture mixed with airborne contaminants. – Persistent residue may indicate hidden leaks behind a wall surface (e.g., plumbing issues), which could mix with drywall materials and create oily-looking spots.
By accurately identifying where these stains are coming from, you’ll be better equipped to select an appropriate cleaning solution and prevent recurrence in the future.
How to Remove Oil Stains from Walls Without Removing Paint
When dealing with oil stains on walls, one of the primary concerns is removing the stain without damaging or stripping the paint. While oil spots can be stubborn, using the right techniques and materials will help you safely restore your walls without compromising their painted surface. Below is a guide to effectively address this issue.
Preparation Before Cleaning
- Mild dish soap
- Warm water
- White vinegar (optional for stubborn stains)
- Microfiber cloths or soft sponges
- Baking soda (optional for additional cleaning power)
- A dry towel for finishing
- Test any cleaning solution on a small, inconspicuous area of the wall first to check if it affects the paint’s color or texture.
- Avoid abrasive scrubbers such as steel wool or rough sponges, as these can damage the paint’s finish.
Step-by-Step Guide to Removing Oil Stains
- Prepare a Gentle Cleaning Solution
Mix a few drops of mild dish soap with warm water in a bucket. You want to create a soapy solution that’s effective but not too harsh. - Blot Instead of Rubbing
Use a clean microfiber cloth or soft sponge dipped in the soapy solution. Gently blot the stained area rather than rubbing it. Rubbing too hard risks spreading the oil or damaging the wall paint. - Use Baking Soda for Persistent Spots
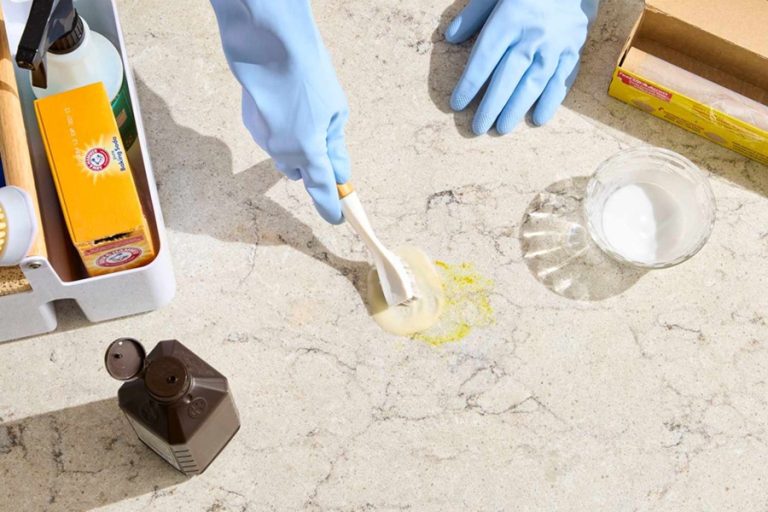
If blotting doesn’t fully remove the stain, sprinkle a small amount of baking soda over it while it’s still damp from the soapy solution. Baking soda acts as a mild abrasive and absorbs grease without harming most types of paint. - Rinse with Clean Water
Once you’ve treated the spot, use another clean cloth dampened in plain water to wipe away any residue from soap or baking soda. - Dry Thoroughly
Pat dry with a soft towel after cleaning to prevent moisture from seeping into painted surfaces, which could cause further issues like bubbling or discoloration.
Alternatives for Stubborn Stains
If soap and baking soda don’t work entirely: – Create a diluted vinegar solution (1 part white vinegar to 2 parts water) and lightly dab at the stain. – For non-glossy painted surfaces, consider using commercial degreasers specifically designed for interior walls—but ensure they’re safe for painted finishes by reading product instructions carefully.
| Cleaning Method | Recommended For | Caution Notes |
| Soapy Water & Microfiber Cloth | Light stains | Use gentle motions only |
| Baking Soda | Moderate grease buildup | Avoid scratching delicate finishes |
| Vinegar Solution | Tougher stains | Test on hidden areas before applying |
Tips for Minimizing Paint Damage
To further protect your walls during this process: – Keep scrubbing motions minimal and gentle. – Never use bleach-based cleaners unless you’re prepared to repaint since they can strip pigment. – Avoid soaking walls with excessive amounts of water as this can lead to warping or peeling paint over time.
By following these steps carefully and choosing appropriate tools, you’ll be able to eliminate oil stains effectively while preserving your wall’s appearance and finish.
Why Oil Stains Need Special Attention
Oil stains on walls are not just an aesthetic issue; they pose unique challenges that demand careful attention. Unlike water-based stains, oil stains penetrate surfaces differently and can cause long-term damage if left untreated. Understanding why these stains require special care is key to handling them effectively.
Characteristics of Oil Stains
- Sticky Residue: Oil-based substances leave behind a greasy or sticky film that is difficult to clean using standard cleaning solutions.
- Absorption into Porous Surfaces: If your wall has a matte finish or is unsealed, the oil can seep into it, making removal more complex.
- Staining Over Time: Over time, untreated oil spots can darken and harden, making them more visible and harder to remove.
- Prone to Spreading: When not handled carefully, cleaning attempts may smudge the stain further or spread it over a larger area.
Why General Cleaning Methods Don’t Work
- Removing surface coatings like paint or sealant.
- Leaving streaks that highlight the original stain even after cleaning.
This underlines the need for specialized cleaning products or techniques designed specifically for grease and oil removal.
Potential Long-Term Effects of Ignoring Oil Stains
| Problem | Impact |
| Discoloration | Oil spots may oxidize over time, creating permanent dark patches. |
| Structural Damage | In porous materials like drywall, absorbed oils can weaken integrity. |
| Odors | Persistent grease buildup may emit unpleasant smells over time. |
Addressing these stains promptly helps protect both your wall’s appearance and longevity.
Tackling Different Types of Oil-Based Substances
- Cooking Oils (e.g., olive oil, vegetable oil): Common in kitchens; these tend to be lighter but spread quickly.
- Use degreasing agents such as dish soap mixed with warm water for mild cases.
- Motor Oils or Industrial Grease: Typically found in garages; heavier oils require stronger solvents like rubbing alcohol or specialized degreasers.
- Cosmetic Oils (e.g., lotions, creams): Often leave stubborn residues on painted surfaces.
- Baking soda paste works well as an abrasive yet gentle option for removal.
By tailoring your approach based on the type of stain, you’re better equipped to achieve effective results without damaging your walls.
Understanding why oil stains need special attention ensures you’re prepared with appropriate tools and techniques for treating them safely while preserving your walls’ appearance and durability.
How to Prevent Oil Stains on Walls in the Future
Preventing oil stains on walls is often easier than removing them, and a proactive approach can save time, effort, and money. By implementing a few precautionary measures and maintaining good habits, you can keep your walls looking clean and free from unsightly marks. Below are practical steps to help reduce the likelihood of oil stains appearing on your walls.
1. Use Protective Wall Coverings
- Splash Guards: Install splash guards in areas prone to grease splatters, such as near stovetops or behind kitchen counters.
- Washable Wall Panels: Consider using washable wall panels or tiles in kitchens or garages where oil exposure is common.
- Protective Coatings: Apply a clear, washable protective coating over painted walls to create a barrier that repels grease and oil.
2. Improve Ventilation
Proper ventilation helps reduce airborne grease particles that can settle on walls. This is particularly important in areas like the kitchen.
- Install an Exhaust Fan: Ensure the kitchen has a functioning exhaust fan to capture cooking fumes containing oil particles.
- Use Range Hoods: Use range hoods with strong suction capacity and regularly clean their filters for optimal performance.
- Open Windows: When cooking or working with greasy substances, open windows to improve airflow and allow fumes to escape.
3. Establish Regular Cleaning Routines
Frequent cleaning prevents small amounts of oil residue from building up over time into noticeable stains.
- Wipe down high-use areas (like those near stoves) weekly with mild soapy water or a degreasing cleaner.
- Dust walls regularly since dust particles can bind with airborne oils, creating sticky residues.
| Recommended Cleaning Intervals |
| Weekly: High-use areas |
| Monthly: Kitchen walls |
| Biannually: Entire room review |
4. Be Mindful of Activities Near Walls
Some common daily activities can inadvertently lead to oil stains—awareness is key.
- Avoid leaning greasy hands against walls after cooking.
- Place furniture or appliances that use lubricants (e.g., bikes or tools) away from wall surfaces.
5. Use Appropriate Wall Paints
| Paint Finish | Oil Resistance | Ease of Cleaning |
| Matte/Flat | Low | Difficult |
| Eggshell/Satin | Moderate | Easy |
| Semi-gloss/Glossy | High | Very easy |
Opt for semi-gloss or glossy finishes in spaces likely to get exposed to oils, as these paints are easier to clean without damaging the surface.
6. Educate Household Members
- Encourage washing hands after handling oily foods or materials.
- Teach younger members not to touch surfaces with greasy fingers.
By adopting these preventative steps and being mindful of potential sources of oil exposure, you can significantly reduce the occurrence of stubborn stains on your walls while promoting long-term cleanliness within your home.
Professional vs. DIY Cleaning: What’s the Best Choice
When faced with stubborn oil stains on your walls, the decision between hiring a professional or tackling the task yourself can greatly depend on several factors, including the severity of the stains, your available resources, and your comfort level with cleaning methods. Each approach has its unique advantages and drawbacks that are worth considering before making a decision.
Professional Cleaning: Advantages and Considerations
- Expertise and Equipment: Professionals have the experience to assess wall materials, identify suitable cleaning agents, and use industry-grade tools to minimize damage.
- For example, certain walls like textured surfaces or porous finishes (e.g., unsealed brick) may require specialized treatments that go beyond basic DIY approaches.
- Time-Saving: If you’re short on time or dealing with multiple affected walls, professionals can efficiently handle large-scale cleanups.
- Damage Prevention: Professionals understand how to balance stain removal with paint preservation, reducing the risk of discoloration or peeling paint during treatment.
However, professional services may not always be necessary for minor stains or easily accessible areas. Additionally: – Cost: Hiring experts can be expensive depending on the size of the job and local rates. – Availability: Scheduling professionals might delay immediate action against oil stains.
DIY Cleaning: When It’s a Practical Choice
- Cost-Effective: The expense is usually limited to basic household items like dish soap, baking soda, white vinegar, or store-bought degreasers.
- Convenience: You have control over when and how you address the stain without having to rely on external schedules.
- Custom Solutions: For eco-conscious individuals, DIY methods allow you to select environmentally friendly products tailored to your preferences.
To get started with DIY cleaning: 1. Use mild detergents mixed with warm water for light grease spots. 2. Test any cleaner on a small patch first to check compatibility with your paint type. 3. Apply using non-abrasive tools like soft sponges or microfiber cloths to prevent scratching wall surfaces.
Keep in mind that some situations might exceed common DIY methods: – Persistent grease marks that seep through multiple layers of paint. – Oil residue resulting from structural issues such as leaking pipes behind walls.
Comparing Professional vs. DIY Options
| Feature | Professional Cleaning | DIY Cleaning |
| Cost | Higher | Lower |
| Time Required | Minimal (outsourced) | Variable (self-managed) |
| Expertise/Equipment | Advanced | Basic household tools |
| Risk of Wall Damage | Low | Varies based on knowledge |
| Flexibility | Limited by provider availability | High |
When To Choose Which Option
Ultimately, choose professional help if: – You’re dealing with extensive damage across multiple rooms. – The wall material is delicate or valuable (e.g., wallpapered surfaces).
Opt for DIY if: – The stain is minor and isolated. – You’re confident about handling basic tasks without risking further wall damage.
Balancing these factors will guide you toward making an informed choice tailored specifically to your needs while managing both cost efficiency and effectiveness effectively within your situation’s context without unnecessary duplication/overlap
Professional vs. DIY Cleaning: What’s the Best Choice
When it comes to dealing with oil stains on walls, deciding between professional cleaning services and a do-it-yourself (DIY) approach can significantly impact your time, budget, and the final result. Here’s an exploration of both options to help you make an informed choice.
Evaluating Professional Cleaning Services
- Expertise: Trained cleaners understand various wall finishes (e.g., painted drywall, textured surfaces, brick) and use appropriate methods for each.
- Time-Saving: If the stain requires extensive treatment or your home has multiple affected areas, professionals can save you significant time.
- Guaranteed Results: Many cleaning companies offer guarantees for their work, ensuring customer satisfaction.
- Specialized Equipment: Professionals may use advanced tools like steam cleaners or industrial-grade degreasers that are inaccessible to most homeowners.
| Pros of Professional Cleaning | Cons of Professional Cleaning |
| Expertise ensures proper care | May be costly depending on stain severity |
| Saves personal effort & time | Scheduling might cause delays |
| Can handle large-scale issues | Some companies lack eco-friendly practices |
The DIY Approach: Affordable and Hands-On
- Cost-Effective: You save money by avoiding labor fees associated with professional services.
- Convenient Timing: You can address the issue immediately without waiting for an appointment.
- Satisfaction of Completion: Solving the problem yourself often provides a sense of accomplishment.
Common Supplies for DIY Oil Spot Removal:
- Mild dish soap (e.g., Dawn) mixed with water
- Baking soda paste
- White vinegar diluted with water
- Microfiber cloths or soft sponges
- Commercial degreasers specifically designed for walls
Steps for DIY Cleaning:
- Identify the type of wall surface you’re working with (painted drywall, wallpapered walls, etc.) to select appropriate cleaning materials.
- Test any cleaner on a hidden area to ensure it doesn’t damage the paint or surface texture.
- Apply cleaning agents gently in circular motions using soft sponges or cloths.
- Rinse residue thoroughly and allow the area to dry completely.
| Pros of DIY Cleaning | Cons of DIY Cleaning |
| Low-cost solution | Risk of damaging paint if uncareful |
| Immediate action possible | May not fully remove tough stains |
| Hands-on learning experience | Time-consuming for larger areas |
Factors to Consider When Choosing Between Professional vs. DIY
- Light stains may be manageable at home, while larger blemishes could require expert care.
- Keep in mind both upfront costs (professional fees vs supplies) as well as potential future costs if improper cleaning damages surfaces.
- Evaluate whether you can commit sufficient time to thorough DIY cleaning or if outsourcing would relieve stress.
- If oil spots are frequent due to factors like cooking habits or environmental conditions, consider whether recurring professional services might make sense over time.
By weighing these considerations carefully against your circumstances, you’ll be better equipped to determine which approach—professional cleaning or DIY—best fits your needs while maintaining a clean and polished appearance for your walls.