Why Candle Wax Sticks to Different Surfaces
Composition of Candle Wax
Candle wax is typically made from paraffin, soy, beeswax, or a blend of these materials. All types of wax consist of hydrocarbons that are solid at room temperature but melt into a liquid when heated. Their sticky nature stems from their semi-solid state between melting and hardening.
Factors That Contribute to Wax Adhesion
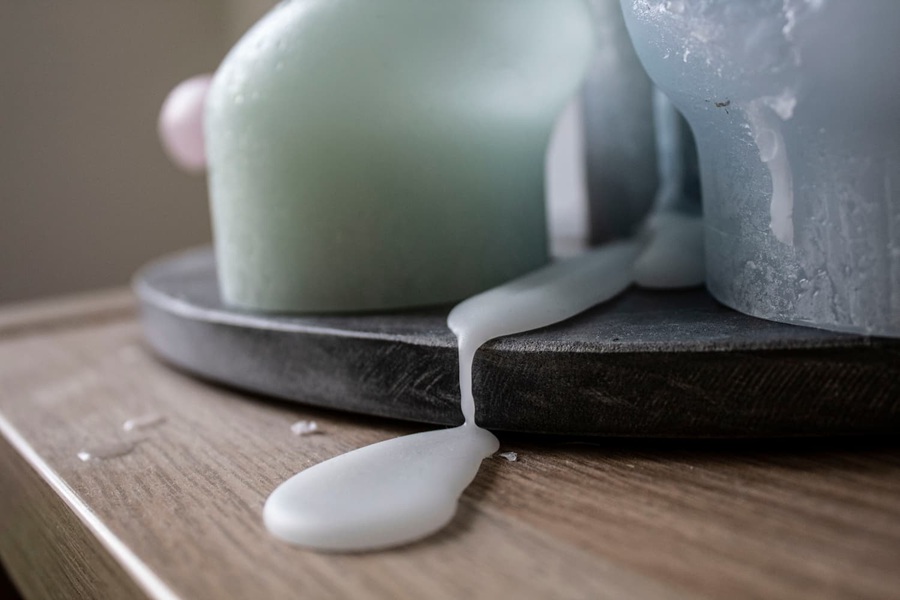
- When melted wax comes into contact with a surface, it cools rapidly and solidifies. This creates a bond with the surface by filling microscopic pores or imperfections.
- On porous materials like wood or fabric, melted wax seeps into tiny crevices, making removal more difficult.
- Smooth surfaces such as glass or metal allow wax to form a thin layer that’s easier to scrape off once hardened.
- Rough or textured surfaces, like stone or fabric, hold onto wax more tenaciously due to increased surface area for adhesion.
- Soy or beeswax candles often leave oil-based residues behind due to their natural composition.
- Paraffin-based candles tend to harden more completely but may incorporate dyes and additives that stain certain surfaces.
- Higher humidity can cause candle wax to spread unevenly on certain materials.
- Sudden cooling, such as when hot wax drips onto cold surfaces, increases its ability to stick firmly.
Why Some Surfaces Are More Challenging
- Fabric and Carpets: These are particularly challenging because fibers trap both the solidified wax and any remaining oils or dyes.
- Wood: The porous nature of wood absorbs wax easily but may also be stained by colored candles.
- Glass: While smooth glass allows for easier scraping, remnants can still leave behind an oily sheen if not cleaned properly.
| Surface Type | Ease of Removal | Common Challenges |
| Glass/Metal | Easy | Oily residues |
| Fabric/Carpet | Difficult | Fibers trap both wax and stains |
| Wood | Moderate | Absorption and potential stains |
| Stone | Moderate | Clogged pores in textured areas |
Summary Tips for Dealing With Sticky Wax Issues
- Always let melted candle wax harden before attempting removal (more on this later).
- Consider the material’s texture before choosing your cleaning method—this will save time and prevent damage.
- Opt for non-abrasive tools like plastic scrapers for delicate surfaces such as glass or polished wood.
Understanding why candle wax behaves differently on various surfaces empowers you with knowledge when tackling cleanup tasks effectively.
Letting Wax Harden Before Removal
When faced with a wax spill, your first instinct may be to start cleaning it immediately. However, allowing the wax to harden before attempting removal often simplifies the process and reduces the risk of spreading it further. Here’s why letting wax solidify is one of the most effective approaches and how to handle it.
Why Hardened Wax is Easier to Remove
- Less Messy: Soft or liquid wax tends to smear when you try to clean it. Once hardened, it becomes a solid layer that can often be lifted off in chunks.
- Minimizes Damage: Scraping or cleaning warm wax may damage delicate surfaces like wood finishes, painted surfaces, or fabrics by embedding the material further into them.
- Easier Handling: Liquid or soft wax tends to drip and spread, while hardened wax stays contained in one area.
Steps for Letting Wax Harden
- Leave It Alone: Avoid touching or attempting to remove the wax while it’s still warm or soft. This prevents unnecessary messes.
- Cool It Down Quickly (Optional): If you’re in a hurry, use ice cubes or an ice pack wrapped in a cloth. Gently place it over the waxed area for several minutes. Cooling rapidly will solidify the wax faster.
- Protect Surrounding Surfaces: If you’re dealing with a surface prone to staining (like fabric), place paper towels or plastic sheets around the edges of the stain while waiting for the wax to cool.
Tools and Products You May Need
| Tool/Product | Use Case |
| Ice cubes/ice pack | To speed up hardening |
| Plastic scraper | For lifting hardened wax from surfaces |
| Paper towels | To protect surrounding areas |
Surface-Specific Tips
- Hard Surfaces (e.g., wood, tile): Hardened candle wax on these can typically be lifted off with minimal effort using a plastic scraper or edge of a credit card.
- Fabric: Allowing fabric stains caused by melted candle wax to harden prevents smearing into surrounding fibers, making later removal simpler.
Things to Avoid While Letting Wax Harden
- Do not apply direct heat (such as from a hairdryer) before removing visible hardened chunks—this melts the mess again and complicates cleanup.
- Don’t attempt scraping soft wax from delicate materials; this could scratch surfaces or grind melted particles deeper into porous areas like carpets and upholstery.
Allowing candle wax time to solidify is often an overlooked but critical first step in proper removal techniques across multiple surfaces. By taking advantage of its physical state change from liquid to solid, you can prevent spreading stains unnecessarily while keeping cleanup manageable and surface-safe.
How to Remove Wax From Hard Surfaces
Removing candle wax from hard surfaces like wood, glass, metal, or stone can seem challenging, but with the right approach, it’s a manageable task. The type of surface you’re dealing with will dictate the tools and techniques you should use to avoid damage while ensuring the wax is fully removed. Below are step-by-step instructions to tackle wax removal effectively.
Tools and Materials Needed
Before starting, gather the following items to simplify the process: – A plastic scraper or old credit card – A hairdryer or heat gun on a low setting – Paper towels or a soft microfiber cloth – Dish soap or mild detergent – Rubbing alcohol (optional for stubborn residue) – Soft sponge or non-abrasive scrubber
Step-by-Step Wax Removal Process
- If you’re working with fresh wax that’s still soft and warm, allow it to cool completely. Trying to remove warm wax could spread it further or push it into crevices of textured surfaces.
- To speed up hardening, place an ice pack or a bag filled with ice cubes over the wax for 5–10 minutes.
- Use a plastic scraper or an old credit card to gently lift as much hardened wax as possible. Be careful not to use metal tools that could scratch delicate surfaces like wood or glass.
- For textured surfaces such as tiles with grout lines, a toothbrush can help dislodge hardened pieces of wax.
- Use a hairdryer on its lowest heat setting and hold it about 6–8 inches away from the surface.
- Move the hairdryer in circular motions across any remaining residue until softened.
- Once softened, wipe away the melted wax using paper towels or a clean microfiber cloth.
- Mix a solution of warm water and mild dish soap.
- Dampen a soft sponge in this soapy water and gently wipe down the surface where the wax was removed.
- For stubborn oily residue left by scented candles, dab rubbing alcohol onto a cloth and rub over affected areas sparingly.
- After cleaning off all traces of wax, polish wooden surfaces using furniture polish for restoration.
- For glass and metal surfaces, finish with glass cleaner for added shine.
Surface-Specific Tips
| Surface Type | Additional Notes |
| Wood | Avoid excess water; ensure all moisture is wiped dry immediately after cleaning. |
| Glass | Use care when heating; too much direct heat can cause glass to crack. |
| Stone (e.g., granite) | Test rubbing alcohol on an inconspicuous area first to avoid discoloration. |
| Metal | Avoid abrasive scrubbers which may scratch finishes; stick with microfiber cloths. |
Mistakes to Avoid
- Using harsh chemicals: These can damage finishes on delicate surfaces like polished wood.
- Scraping aggressively: This risks scratching materials such as glass or lacquered wood.
- Overheating: Applying excessive heat may warp some plastics or crack certain types of glass.
By carefully following these steps tailored for hard surfaces, you can ensure effective removal without causing lasting damage.
Using Heat Safely to Lift Wax Residue
Using heat to lift wax residue can be an effective and efficient method, but it must be done with caution to avoid damaging the underlying surface. This approach works well on various materials, such as wood, glass, metal, and fabrics. Below is a detailed guide for safely applying heat to remove wax without causing harm.
Materials You Will Need:
- A hairdryer or an iron with adjustable heat settings
- Clean paper towels or soft cotton cloths
- A plastic scraper or credit card (optional)
- Parchment paper or a thin towel (for protection)
- Heat-resistant gloves (if necessary)
Steps for Using Heat on Different Surfaces
1. Hard Surfaces (e.g., wood, metal, and glass): – Preparation: Begin by removing as much hardened wax as possible using a plastic scraper or your fingers. Avoid using sharp tools that may scratch the surface. – Apply Heat: Set your hairdryer to a low-to-medium setting and aim it directly at the wax residue. Hold the dryer a few inches away from the surface to prevent overheating. – Absorb the Wax: As the wax begins to soften and melt, place a clean paper towel over it to absorb the liquefied wax. – Repeat if necessary: Continue applying gentle heat and blotting until all visible wax is gone.
2. Fabrics (e.g., tablecloths or clothing): – Protect the Fabric: Lay parchment paper or a thin cotton towel over the stained area before applying heat. – Ironing Technique: Set your iron to a low heat setting suitable for the fabric type. Gently press it over the parchment/towel-covered area. The heat will melt the wax and transfer it onto the protective layer. – Replace Protective Layer: Rotate or replace the parchment/towel as needed until no more wax transfers.
3. Carpets: – Place a towel or paper bag over the affected area. – Use an iron on low heat to gently warm up the wax through the barrier material. Avoid pressing too hard so you don’t embed any residue further into carpet fibers. – As soon as you see melted wax transferring, replace your barrier material with fresh pieces.
Important Safety Tips
- Always test your heating method on an inconspicuous area first if you’re unsure how it will interact with sensitive materials like wood finishes or delicate fabrics.
- Never use high heat settings directly on surfaces; excessive temperature can scorch fabrics, warp wood, or crack glass.
- Keep flammable materials away from your work area—especially while using devices like irons or hairdryers.
Common Mistakes to Avoid:
| Mistake | Why It’s Risky |
| Using direct high heat | May cause discoloration, burns, or damage |
| Skipping protective barriers | Increases risk of melting into fibers |
| Failing to test surfaces beforehand | Potential for irreversible damage |
By following these guidelines carefully, you can safely use heat as part of your strategy for lifting stubborn candle wax while protecting your surfaces from further harm.
Using Heat Safely to Lift Wax Residue
When it comes to removing candle wax from various surfaces, heat can be an effective and safe method if used carefully. The use of heat helps soften or melt the wax, making it easier to lift without scratching or damaging the surface beneath. However, precautions must be taken to ensure safety and avoid unintentional harm to the material being treated.
Methods for Using Heat Safely
- Place a clean piece of absorbent paper, such as a brown paper bag or parchment paper, over the wax stain.
- Set your iron to a low or medium setting with no steam.
- Gently press the iron over the paper for a few seconds at a time. The heat will transfer the melted wax onto the paper.
- Repeat with fresh paper until all visible wax is removed.
- Use a hair dryer on its lowest heat setting to gently warm the hardened wax.
- As it softens, use a plastic scraper or an old credit card to lift off the wax carefully.
- Wipe away any residue with a soft cloth.
- Rinse or soak smaller items under hot water to loosen and dissolve wax buildup.
- For larger objects, dip a cloth in hot water and apply it directly over the affected area for several seconds before wiping off softened wax.
Safety Tips When Using Heat
- Always start with low heat settings—it’s better to increase heat gradually than risk overheating and damaging your item.
- Never use direct flame (e.g., blowtorches) as this can scorch surfaces or ignite residual wax.
- Test all methods on an inconspicuous area first to ensure compatibility with delicate materials like textiles, wood finishes, or painted surfaces.
Common Mistakes to Avoid
| Mistake | Why It’s Problematic | Alternative Solution |
| Using too much pressure | Can damage fabric fibers or scratch hard surfaces | Let heat do most of the work before scraping |
| Overheating sensitive areas | May discolor fabrics, warp plastic, or crack glass | Use lower temperatures; proceed gradually |
| Ignoring safety guidelines | Could result in burns or accidental surface damage | Wear gloves if needed; work in well-lit areas |
Post-Treatment Care
Once all visible wax has been removed using heat: – Clean any lingering oily residue by wiping with mild soap and warm water. – Inspect for dye stains left behind by colored candles (these might require specialized cleaning products). – Ensure that delicate materials are completely dry after treatment to prevent unwanted moisture-related issues.
By approaching heated methods systematically and cautiously, you can effectively lift candle wax from most surfaces without causing damage. Combining proper tools with patience ensures successful removal every time while maintaining safety as a priority during cleanup efforts.
Using Heat Safely to Lift Wax Residue
When it comes to removing leftover wax residue from various surfaces, heat can be a highly effective tool. However, it’s essential to approach this method with care, as inappropriate use of heat can damage delicate surfaces or even create a safety hazard. Below, we’ll discuss how you can safely use heat to lift wax residue while minimizing risks.
Tools You’ll Need
- Iron or Hair Dryer: For controlled and direct application of heat.
- Clean Cloth or Paper Towel: To absorb melted wax.
- Parchment Paper or Brown Paper Bag: Acts as an intermediary layer between the surface and your heated tool.
- Plastic Scraper or Credit Card: To gently scrape off any softened wax after heating.
- Soft Sponge and Mild Soap: To clean up any lingering residue once the wax is removed.
Step-by-Step Process
- Test for Heat Sensitivity
Before applying any form of heat, check if the surface is sensitive to high temperatures: - For wooden surfaces, ensure there’s no varnish that might bubble under heat.
- For fabrics, consult care labels and avoid ironing materials prone to melting (like polyester).
- Place parchment paper or a brown paper bag over the wax stain if you’re dealing with hard surfaces like wood or glass.
- For carpets or fabrics, lay a clean cloth over the affected area instead. This prevents direct contact between the heating tool and the surface.
- If using an iron:
- Set it to a low or medium setting with no steam.
- Lightly press it over the prepared protective layer for 10-15 seconds at a time.
- Hold it about 6 inches away from the surface and move it in circular motions over the spot until you notice softening.
- Absorb Melted Wax
Once the wax begins to soften, press gently on top of your protective layer (paper towel/cloth) so it absorbs as much melted wax as possible. - Repeat if Necessary
Continue reheating and blotting until most of the wax has been lifted.
Common Mistakes to Avoid
- Applying excessive heat directly onto painted or varnished surfaces—this can cause discoloration or blistering.
- Skipping testing on delicate fabrics such as silk before using any heating method.
- Leaving heating tools unattended during use as this increases safety risks.
Cleaning After Heating
After removing most of the visible wax with heat: – Use mild soap and warm water for hard surfaces like metal, glass, or wood to clean off any greasy residue left by melted wax. – On carpets and fabrics, follow up with stain removers designed specifically for oils or dyes if discoloration remains.
| Surface Type | Recommended Heating Tool | Protective Layer |
| Wood | Iron (low setting) | Parchment paper |
| Glass | Hair dryer | None needed unless delicate |
| Carpet/Fabric | Iron (medium setting) | Clean cloth |
By carefully applying these methods while prioritizing safety precautions specific to each surface type, you can effectively remove stubborn wax residues without causing additional damage.
Tips to Prevent Wax Spills and Damage
Preventing candle wax spills and minimizing potential damage to surfaces can save both time and effort in clean-up. With a few proactive strategies, you can enjoy candles while keeping your surroundings protected. Below are some practical tips to help prevent wax spills and associated issues.
Use Candle Holders and Trays
- Invest in quality candle holders: Always place candles in stable, heat-resistant holders that catch any dripping wax.
- Use trays or plates: Place candles on decorative trays or plates with raised edges to contain accidental drips.
- Avoid unstable surfaces: Ensure the surface where the candle is placed is level and secure to prevent tipping or sliding.
Choose the Right Candle Placement
- Keep candles away from drafts: Air movement from fans, open windows, or air conditioning can cause uneven melting of the wax, leading to spills.
- Avoid high-traffic areas: Placing candles where they may be accidentally bumped increases the risk of wax splattering onto furniture or floors.
- Protect delicate surfaces: Use protective coverings like cloth, heat-proof mats, or coasters under candles if they are on fragile materials such as wood or glass.
Burn Candles Responsibly
- Don’t overfill containers: For jarred candles, avoid burning them for extended periods as this may cause them to overheat and spill melted wax over the edges.
- Trim wicks regularly: A wick that is too long causes the flame to burn higher than necessary, increasing the chance of splattering melted wax. Aim for a wick length of about ¼ inch (6 mm).
- Extinguish carefully: Instead of blowing on a flame—risking molten wax splatter—use a snuffer for controlled extinguishing.
Use Protective Layers on Surfaces
| Surface Type | Recommended Protection |
| Wood & Furniture | Heat-resistant placemats or silicone pads |
| Glass & Marble | Non-slip coasters with raised edges |
| Fabrics | Washable tablecloths treated with water-repellent spray |
Opt for Alternative Candle Types
Certain types of candles are designed to reduce mess:
– Dripless candles: These are formulated to minimize dripping by solidifying quickly after melting. They work well for dinner tables or other exposed settings. – Soy-based options: Soy wax tends to burn evenly compared to paraffin, reducing pooling that leads to spills.
By taking these preventative measures into account before lighting any candle, you can focus more on creating an enjoyable ambiance while avoiding unnecessary damage caused by spilled wax.