Clean the Shower Doors
Proper cleaning and maintenance can help keep your shower doors spotless and extend their lifespan.
Materials You’ll Need
Before you get started, gather the following items:
– White vinegar or a commercial glass cleaner
– Baking soda (optional, for tougher stains)
– A spray bottle
– A squeegee
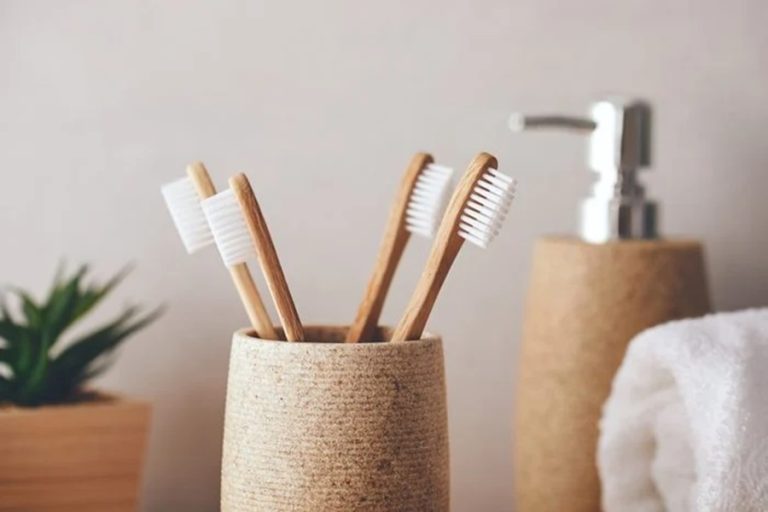
– Old toothbrush (for corners and edges)
Step-by-Step Cleaning Process
- Fill a spray bottle with equal parts white vinegar and warm water.
- Spray this mixture generously over the shower doors, focusing on areas with visible spots or buildup.
- Let it sit for about 10–15 minutes to break down soap scum and hard water deposits.
- Start from the top and work your way down to prevent cleaned areas from becoming dirty again.
- For stubborn spots, sprinkle some baking soda on a damp sponge and scrub gently in circular motions.
- Dip an old toothbrush in warm soapy water and use it to scrub along door tracks, edges, and hinges. These areas often collect dirt that’s difficult to remove with just a cloth or sponge.
- Rinse off all cleaning solutions with clean water to avoid streaks or residues being left behind on the glass.
- Use a squeegee immediately after rinsing to remove excess water.
- Finally, dry using a clean microfiber cloth for a streak-free finish.
Preventive Maintenance Tips
- Keep your bathroom well-ventilated by turning on an exhaust fan or opening windows after each use to minimize moisture levels.
Table: Quick Reference Guide for Shower Door Cleaning
| Problem | Solution | Tools Needed |
| Soap Scum | Vinegar + Baking Soda Scrub | Sponge/Cloth + Vinegar |
| Hard Water Stains | Vinegar soak + Squeegee | Spray Bottle + Squeegee |
| Mold/Mildew in Tracks | Soapy Water + Toothbrush | Toothbrush |
By following these steps routinely—whether weekly as part of your regular cleaning schedule or tackling deeper cleans monthly—you’ll enjoy clear, sparkling shower doors without putting in too much effort over time.
Clean the Showerhead
A clean showerhead ensures a steady and efficient water flow, promotes better hygiene, and extends its lifespan. Over time, mineral deposits such as calcium and lime can build up, affecting the performance of your shower. Regular cleaning keeps your shower functioning optimally and prevents potential problems. Below is a step-by-step guide to clean your showerhead effectively.
Why Cleaning the Showerhead Is Important
- Enhanced Water Pressure: Mineral buildup can block water flow, reducing pressure.
- Improved Hygiene: A neglected showerhead may harbor bacteria or mold.
- Extended Lifespan: Routine maintenance prevents wear and tear due to clogs.
Tools and Materials Needed
Gather these items before starting: – White vinegar
– Baking soda (optional for tougher stains)
– Plastic bag or zip-top bag
– Rubber bands or twist ties
– Soft-bristled brush (e. g.
– A dry microfiber cloth
Step-by-Step Cleaning Process
1. Detach or Secure the Showerhead:
If your showerhead is removable, detach it for easier access. If it’s fixed, you can still clean it in place using a plastic bag filled with solution.
2. Prepare a Vinegar Solution:
White vinegar is an excellent natural cleaner that dissolves mineral deposits: – Mix equal parts white vinegar and water in a bowl. – For stubborn buildup, add 1 teaspoon of baking soda to the mixture.
3. Soak the Showerhead:
– If removable: Submerge the showerhead in the bowl of vinegar solution for 30–60 minutes. – If fixed: Fill a plastic bag with the solution, secure it around the showerhead using a rubber band or twist tie, ensuring all nozzles are submerged.
4. Brush Away Residue:
After soaking: – Use a soft-bristled brush to scrub away loosened debris—focus on nozzles where buildup tends to concentrate. – For small nozzles that are clogged, gently poke them with a toothpick or needle.
5. Rinse Thoroughly:
Rinse the showerhead under warm running water until all residues are removed.
6. Dry and Reinstall:
– Wipe down the exterior using a dry microfiber cloth to remove streaks. – Reinstall if you removed it earlier.
Preventing Future Build-Up
To keep your showerhead cleaner for longer: – Use Water Softeners:These reduce mineral content in hard water areas.Dry After Use:Wipe down your showerhead periodically with a towel post-shower to limit residue accumulation.Monthly Maintenance Plan:Dedicate time each month for preventive cleaning using steps above.
Troubleshooting Common Issues
Here’s how to address common problems: | Problem | Solution | |————————|————————————————————————–| | Weak Water Flow | Check nozzles for clogs; use vinegar soak followed by brushing. | | Persistent Stains | Scrub with baking soda paste (baking soda + small water amount). | | Unusual Odors | Deep-clean with vinegar and rinse thoroughly to eliminate trapped debris.
A clean showerhead paves the way for enjoyable showers while promoting better hygiene at home. Set reminders to conduct regular maintenance so you’ll never face unexpected inconveniences related to buildup again!
Clean the Showerhead
Cleaning the showerhead is an essential part of maintaining a hygienic and efficient shower. Over time, mineral deposits, soap scum, and bacteria can accumulate, affecting both water flow and quality. Proper maintenance not only restores functionality but also minimizes the risk of harmful buildup.
Why Cleaning the Showerhead Is Important
- Improved Water Pressure:Mineral buildup can block water flow. Cleaning helps restore proper pressure.
- Better Hygiene:A dirty showerhead can harbor bacteria like Legionella, which may be released into your water.
- Prolonged Lifespan:Regular maintenance prevents corrosion and wear caused by calcium deposits.
- Aesthetic Appeal:A sparkling clean showerhead enhances the overall appearance of your bathroom.
Tools and Materials You’ll Need
To clean your showerhead effectively, gather the following supplies: – White vinegar – Baking soda (optional) – A large plastic bag or zip-top bag – Rubber bands or twist ties – An old toothbrush or small cleaning brush – Soft cloth for polishing
Step-by-Step Guide to Cleaning Your Showerhead
- Check for visible clogs in the spray holes.
- Identify mineral deposits or discolorations that need attention.
- Fill a plastic bag with enough white vinegar to submerge the nozzle area of your showerhead.
- For heavy buildup, mix 1 tablespoon of baking soda with vinegar for an extra cleaning boost.
- Securely fasten the vinegar-filled bag around your showerhead using rubber bands or twist ties.
- Allow it to soak for at least 30 minutes; heavily clogged heads may require soaking overnight.
- Remove the bag and discard its contents.
- Use an old toothbrush to scrub away loosened debris from hard-to-reach areas like spray holes and seams.
- Turn on hot water to flush out any remaining residue from inside the head.
- Wipe down external surfaces with a damp cloth.
- Dry with a soft microfiber cloth to prevent water spots and restore shine.
Alternative Methods for Stubborn Build-Up
For detachable showerheads: 1. Detach it from its base (consult manufacturer instructions). 2. Immerse it fully in a bowl of warm vinegar solution for deeper cleaning. 3. Reassemble after rinsing thoroughly.
For non-removable heads with tough lime scale: – Use commercial descaling products designed specifically for bathroom fixtures, ensuring they are safe for your specific material (e. g. , chrome or brushed nickel).
Regular Maintenance Tips
To reduce future buildup: – Wipe down your showerhead weekly with a damp cloth post-shower. – Install a water softener if you live in an area with hard water to minimize mineral accumulation.
| Problem | Common Causes | Solution |
| Weak Water Flow | Mineral Deposits | Vinegar Soak + Scrubbing |
| Discolored Spray Openings | Bacterial Growth | Deep Cleaning Monthly |
| Dripping Nozzle | Internal Blockages | Rinsing + Regular Upkeep |
Maintaining a clean showerhead doesn’t just improve its performance—it contributes significantly to a more enjoyable and healthier bathing experience over time.
Things That Can Get Stuck in the Shower Drain
A clogged shower drain can lead to slow drainage, unpleasant odors, and even costly plumbing repairs if left unchecked. Understanding what commonly causes blockages in your shower drain is essential for preventing future issues. Below, we’ll explore the most common culprits, why they cause blockages, and practical tips for addressing each.
Common Items That Get Stuck in Shower Drains
- Hair is the leading cause of shower drain clogs. Whether short or long, hair strands easily tangle together and form clumps that trap soap scum and other debris. Over time, this creates a solid blockage.
- Prevention Tip: Use a drain cover or hair catcher to trap strands before they go down the drain. Clean it regularly.
- Soap residue combines with hard water minerals to create a sticky substance that adheres to the walls of your pipes.
- Prevention Tip: Opt for liquid soap instead of bar soap whenever possible, as it produces less residue.
- Creamy shampoos and conditioners may leave behind oily residues that accumulate over time.
- Prevention Tip: Pour boiling water down the drain once a week to break down oils or use an eco-friendly enzyme-based cleaner.
- After outdoor activities like hiking or gardening, dirt and sand can rinse off your body during showers and settle in your pipes.
- Prevention Tip: Rinse off heavy dirt outdoors with a hose before getting into the shower.
- Items like rings, bottle caps from shampoo containers, or even razor blade covers can accidentally fall into drains.
- Prevention Tip: Install a grate-style drain cover to catch small objects while allowing water to flow through unobstructed.
- While mold itself doesn’t “clog” drains in the traditional sense, its growth inside pipes can worsen existing blockages caused by other materials.
- Maintenance Tip:Regularly clean your drains using vinegar and baking soda; this helps break down organic build-up.
How to Remove Drain Clogs
- Use a Plunger: A plunger creates suction pressure that dislodges clogs blocking the pipe.
- Try Baking Soda & Vinegar: Pour 1/2 cup of baking soda followed by 1/2 cup of vinegar into the drain. Let it sit for 30 minutes before flushing with hot water.
- Drain Snake/Plumber’s Auger: This tool is effective for pulling out hair clumps or dislodging stubborn debris further down the pipe.
- Enzyme-Based Cleaners: These eco-friendly solutions safely dissolve organic matter without damaging pipes.
| Tool | Use Case | Effectiveness Level |
| Plunger | General clog removal | Moderate |
| Baking Soda + Vinegar | Organic material build-up | High |
| Drain Snake | Hair/debris further down pipe | Very High |
| Enzyme Cleaner | Preventing recurring organic clogs | High |
Long-Term Maintenance Tips
- Regularly inspect visible parts of your plumbing for signs of buildup.
- Avoid flushing non-biodegradable items like plastic particles or packaging materials from personal care products down the drain.
- Perform weekly maintenance by pouring hot water through your drains to keep them clear.
By understanding what typically causes shower drain clogs and taking proactive steps to address them, you can maintain smooth drainage while avoiding unnecessary stress from plumbing issues.
Remove Mildew
Mildew is one of the most common and stubborn issues found in bathrooms, particularly in showers. It thrives in warm, damp environments and can quickly spread if not addressed. Removing it effectively not only restores the cleanliness of your shower but also improves air quality and reduces potential health risks.
Why Does Mildew Form?
Mildew forms when moisture lingers on surfaces for long periods.
– High humidity levels. – Poor ventilation. – Lack of frequent cleaning or drying.
Steps to Remove Mildew from Shower Surfaces
- Rubber gloves (for protection).
- A soft-bristled brush or sponge for scrubbing.
- A spray bottle filled with a cleaning solution (e. g. , white vinegar, hydrogen peroxide, or a store-bought mildew remover).
- Old towels or rags for wiping surfaces.
- Ensure the bathroom is well-ventilated by opening windows or turning on an exhaust fan. Ventilation helps reduce lingering fumes from cleaning products and controls humidity levels while you work.
- Spray your chosen cleaning solution directly onto areas with visible mildew growth (e. g. , grout lines, tiles, shower curtains). Allow the solution to sit for 10–15 minutes so it can break down the mildew effectively.
- Use a soft-bristled brush or non-abrasive sponge to gently scrub affected areas. Focus on grout lines where mildew tends to accumulate most persistently.
- Rinse all cleaned surfaces with warm water to remove any remaining residue from both mildew and cleaning products.
- Use old towels or a squeegee to dry the area thoroughly after rinsing. This step is crucial in preventing future mildew growth as moisture is its primary catalyst.
Preventing Mildew in Showers
- Improve Ventilation:Leave the bathroom door slightly open after showering or use an exhaust fan during and after each use to reduce moisture buildup.
- Wipe Down Surfaces After Use:Keep a dedicated squeegee handy to remove excess water from glass doors and tiles after each shower.
- Wash Shower Curtains Regularly:If you use fabric shower curtains, wash them every few weeks according to care instructions.
- Seal Grout Lines Periodically:Apply grout sealer every 6–12 months to prevent moisture seepage into porous grout material.
- Limit Humidity Levels:Consider using a dehumidifier if your bathroom lacks proper airflow.
| Product | Suitable For | Notes |
| White Vinegar | Tiles, Glass Doors | Natural option; strong odor dissipates quickly |
| Hydrogen Peroxide | Grout Lines | Effective against stubborn mold and mildew |
| Commercial Mildew Removers | Any Surface (per label) | Follow product-specific safety instructions |
With consistent care and attention, you can keep your shower free from unsightly and unhealthy mildew growth while maintaining its overall cleanliness over time.
Clean the Shower
Keeping your shower clean is essential not only for hygiene but also for maintaining its functionality and appearance over time. A consistent cleaning routine helps prevent stains, build-up, and damage from developing, ensuring your shower stays in excellent condition. Below are practical steps, tips, and methods to effectively clean any type of shower.
Understand Your Shower Materials
Before diving into cleaning, it’s important to identify the materials used in your shower. Different surfaces require different approaches to avoid damage.
| Material | Cleaning Recommendations |
| Glass | Use a vinegar-water solution or a commercial glass cleaner to remove hard water stains. |
| Tile & Grout | Opt for a non-abrasive cleaner and scrub gently with a grout brush or soft-bristle brush. |
| Fiberglass | Stick to mild soap or specialized fiberglass cleaners to avoid scratching the surface. |
| Natural Stone | Do not use acidic cleaners (e.g., vinegar). Use pH-neutral stone cleaners instead. |
Tools You’ll Need
Gather these tools to make the cleaning process easier and more effective: – Microfiber cloths – Soft-bristle scrub brush or sponge – Squeegee – Non-abrasive cleaning solution suited for your shower’s materials – Baking soda (optional) – Vinegar (optional; avoid on natural stone) – Bucket or spray bottle
Step-by-Step Shower Cleaning Process
- Rinse the Shower Walls and Floor
Begin by rinsing all surfaces with warm water to loosen dirt, soap scum, and other debris. - For general grime: Spray an all-purpose cleaner evenly across all surfaces.
- For stubborn stains: Create a paste using baking soda and water, then apply it directly to affected areas.
- For hard water build-up: Use a mixture of equal parts vinegar and water (unless you have natural stone).
- Scrub Gently
Use a soft-bristle brush or sponge to scrub walls, floors, tiles, and grout lines thoroughly but gently. - Focus on Problem Areas
Pay extra attention to high-use areas like the corners of the shower floor or near fixtures where grime tends to accumulate. - Clean Fixtures Separately
Wipe down faucets, knobs, handles, and any other metal components with an appropriate cleaner or warm soapy water. - Rinse Thoroughly
Once scrubbing is complete, rinse all surfaces thoroughly with warm water to remove residues. - Dry Surfaces Completely
Use a squeegee or microfiber cloth to dry all surfaces after cleaning. This step helps prevent new water spots from forming.
Tips for Maintaining a Clean Shower
To reduce how often deep cleaning is required: – Use a squeegee after each use to remove excess water from walls and glass doors. – Keep ventilation high by running an exhaust fan during showers or keeping the door slightly open afterward. – Spray daily shower cleaners that are designed as leave-on solutions after each use. – Avoid leaving bar soap in wet zones as it can lead to residue build-up; consider switching to liquid soap instead.
By following these steps and maintaining good habits after every shower use, you’ll save time on future cleanings while keeping your bathroom fresh and spotless year-round.
Clean the Shower
A clean shower not only enhances the bathroom’s appearance but also protects your health by minimizing mold, mildew, and soap scum buildup. Regular cleaning prevents grime from accumulating, making maintenance easier over time. This section provides effective methods and practical tips to ensure a spotless and hygienic shower.
Gather Your Cleaning Supplies
Before you start cleaning, make sure you have all the necessary supplies on hand.
- Non-abrasive sponge or microfiber cloth
- Scrub brush with soft bristles
- Squeegee
- Old toothbrush (for small crevices)
- Vinegar and baking soda (for an eco-friendly option)
- Mild bathroom cleaner
- Dish soap (cuts through grease effectively)
- Hydrogen peroxide or bleach-based cleaner (for mold or mildew)
Step-by-Step Shower Cleaning Guide
- Declutter the Area:
Remove all toiletries, shampoo bottles, and loofahs from the shower space. These items can obstruct your cleaning process and often collect residue that needs to be cleaned separately. - Tackle Soap Scum:
Soap scum can create a stubborn layer on shower walls and doors. - Spray the solution onto affected areas.
- Let it sit for about 10–15 minutes.
- Wipe down with a sponge or microfiber cloth.
- Clean Tiles & Grout:
Bathroom tiles are prone to collecting dirt in grout lines: - Use baking soda mixed with water to form a paste.
- Apply the paste along grout lines using an old toothbrush.
- Scrub gently, then rinse thoroughly for brighter tiles.
- Scrub Shower Walls And Floors:
For walls and floors made of fiberglass or porcelain: - Apply dish soap or a mild cleaner directly onto surfaces.
- Scrub using either a non-abrasive sponge or scrub brush.
- Rinse well with warm water.
- Polish Shower Fixtures:
Clean metal fixtures like faucets or handles by: - Wiping them down with vinegar to remove water spots.
- Buffing them with a dry microfiber cloth for extra shine.
- Finish With Glass Doors Or Curtains: Glass shower doors can become cloudy due to hard water stains:
- For glass doors: Use equal parts vinegar and water as a spray cleaner.
- For curtains: Wash fabric liners in warm soapy water; replace plastic liners if they’re damaged.
- Squeegee After Each Use:
To prevent future buildup of soap scum and mildew:- Keep a squeegee in your shower for daily use after bathing. This quick habit minimizes moisture retention on surfaces.
Tips for Long-Term Maintenance
- Keep ventilation high by running an exhaust fan during showers or opening windows afterward.
- Invest in moisture-resistant storage for toiletries to prevent residue accumulation beneath bottle bases.
- Deep-clean your shower at least once per month if used daily; adjust frequency based on usage.
By following these steps, you’ll ensure that every corner of your shower stays fresh, sparkling clean, and free from harmful bacteria or grime buildup over time.