First, What Is Vinegar
Vinegar is a common household staple that has been used for centuries in cooking, cleaning, and even medicinal applications. At its core, vinegar is a liquid primarily composed of acetic acid and water, which is created through a fermentation process. This fermentation involves the conversion of ethanol (often derived from grain or fruit) into acetic acid by acetic acid bacteria. The result is a tangy, acidic liquid with antimicrobial properties that make it incredibly versatile.
- Culinary Vinegars: These typically have an acidity around 5%, making them safe to consume while still strong enough to provide flavor and preservation benefits.
- Cleaning Vinegars: These may have a slightly higher acidity level—often around 6%—to enhance their cleaning power without being overly harsh.
Vinegar can come in many varieties beyond white vinegar, such as apple cider vinegar, balsamic vinegar, rice vinegar, or malt vinegar. Each type has specific characteristics that make it suitable for different applications.
Key Properties of Vinegar
Here are some defining features of all types of vinegars: – Acidic Nature: Its acidic composition makes it effective against grease, grime, and certain bacteria. – Low pH: With a pH typically between 2 and 3, it’s highly efficient at breaking down mineral deposits like limescale. – Natural Origin: Vinegar is often made using natural fermentation processes with minimal processing.
How Vinegar Is Used
The range of uses for vinegar extends far beyond its immediate culinary role: 1. Cooking: Used as a flavor enhancer in dressings, marinades, pickling liquids, and sauces. 2. Preservation: Due to its antibacterial properties and low pH levels, it’s commonly used for preserving foods like cucumbers or peppers (e.g., pickling). 3. Cleaning: Its ability to dissolve dirt and kill bacteria makes it an eco-friendly alternative to chemical cleaning agents. 4. Health & Wellness: Apple cider vinegar in particular has gained popularity for perceived health benefits like aiding digestion or balancing blood sugar levels.
Table Example – Culinary vs Cleaning Uses of Vinegar
| Feature/Use | Culinary Vinegars | Cleaning Vinegars |
| Acidity Level | ~5% | ~6%-7% |
| Common Varieties | White vinegar; Apple cider | White cleaning vinegar |
| Applications | Dressings; Pickling; Sauces | Windows; Countertops; Grime |
| Safety | Edible | Not recommended for food |
Understanding the fundamentals of what makes up vinegar sets the stage for recognizing how different variations—like white vinegar versus cleaning vinegar—serve distinct purposes in both daily life and specialized tasks.
So, What Is White Vinegar vs. Cleaning Vinegar
White vinegar and cleaning vinegar are often mistaken for one another due to their similar appearance and shared primary ingredient: acetic acid. However, these two types of vinegar serve distinct purposes in households, and understanding their differences can help ensure both safe usage and optimal results.
Composition Differences
| Type of Vinegar | Acetic Acid Content | Primary Uses |
| White Vinegar | 4–5% | Cooking, food preservation, light household cleaning tasks |
| Cleaning Vinegar | 6–7% | Heavy-duty cleaning tasks such as grease removal or mold elimination |
The higher acidity of cleaning vinegar makes it 20% stronger than white vinegar, giving it more power when tackling stubborn messes. However, this increased strength also means it is not safe for consumption or use on certain delicate surfaces.
Safety Considerations
- White Vinegar: Designed with food-grade purity in mind, white vinegar is perfectly safe for culinary applications like pickling vegetables or enhancing flavors in recipes. It can also be used for light cleaning needs but may not be strong enough for tougher grime.
- Cleaning Vinegar: While non-toxic, cleaning vinegar is not intended for ingestion because of its higher acidity level. This added strength can irritate skin if handled without gloves and damage sensitive materials like natural stone or hardwood floors if left undiluted.
How They Smell
Both types have a distinct sharp odor typical of acetic acid. However:
– White vinegar has a milder scent that tends to dissipate quickly after application.
– Cleaning vinegar’s smell may linger longer due to its stronger acidity but can often be masked with essential oils if desired during DIY cleaner formulations.
Packaging and Labeling Clues
To avoid confusion:
– Look carefully at product labels before purchase; bottles labeled “cleaning vinegar” will clearly state that they are intended solely for household use.
– Standard white vinegar will typically indicate “food-grade” or mention culinary uses on the label.
Practical Takeaways
- For culinary purposes or mild cleaning, stick with white vinegar since it’s food-safe and less harsh on surfaces.
- For tougher stains like soap scum, grime buildup, or mildew removal, opt for the extra punch provided by cleaning vinegar — but always wear gloves and test on an inconspicuous area first to prevent unintended damage.
Understanding these distinctions will allow you to leverage each type’s strengths effectively while avoiding common mistakes in both your home maintenance routines and kitchen experiments!
When to Use Cleaning Vinegar Over White Vinegar
Cleaning vinegar and white vinegar are both versatile, but they serve slightly different purposes due to their chemical composition. Knowing when to use one over the other can save time, effort, and even protect surfaces from damage. Cleaning vinegar typically contains about 6% acetic acid, compared to white vinegar’s 5%, which makes it about 20% stronger. This increased acidity gives cleaning vinegar an edge for tougher cleaning tasks.
Best Uses for Cleaning Vinegar
- Removing Hard Water Stains:
Use cleaning vinegar to dissolve stubborn mineral buildup on faucets, showerheads, or glass shower doors. Soak a cloth in the solution and let it sit on the surface for 15–30 minutes before scrubbing gently. - Tackling Grease and Grime:
The extra acidity in cleaning vinegar makes it highly effective for cutting through greasy residue on stovetops or kitchen cabinetry. - Deep-Cleaning Floors:
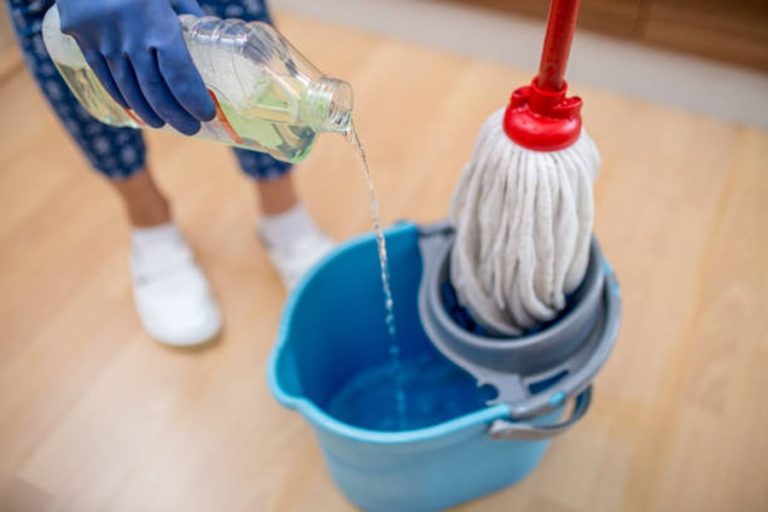
Diluted with water (e.g., one cup of cleaning vinegar per gallon of warm water), this solution works well on tile or linoleum floors to remove dirt without leaving a sticky residue. Avoid using natural stone surfaces like marble or granite as the acid can erode them. - Sanitizing High-Touch Surfaces:
Cleaning vinegar can be used to wipe down doorknobs, light switches, and countertops (except natural stone surfaces). Its acidity helps reduce bacteria effectively without introducing harsh chemicals into your home.
Best Uses for White Vinegar
- Culinary Applications:
White vinegar is appropriate for pickling vegetables, cooking recipes, or adding tangy flavor to dishes. Cleaning vinegar should never be consumed because of its higher acetic acid concentration. - Gentle Household Cleaning:
For delicate surfaces like wood furniture or fabrics prone to damage from stronger acids, white vinegar is safer due to its milder formula.
Key Considerations
| Factor | Cleaning Vinegar | White Vinegar |
| Acidity Level | Higher (6%) | Lower (5%) |
| Ideal Uses | Heavy-duty cleaning tasks | Cooking & gentle household use |
| Surface Sensitivity | Avoids delicate materials | Safer on most materials |
| Cost | Slightly pricier | Affordable & versatile |
Safety Reminders
When using either type of vinegar: 1. Always test in an inconspicuous area first. 2. Never mix with bleach—this can produce toxic chlorine gas. 3. Store both products out of reach of children and pets.
By understanding these differences in application and strength, you’ll get better results while maintaining safety around your home.
Your New Go-To Homemade Vinegar Cleaner Recipe
Creating an effective, homemade vinegar cleaner is simple, cost-effective, and environmentally friendly. Whether you’re looking to clean glass surfaces, remove grime, or freshen up your home, this recipe can become a staple in your cleaning routine. The best part? You only need a few readily available ingredients to get started.
Ingredients Needed
- Cleaning Vinegar: 1 cup (Cleaning vinegar is more effective for tough cleaning due to its slightly higher acidity compared to white vinegar.)
- Water: 1 cup (Dilutes the vinegar to make it safe for general use on most surfaces.)
- Essential Oils: About 10-15 drops of your choice (adds a pleasant fragrance and can offer additional antibacterial properties depending on the oil used). Popular choices include lavender, tea tree oil, lemon, or eucalyptus.
- Spray Bottle: A reusable bottle with a nozzle for easy application. Choose glass if possible for better durability and eco-friendliness.
Optional Add-ins:
– Baking Soda (for stubborn stains or deodorizing carpets). – Rubbing Alcohol (can help with faster evaporation when cleaning mirrors or windows).
Step-by-Step Instructions
- Using a measuring cup, combine equal parts of water and cleaning vinegar in your spray bottle. For instance, 1 cup of each works well for most general-purpose cleaners.
- If you’re using essential oils, add 10-15 drops directly into the mixture at this stage.
- If targeting stubborn grime or soap scum on bathroom tiles, consider adding ½ teaspoon of baking soda into the mixture.
- For streak-free glass and mirror cleaning, add about ¼ cup rubbing alcohol to aid quick drying.
- Secure the spray bottle’s cap tightly and shake thoroughly to ensure all ingredients are evenly mixed.
- Label Your Cleaner
Always label DIY cleaners so everyone in the household knows what’s inside the bottle—this is especially important if you’ve added any extra components like rubbing alcohol.
Where & How to Use This Cleaner
| Surface | Instructions For Use | Notes |
| Kitchen Counters | Spray directly onto surface; wipe with microfiber cloth | Avoid marble or granite (vinegar can damage). |
| Glass/Windows | Light mist; wipe with lint-free cloth | Rub gently until streak-free shine appears. |
| Bathrooms | Spray on tiles/shower walls; scrub with brush or sponge | Great for removing soap scum and mildew. |
| Floors | Add mixture to mop water | Safe on sealed hardwood and laminate floors.* |
*Test in an inconspicuous area before widespread use.
Additional Tips for Effectiveness
- Always test this cleaner on a small section before applying it broadly—especially when working with delicate surfaces like natural stone or wood.
- Store your cleaner in a cool place away from direct sunlight; this preserves its efficacy over time.
- Reapply essential oils as needed since their scent may fade after prolonged storage.
Using this homemade recipe not only helps reduce dependency on chemical-laden store-bought cleaners but also aligns with sustainable living practices by minimizing waste and reusing materials like spray bottles.
By incorporating small tweaks based on specific needs—such as adding baking soda for deodorizing carpets—you’ll have an adaptable cleaning solution suited perfectly to your home environment without compromising safety or quality standards.
Your New Go-To Homemade Vinegar Cleaner Recipe
Creating your own vinegar-based cleaner at home is a simple, cost-effective, and eco-friendly way to tackle household cleaning tasks. Cleaning vinegar, with its higher acidity compared to white vinegar, makes it particularly effective for various cleaning purposes. Here’s how you can make a versatile homemade cleaner using cleaning vinegar and a few other natural ingredients.
Ingredients Needed
- 1 cup of cleaning vinegar (6% acetic acid for stronger cleaning power).
- 1 cup of water (distilled or filtered recommended).
- 15-20 drops of essential oil (optional; tea tree oil, lemon, or lavender work well for fragrance and added antibacterial properties).
- 1 tablespoon of baking soda (for enhanced cleaning on tougher stains or grease).
- A spray bottle (glass is recommended if using essential oils to prevent plastic degradation).
Step-by-Step Instructions
- Prepare the Spray Bottle:
Start by rinsing out the spray bottle thoroughly to ensure it’s clean and free from any residue that may interact with your homemade solution. - Mix Vinegar and Water:
In the spray bottle, combine 1 cup of cleaning vinegar with 1 cup of water. This dilution balances strength while being safe for most surfaces.* - Add Baking Soda:
If you’re tackling tougher grease or grime, add 1 tablespoon of baking soda directly to the mixture. Be cautious as combining baking soda and vinegar will cause fizzing; allow it to settle before securing the spray nozzle. - Incorporate Essential Oils (Optional):
To mask the strong smell of vinegar and enhance its disinfectant qualities, add 15–20 drops of essential oil based on your preferences. Tea tree oil is ideal for its antimicrobial properties, while lemon oil adds a fresh citrus scent. - Shake Gently Before Use:
Once all ingredients are combined in the spray bottle, shake gently to ensure they are well mixed.
How to Use Your Homemade Cleaner
- Counters: Use on non-granite or marble surfaces for easy removal of grease and food residues.
- Appliances: Degrease microwaves or refrigerators by spraying and wiping with a soft cloth.
- Sinks & Faucets: Tackle soap scum and mineral deposits with just a few sprays.
- Shower Glass: Spray directly onto glass doors to dissolve hard water stains.
- Floors & Windows:
Dilute further if needed (e.g., mixing an additional cup of water in) for mopping or streak-free window cleaning.
Important Notes on Safety
| Surface/Material | Safe? | Notes |
| Granite/Marble | No | The acidity can erode natural stone finishes over time. |
| Wood Surfaces | Yes* | Ensure wood is sealed; test on an inconspicuous area first. |
| Stainless Steel | Yes | Wipe immediately after application to avoid streaks or discoloration. |
*Avoid using undiluted solutions directly on sensitive surfaces as they may cause damage over extended periods.
With this easy recipe, you’ll have an effective cleaner that aligns with both sustainability goals and household needs—all without relying on harsh chemicals found in many store-bought cleaners.
Your New Go-To Homemade Vinegar Cleaner Recipe
Homemade vinegar cleaners are an effective, eco-friendly, and affordable solution for tackling household messes. By using cleaning vinegar—an alternative to traditional chemical-based cleaners—you can create a versatile cleaner that works on multiple surfaces. Below is an easy-to-follow recipe for making your own all-purpose cleaning vinegar solution, along with practical tips on how to use it effectively.
Ingredients for the Vinegar Cleaner
Here’s what you’ll need to make your homemade cleaning vinegar solution:
– 1 cup of cleaning vinegar (higher acidity level than white vinegar, typically around 6%)
– 1 cup of distilled water (prevents mineral build-up when used on glass and smooth surfaces)
– 15–20 drops of essential oil (optional, for added fragrance; lemon or tea tree oil are great options)
– Spray bottle (preferably glass or BPA-free plastic)
Steps to Prepare the Cleaner
- In a clean bowl or container, mix one part cleaning vinegar with one part distilled water. This creates a balanced ratio that is both effective and safe for most surfaces.
- Add 15–20 drops of your chosen essential oil if you’d like a pleasant scent or additional antibacterial properties (e.g., tea tree oil). Stir gently to combine.
- Using a funnel, pour the mixture into the spray bottle and secure the cap tightly. Label the bottle clearly to avoid any confusion later.
How and Where to Use Your Vinegar Cleaner
| Surface/Area | Directions | Notes |
| Countertops | Spray directly onto nonporous countertops; wipe clean with a damp cloth | Avoid use on natural stone like granite or marble to prevent etching |
| Windows & Mirrors | Mist lightly over glass surfaces; wipe dry using a microfiber cloth | Distilled water ensures streak-free results |
| Floors | Add 1/4 cup of the cleaner solution to a gallon of warm water | Safe for tile or vinyl floors; avoid wood unless sealed |
| Bathroom Fixtures | Apply directly onto faucets and showerheads; scrub gently | Effectively removes soap scum and light limescale |
| Kitchen Appliances | Wipe down refrigerators, microwaves, and stovetops | Always test in an inconspicuous spot before applying liberally |
Tips for Using Cleaning Vinegar Safely
While this homemade cleaner is effective, there are some precautions to keep in mind:
– Avoid mixing with bleach: Combining vinegar and bleach creates toxic chlorine gas. Stick to using these products separately. – Test before use: If you’re unsure about compatibility with certain materials (e.g., delicate finishes), test in an inconspicuous area first. – Store properly: Keep your homemade cleaner stored in a cool, dark place away from direct sunlight.
By creating this simple yet powerful homemade vinegar cleaner recipe, you can maintain an eco-friendly household while cutting down on unnecessary chemicals—an excellent step toward sustainable living practices.
Your New Go-To Homemade Vinegar Cleaner Recipe
If you’re looking to switch to a more natural and effective cleaning solution, homemade vinegar cleaners are an excellent choice. Cleaning vinegar is a versatile and eco-friendly option that can replace many chemical-laden household cleaners. Below is a recipe for a simple yet powerful cleaning solution, along with tips on its usage.
Benefits of Using a Homemade Vinegar Cleaner
- Eco-Friendly: Reduces reliance on chemical cleaners that may harm the environment.
- Non-Toxic: Safe for use around children and pets (note: avoid direct contact with certain surfaces as noted below).
- Cost-Effective: Cleaning vinegar is affordable and stretches far when combined with other ingredients.
- Multi-Purpose: Suitable for various surfaces and applications.
Ingredients You’ll Need
| Ingredient | Purpose | Notes |
| 1 cup cleaning vinegar | Primary cleaning agent | Stronger than white vinegar |
| 1 cup water | Dilutes the acidity slightly | Use distilled or filtered water |
| 10–20 drops essential oil (optional) | Adds fragrance, antibacterial properties | Lavender, tea tree, or lemon recommended |
| 1 tablespoon baking soda (optional) | Enhances scrubbing power and deodorizes | Do not mix directly in a closed container due to fizzing reaction |
Optional: Add citrus peels (like orange or lemon) during preparation for added scent and natural grease-fighting properties. Allow them to soak in the mixture for at least 24 hours before use.
Instructions
- In a large spray bottle (plastic or glass), combine the cleaning vinegar and water in equal parts.
- If desired, add essential oils for fragrance or antibacterial benefits. Lavender has calming properties, while tea tree oil offers antimicrobial effects.
- For deeper cleaning solutions like tackling soap scum in bathrooms, stir in baking soda—just be cautious of potential fizzing when combining it with vinegar.
- Shake Well Before Use:
Ensure all ingredients are thoroughly mixed by shaking the spray bottle gently before each use. - Label Your Cleaner:
Clearly label your homemade cleaner bottle so everyone knows its contents. Include dilution ratios if needed for future reference.
Where To Use Your Vinegar Cleaner
Ideal Applications:
- Countertops (excluding natural stone like granite or marble)
- Floors (ceramic tile, vinyl)
- Removing sticky residues or hard water stains
Surfaces To Avoid:
While versatile, there are some materials where vinegar can cause damage: – Natural stone surfaces like granite, marble, or quartz – Hardwood flooring unless diluted further – Electronics screens (TVs and smartphones)
Bonus Tip: Storing Your Homemade Cleaner
Store your cleaner in a cool, dark place away from direct sunlight to preserve essential oils’ effectiveness if added. Depending on your usage frequency, this solution can last up to several months without losing potency.
By creating your own homemade cleaning solution using cleaning vinegar, you can cut down on wasteful packaging from store-bought products while maintaining a spotless home naturally.