DIY Natural and Holistic Wall Cleaners
Using natural and holistic cleaners is not only environmentally friendly but also safe for your family and pets. Commercial cleaning products often contain harsh chemicals that can damage your walls or leave behind harmful residues. By creating your own DIY solutions, you can clean effectively while maintaining a healthier home environment.
Benefits of Natural Wall Cleaners
- Eco-Friendly: Natural cleaning agents reduce environmental pollution as they are biodegradable.
- Non-Toxic: Safe for children, pets, and allergy-prone individuals.
- Cost-Effective: Many DIY recipes use household staples, saving money compared to store-bought products.
- Customizable: Adjust ingredients to suit your specific needs, such as adding essential oils for a fresh scent.
Common Ingredients for DIY Wall Cleaners
| Ingredient | Purpose | Notes |
| White vinegar | Degreaser and stain remover | Avoid on stone walls (may cause etching). |
| Baking soda | Gentle abrasive cleaner | Ideal for tough spots or scuff marks. |
| Lemon juice | Natural disinfectant | Leaves a refreshing citrus smell. |
| Castile soap | All-purpose cleaner | Great for removing dirt without residue. |
| Essential oils | Adds fragrance, some disinfectant properties | Tea tree oil is particularly effective against bacteria. |
Simple DIY Recipes
- All-Purpose Vinegar Solution (for grease and light stains):
- Mix 1 cup of warm water with 1/4 cup white vinegar in a spray bottle.
- Use on painted walls or tiles; avoid using on wallpaper or unfinished surfaces.
- Baking Soda Paste (for stubborn stains):
- Combine 2 tablespoons of baking soda with water to create a paste.
- Apply to the stain gently using a microfiber cloth; wipe off with warm water.
- Castile Soap Mixture (for general dirt removal):
- Blend 2 teaspoons of liquid Castile soap in 1 liter of warm water.
- Apply with a soft sponge and clean gently.
- Create a mix of 10 drops lavender essential oil, 5 drops tea tree oil, and 2 cups distilled water.
- Spray lightly after cleaning for an inviting aroma.
Tips for Effective Cleaning Using DIY Solutions
- Test the solution first on an inconspicuous area of the wall to ensure no discoloration occurs.
- Always use soft microfiber cloths or sponges to avoid scratching paint or surfaces.
- Avoid soaking the walls; excess moisture can seep into materials like drywall or wallpaper leading to damage.
- Clean from top to bottom in sections to prevent streaks from forming as you go.
By using these natural alternatives, you can effectively maintain spotless walls while prioritizing health and sustainability in your household cleaning routine.
How to Clean Painted Walls
Painted walls are a common feature in most homes and, with time, they can accumulate dust, smudges, or stains that can dull their appearance. Proper cleaning techniques can help you maintain the look of your painted walls without damaging the paint finish. Whether your walls have a matte, satin, eggshell, or glossy finish, understanding the right methods and materials is essential.
Assess the Paint Finish
- Matte or flat paint: These finishes are more delicate and prone to damage if scrubbed too hard. Avoid abrasive cleaners.
- Eggshell or satin paint: These have a slight sheen and are slightly more durable than matte finishes but should still be cleaned gently.
- Glossy or semi-gloss paint: These finishes are durable and easier to clean because they resist moisture and stains better than other types.
Tools and Materials Needed
- Microfiber cloths (soft and non-abrasive)
- A bucket of lukewarm water
- Mild dish soap or liquid castile soap
- A sponge (preferably soft with no abrasive side)
- White vinegar (optional for tougher stains)
- Non-abrasive eraser sponge for scuff marks (like Magic Erasers)
For especially delicate painted surfaces such as matte finishes, consider using only water with a microfiber cloth.
Step-by-Step Cleaning Process
- Use a clean microfiber cloth or a wall duster to gently remove dust from the surface of the wall.
- Pay close attention to corners where cobwebs may gather.
- Fill a small bucket with lukewarm water.
- Add one teaspoon of mild dish soap per gallon of water; mix gently to avoid excessive suds.
- For tougher stains, add 1/4 cup white vinegar per gallon as an optional addition.
- Before cleaning large portions of your wall, test your solution on an inconspicuous area (e.g., behind furniture).
- Wait for it to dry completely before proceeding.
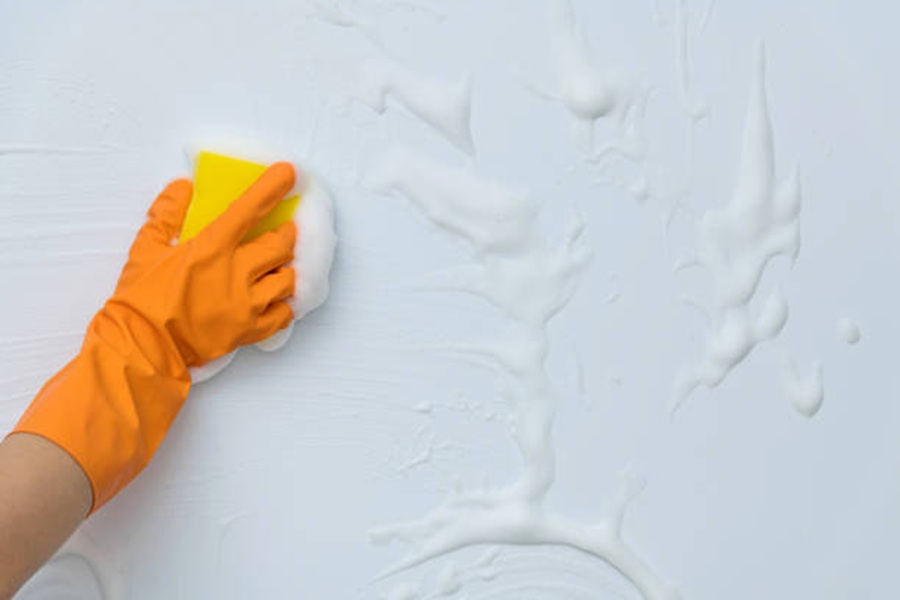
- Dip your sponge into the solution and wring it out until damp—not soaking wet.
- Starting from the top of the wall and working downward in sections, wipe gently in circular motions.
- For deeper smudges or fingerprints near high-use areas like doorways or light switches, apply slightly firmer pressure but avoid scrubbing.
- If soap residue remains after wiping, rinse by wiping down again with clean water using another damp cloth or sponge.
- Use an eraser sponge lightly on scuff marks but don’t overdo it as it might dull glossy finishes.
- Use a clean dry microfiber cloth to pat-dry areas you’ve cleaned to prevent streaks.
Tips for Regular Maintenance
- Dust regularly using a soft microfiber cloth or extendable duster.
- Address spills immediately—especially on lighter-colored paints—to prevent long-term staining.
- Avoid leaning furniture directly against painted surfaces; use felt pads where necessary.
Cleaning Solutions Quick Reference Table
| Problem | Recommended Solution |
| General dirt & grime | Mild dish soap + warm water |
| Grease stains | Add white vinegar to soapy water |
| Scuff marks | Non-abrasive eraser sponge |
| Sticky residues | A mix of baking soda paste + gentle scrubbing |
Keeping painted walls clean doesn’t have to be labor-intensive if regular maintenance is practiced along with proper care techniques tailored to each type of paint finish in your home.
How to Clean Painted Walls
Painted walls are a staple in most homes and can come in different finishes, ranging from matte to glossy. Each type of paint requires specific care to avoid damage while achieving a clean, refreshed look. Below is a guide to help you effectively clean painted walls without compromising their finish.
1. Understand Your Wall’s Paint Finish
- Matte or Flat Finish: This finish is delicate and prone to scuffs or stains but can be less resistant to scrubbing.
- Eggshell or Satin Finish: Slightly more durable than matte, these finishes can handle light cleaning with minimal damage.
- Semi-gloss or Glossy Finish: These are the most durable finishes and are often found in kitchens and bathrooms due to their resistance to moisture and stains.
2. Dust the Surface First
- Microfiber Cloth: Gently wipe down the wall for a quick and efficient dust removal.
- Vacuum Cleaner with Brush Attachment: Ideal for reaching higher areas without climbing ladders.
- Extendable Duster: Great for ceilings and corners where cobwebs collect.
Removing dust ensures that you don’t smear debris into the wall when applying cleaning solutions.
3. Prepare a Cleaning Solution
Basic Recipe:
| Ingredient | Measurement |
| Warm Water | 1 gallon |
| Mild Dish Soap | 2–3 drops |
For tougher stains: – Add 1 cup of white vinegar for extra cleaning power. – Avoid harsh chemicals like bleach as they may strip paint or cause discoloration.
Tip: Always test any solution on an inconspicuous area before applying it across an entire wall.
4. Spot Cleaning Stains
- Dip a soft sponge or cloth into your prepared cleaning solution.
- Squeeze out excess liquid—walls should never be overly saturated.
- Lightly scrub the stained area using circular motions.
- Wipe away residue with clean water to prevent streaks.
For stubborn marks: – Try using a magic eraser sparingly on glossy finishes (avoid heavy pressure as it may remove paint).
5. Cleaning Large Sections
When dealing with entire walls: 1. Soak a soft sponge or microfiber mop in your cleaning solution. 2. Start at the top of the wall and work downward in sections to prevent streaking. 3. Regularly rinse your sponge or mop during use. 4. Dry each section with a clean towel immediately after washing.
This top-to-bottom method avoids dirty water dripping onto already-cleaned areas.
6. Tips for Avoiding Damage During Cleaning
- Avoid abrasive scrubbers or brushes—they can scratch the surface and remove paint layers.
- Minimize water use on matte-finished walls since they’re more porous and absorbent compared to gloss finishes.
- Don’t allow liquid cleaners to sit on the surface too long; wipe them off promptly.
Maintenance Suggestions
- Dust walls monthly using microfiber tools or dusters designed for delicate surfaces.
- Address spills or marks as soon as they occur rather than letting them settle over time.
By following these steps tailored specifically for painted surfaces, you can maintain their appearance while ensuring durability over time without compromising their aesthetic appeal.
How to Clean Wallpapered Walls
Wallpapered walls require special care during cleaning to preserve their texture, color, and adhesive. Different types of wallpaper—vinyl-coated, fabric-backed, or traditional paper—may have unique needs, so it’s essential to identify the material before starting. Below is a detailed guide on safely and effectively cleaning wallpapered walls.
Step 1: Identify the Type of Wallpaper
- Vinyl-Coated Wallpaper: Durable and moisture-resistant; can generally handle mild soaps and water.
- Fabric-Backed or Traditional Paper Wallpaper: More delicate; requires extra care and minimal moisture to prevent damage.
Step 2: Gather Supplies
| Item | Purpose |
| Microfiber cloth | Gentle dusting without scratching |
| Soft-bristle brush | Removing surface dirt from textured areas |
| Mild dish soap | Cleaning tough spots (for vinyl-coated) |
| Distilled water | Prevents mineral residue on wallpapers |
| Sponge | For precise spot-cleaning |
| Dry towel | Pat-drying areas after cleaning |
Step 3: Dust Before You Wash
- Use a microfiber cloth or soft-bristle brush to gently sweep away loose debris and cobwebs.
- Pay attention to corners, edges near ceilings, and baseboards where dust often accumulates.
For textured or embossed wallpapers, lightly brush them with a soft brush in circular motions to loosen trapped dirt.
Step 4: Spot Test Your Cleaner
- Mix a small batch of mild dish soap with distilled water (if applicable).
- Choose an inconspicuous area (e.g., behind furniture) for testing.
- Dampen a sponge with your solution and gently apply it. Wait for the area to dry completely before assessing whether there’s any discoloration or damage.
If your wallpaper seems prone to damage during this test, stick solely to dry cleaning methods like dusting.
For Vinyl-Coated Wallpapers:
- Mix warm distilled water with a few drops of mild dish soap in a bowl.
- Dampen (not soak) your sponge in the solution.
- Gently wipe down walls in sections using smooth strokes.
- Rinse with plain distilled water on another sponge if soapy residue remains.
- Immediately dry each cleaned section with a soft towel.
For Fabric-Backed or Paper Wallpapers:
- Avoid excessive moisture; use only slightly damp sponges or cloths.
- Dab at stains rather than scrubbing harshly.
- Spot-clean using distilled water alone if possible; avoid soaps unless absolutely necessary.
- Allow cleaned areas to air-dry naturally but ensure proper ventilation in the room.
Step 6: Handle Stubborn Stains Carefully
- Mix cornstarch with cold water into a paste for oil stains on paper-based wallpapers; apply it gently and let it sit before brushing off once dry.
- Use an eraser sponge for small scuffs—but ensure light pressure is applied so as not to tear delicate surfaces.
For larger or deeper stains that cannot be removed without harm, consider consulting professional cleaners or replacing that section of wallpaper altogether.
Maintenance Tips for Long-Term Care
- Dust walls regularly—at least once every two weeks—to minimize particles settling into textures.
- Address spills immediately by blotting them gently with an absorbent cloth instead of wiping harshly.
- Avoid placing furniture too close against walls; this prevents dents and allows better airflow around them.
By following these guidelines carefully tailored for wallpapered surfaces, you’ll preserve their beauty while maintaining cleanliness throughout your home environment without compromising their integrity over time!
How to Clean Wallpapered Walls
Wallpaper adds style and personality to any room, but keeping it clean can be tricky. It requires special care, as harsh cleaning methods can damage the texture or pattern. Here’s a detailed guide on how to properly clean wallpapered walls without causing unnecessary wear.
Assess the Wallpaper Type
- Vinyl-coated wallpaper: Durable and water-resistant; can handle light scrubbing.
- Fabric or grasscloth wallpaper: More delicate; avoid water and use dry methods.
- Textured or embossed wallpaper: Needs gentle handling to preserve details.
- Non-woven or paper-based wallpaper: Very sensitive to moisture; proceed with care.
Gather Your Materials
| Materials Needed | Purpose |
| Soft microfiber cloth | For gentle wiping |
| Vacuum cleaner with brush head | Removes loose dust and debris |
| Soft sponge (for washable types) | For wet cleaning |
| Mild dish soap or vinegar solution | Cleans stains on vinyl wallpapers |
| Eraser sponge | Removes small marks on durable surfaces |
| Dry cloth | To pat surfaces dry after cleaning |
Step-by-Step Cleaning Process
- Start by using a vacuum cleaner with a soft brush attachment to remove loose dust and cobwebs. Work from top to bottom in vertical sections for thorough coverage.
- Alternatively, use a feather duster or soft microfiber cloth if you don’t have access to a vacuum.
- Before applying any liquid solution, test it in an inconspicuous area of the wallpaper. Wait for 10–15 minutes to ensure there’s no discoloration or damage.
- Mix a few drops of mild dish soap with warm water in a bowl. Dip a soft sponge into the mixture, wring it out well, and gently dab (don’t rub) the stained area.
- Use circular motions for persistent spots but avoid applying too much pressure.
- Use a dry microfiber cloth to wipe away surface dirt.
- Stubborn marks can sometimes be removed using an eraser sponge applied gently.
- Sprinkle cornstarch or baking soda onto grease stains and let it sit for 15–20 minutes before brushing it off gently with a dry cloth.
- Avoid wet products as they may spread the stain further.
- Always pat wallpapers dry after any damp cleaning using an absorbent dry cloth.
- Check corners and edges where moisture tends to accumulate.
Preventative Tips
- Avoid placing furniture too close to walls; this reduces scuff marks and prevents trapped dust buildup.
- Wipe high-touch areas (like near light switches) regularly using gentle methods tailored for your wallpaper type.
- Regularly check for signs of moisture accumulation behind wallpapers in humid rooms like bathrooms or kitchens—this will prevent mold growth.
By understanding how each type of wallpaper reacts to different treatments, maintaining their pristine appearance becomes much easier while safeguarding their longevity over time.
How to Clean Painted Walls
Properly cleaning painted walls not only keeps your home looking fresh and vibrant but also helps maintain the integrity of the paint over time. Whether you need to address everyday dust, fingerprints, or stubborn stains, it’s important to use the right techniques and materials based on the type of paint finish on your walls. Follow these steps for an effective and damage-free cleaning process.
Identify Your Paint Finish
| Paint Finish | Characteristics | Cleaning Durability |
| Matte/Flat | Non-reflective, absorbs light; delicate | Low |
| Eggshell | Slight sheen; more durable than matte | Medium |
| Satin | Smooth with a soft shine | High |
| Semi-Gloss/Gloss | Shiny, reflective, highly durable | Very High |
Knowing your wall’s finish will help you choose appropriate cleaning tools and solutions.
Materials You’ll Need
- Soft microfiber cloths (avoid abrasive materials).
- Non-abrasive sponge for gentle scrubbing.
- Mild detergent (e.g., dish soap) or a commercial cleaner formulated for painted surfaces.
- Bucket of warm water for rinsing.
- Dry towel for wiping down walls after cleaning.
- For tougher stains: baking soda paste (baking soda + water) or white vinegar diluted with water in a spray bottle.
Step-by-Step Process for Cleaning Painted Walls
- Use a duster or dry microfiber cloth to wipe down the wall surface gently.
- Pay special attention to corners and baseboards as they collect more dirt.
- Before applying any solution to an entire wall, test it in an inconspicuous area to ensure it doesn’t damage or discolor the paint.
- Mix 1–2 drops of mild dish soap into a bucket of warm water.
- Stir gently so as not to create too many suds.
- Dampen your microfiber cloth or sponge in the solution (not soaking wet). Wring out excess liquid.
- Start at the top of the wall and work your way down in small sections using circular motions.
- Avoid scrubbing too hard—particularly on matte finishes—as this can remove some pigment over time.
- Tackle Stains Carefully:
For specific stains:- Grease marks: Use diluted white vinegar on a soft cloth and rub gently.
- Crayon marks: Apply baking soda paste on the stain, scrub lightly, then rinse.
- Fingerprints: A damp microfiber cloth with dish soap should suffice.
- Rinse Residue:
After cleaning each section, rinse it using another damp cloth dipped in clean water to remove any soapy residue that could dull the surface over time. - Dry Thoroughly:
Prevent streaks by drying immediately with a clean towel after rinsing each section.
Tips for Long-Term Maintenance
- Dust walls periodically using a dry microfiber cloth or duster to prevent buildup.
- Place furniture away from walls where possible to avoid scuffs and general wear.
- Address spills or fingerprints promptly before they set into painted surfaces.
- Avoid harsh chemical cleaners unless specifically designed for painted surfaces.
By following these guidelines tailored specifically for painted walls, you’ll keep them looking polished while preserving their color and texture over time without unnecessary risk of damage.
How to Clean Wallpapered Walls
Cleaning wallpapered walls requires a gentle approach to ensure the wallpaper remains intact without damage to its texture, color, or adhesive. Different types of wallpaper—vinyl, fabric-backed, or traditional paper—may require slightly varied methods, but the goal is always the same: remove dirt, stains, and smudges while preserving the wall’s aesthetic appeal. Below are practical tips and step-by-step guidance for cleaning wallpapered walls.
Preparation Before Cleaning
- Dust first: Use a microfiber duster or soft vacuum brush attachment to remove dust and cobwebs. Dusting first prevents smearing dirt during cleaning.
- Test in an inconspicuous spot: Always test your cleaning method on a small hidden section of your wallpaper to ensure there’s no discoloration or damage.
- Gather tools: You’ll need:
- A soft sponge or microfiber cloth
- Mild dish soap (or specialized wallpaper cleaner)
- Distilled water (to prevent mineral deposits)
- A clean bucket or two for rinsing
- Towels or drop cloths to protect flooring
Spot Cleaning Stains
- Blot gently: Never rub stains aggressively; blot them with a damp sponge instead. This will help lift the stain rather than spreading it.
- Use mild soap solution: Mix a small amount of mild dish soap into lukewarm water (a ratio of about 1 teaspoon per quart). Dip your sponge in this solution and wring it out well; it should be just slightly damp. Use this to gently clean the stained area without over-wetting the wall.
Full Wall Cleaning
- Work from top to bottom: Start at the top of your wall and work downward in sections to prevent streaks from dirty water running down clean areas.
- Damp sponge technique: Lightly dampen a soft sponge with soapy water as described earlier and wipe gently along the surface in overlapping strokes.
- Rinse sparingly: Follow up with another damp sponge dipped in plain distilled water to remove any residual soap.
- Dry immediately: Use a clean lint-free towel to pat the area dry after washing each section.
| Material Type | Suggested Approach | Notes |
| Vinyl Wallpaper | Use mild soap and soft sponges | Durable; easier to clean than others |
| Fabric-Backed | Avoid excess moisture | May require dry-cleaning products |
| Traditional Paper | Spot-clean carefully | Most delicate; avoid soaking entirely |
Tips for Preventing Future Damage
- Avoid harsh cleaners such as bleach-based products—they can strip color from wallpapers.
- Keep walls dry: Excess moisture can cause peeling wallpaper over time.
- Address spills immediately: The quicker you tend to spills, splatters, or marks on your walls, the better chance you have of preserving their condition.
By following these steps, you can maintain fresh-looking wallpapered walls while extending their lifespan without compromising aesthetics or durability.