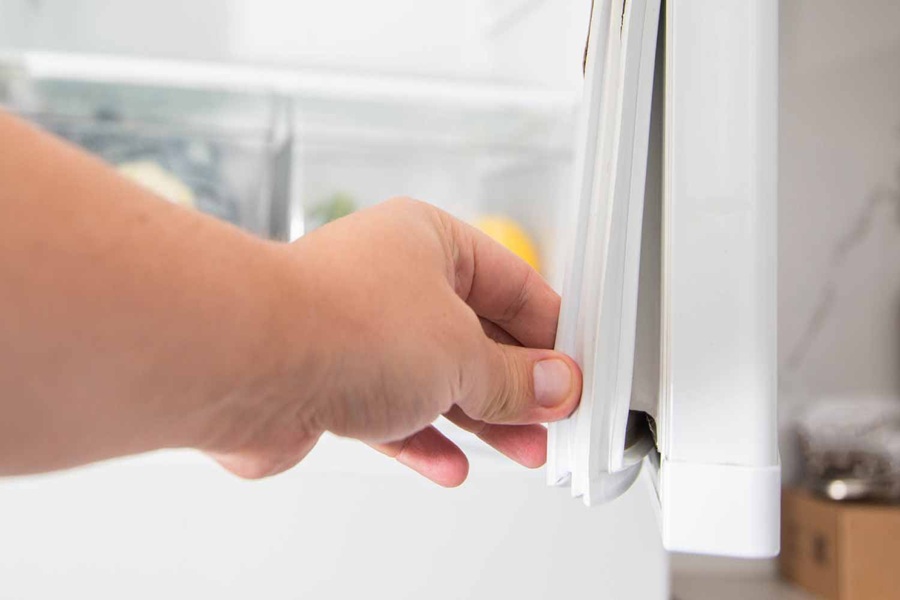
Why Gasket Maintenance Is Essential
The rubber seal, or gasket, on your refrigerator door plays a crucial role in ensuring the appliance operates efficiently. This small yet vital component creates an airtight seal that helps regulate the internal temperature of your fridge. Neglecting its maintenance can lead to a host of issues, from higher energy bills to spoiled food. Understanding the importance of this often-overlooked part will help you keep it in optimal condition.
The Role of the Gasket
- Energy Efficiency: A properly sealed gasket ensures that cold air stays inside the refrigerator and warm air is kept out. When the seal is compromised, your refrigerator has to work harder to maintain its internal temperature, increasing energy consumption.
- Preserving Food Quality: An airtight seal prevents external moisture and heat from entering, which helps maintain consistent cooling and keeps food fresh for longer.
- Preventing Mold and Bacteria Growth: The rubber material of gaskets can trap dirt, grime, and moisture over time. Without regular cleaning, these areas become prime breeding grounds for mold and bacteria.
Signs Your Gasket Needs Attention
- Visible Dirt or Mildew: Dark spots or discoloration along the gasket may indicate mold growth or grime buildup.
- Cracks or Tears: Over time, wear and tear can cause splits in the rubber material.
- Door Not Closing Properly: If your fridge door doesn’t close tightly or pops open easily, it’s often due to a damaged or dirty gasket.
- Higher Energy Bills: A sudden spike in electricity costs could be caused by an inefficient fridge working overtime due to a failing seal.
Consequences of Ignoring Maintenance
If left unchecked, an unclean or damaged gasket can lead to: 1. Increased energy consumption — raising monthly utility costs significantly. 2. Reduced lifespan of the refrigerator as it strains to maintain consistent cooling. 3. Spoiled groceries caused by fluctuating temperatures inside the fridge.
| Problem | Cause | Solution |
| Frost buildup inside | Warm air entering through gaps | Clean/replace gasket |
| Fridge running nonstop | Inefficient cooling | Inspect for damage |
| Bad odors | Mold/mildew growth | Regular cleaning with care |
Benefits of Regular Maintenance
By keeping your gasket clean and intact: – You save money by reducing energy usage. – You extend the life of both your food items and appliance. – You create a healthier kitchen environment free from mold and harmful bacteria.
Regular attention to this small detail ensures that your refrigerator stays efficient while preserving its lifespan. Prioritizing gasket maintenance isn’t just about cleanliness—it’s an investment in better performance for one of your most essential household appliances.
How to Safely Clean Your Refrigerator Door Gasket
Cleaning your refrigerator door gasket, also known as the rubber seal, is a simple but essential task to maintain its functionality and hygiene. The gasket plays a crucial role in keeping the refrigerator door airtight, ensuring optimal cooling and energy efficiency. Over time, dirt, mold, and debris can accumulate on the gasket, reducing its effectiveness. Below is a detailed guide on how to clean it safely and effectively.
Gather Your Cleaning Supplies
- Mild dish soap or an all-purpose non-toxic cleaner
- A soft sponge or microfiber cloth (to avoid damaging the rubber)
- A toothbrush (for scrubbing hard-to-reach crevices)
- White vinegar or baking soda (optional for stubborn stains or mold)
- Dry towel for wiping down after cleaning
Avoid harsh chemicals such as bleach or ammonia-based cleaners as they can weaken or crack the rubber over time.
Step-by-Step Cleaning Process
- Turn Off Your Refrigerator:
For safety and energy efficiency, turn off your refrigerator while cleaning. This prevents cold air loss during the process. - Inspect for Debris:
Check the entire length of the gasket for visible dirt, crumbs, grease buildup, or mold growth. Pay close attention to folds and crevices where grime tends to accumulate. - Prepare Your Cleaning Mixture:
Mix a few drops of mild dish soap with warm water in a small bowl. Alternatively, you can use a solution of one part white vinegar to two parts water if dealing with tougher stains or mild mold buildup. - Wipe Down Gently:
Dip your microfiber cloth or soft sponge into the cleaning solution and wring it out until damp (not dripping). Gently wipe along all sides of the gasket’s surface without stretching or pulling it. - Use a Toothbrush for Crevices:
For areas where dirt is lodged deep within folds or corners of the seal, dip a toothbrush into your cleaning solution and scrub lightly using circular motions. - Rinse Thoroughly:
Use another clean damp cloth dipped in plain water to remove any soap residue from the gasket. - Remove Excess Moisture:
Dry thoroughly with a towel after rinsing since leftover moisture could encourage mold growth over time. - Inspect Your Work:
After drying, closely examine again for any stubborn spots that may require additional attention with vinegar or baking soda paste (sprinkle baking soda on stubborn areas dampened with vinegar).
Additional Tips for Safe Cleaning
- Perform this cleaning task every 3–6 months depending on how often you use your fridge and exposure conditions.
- If you notice cracks or severe wear while cleaning your gasket that compromises its ability to form an airtight seal around doors—consider replacing it.
- Avoid using abrasive scrubbers like steel wool which can scratch or tear delicate rubber surfaces.
By following this step-by-step process regularly using safe methods tailored specifically toward maintaining durable seals—you’ll prolong its lifespan while ensuring better performance from your fridge overall!
How to Safely Clean Your Refrigerator Door Gasket
Keeping the rubber gasket on your refrigerator door clean is vital for its functionality and longevity. The gasket, or rubber seal, plays a crucial role in maintaining a proper seal, preventing energy waste, and keeping your fridge operating efficiently. Cleaning it safely requires the right tools, techniques, and products to avoid damage while ensuring optimal performance.
What You’ll Need
- Soft microfiber cloth: Prevents scratching delicate surfaces.
- Mild dish soap: Gentle enough for rubber but effective against grime.
- Warm water: Loosens dirt and debris.
- Old toothbrush or soft-bristle brush: Helps clean tight crevices.
- White vinegar (optional): Acts as a natural disinfectant for stubborn stains or mold.
- Cotton swabs (optional): Ideal for cleaning narrow corners.
- Dry towel: Necessary for drying the gasket thoroughly.
Step-by-Step Cleaning Process
- Turn Off Your Refrigerator
Unplug your refrigerator or turn off its power supply during the cleaning process. This ensures safety and keeps cold air from escaping unnecessarily. - Inspect the Gasket
Examine the gasket for any visible dirt, food particles, or mold growth. Also, check for signs of wear like cracks or tears that might require professional attention. - Prepare Your Cleaning Solution
Mix a few drops of mild dish soap with warm water in a bowl. For deeper cleaning or mild disinfection, you can add equal parts white vinegar to your solution. - Wipe Down Surface Dirt
Dip a soft microfiber cloth into your cleaning solution and wring it out until damp. Gently wipe along the entire length of the gasket to remove surface grime. - Clean Crevices Thoroughly
Use an old toothbrush dipped in the same solution to scrub hard-to-reach areas such as folds and edges where dirt often accumulates. For particularly narrow gaps, cotton swabs can help remove trapped debris effectively. - Rinse with Clean Water
Dampen another clean microfiber cloth with plain water and wipe down the gasket again to remove soap residue that could potentially cause stickiness over time. - Dry Completely
Use a dry towel to pat down all parts of the gasket thoroughly after cleaning; moisture left behind can promote mold growth or degrade rubber over time. - Recheck and Reattach Power Supply
After ensuring that everything is clean and dry, recheck for any spots you may have missed before restoring power to your refrigerator.
Tips To Avoid Common Mistakes
- Avoid using abrasive sponges or harsh cleaners like bleach or ammonia-based products—they can degrade rubber material over time.
- Do not forcefully scrub if you encounter stubborn grime; apply white vinegar directly on stains using a cloth instead and let it sit before wiping away gently.
- Never leave excess moisture on or near gaskets as it encourages mold growth.
Safe Cleaning Frequency
For optimal results, aim to clean your refrigerator’s door gasket every three months as part of routine maintenance—or more frequently if spills occur around this area frequently due to heavy household use.
By following these steps carefully while prioritizing proper tools and techniques, you can ensure that your refrigerator door gasket remains in excellent condition without risking unnecessary wear or damage during cleaning tasks.
Tips for Maintaining Your Refrigerator Gasket
The rubber seal, or gasket, on your refrigerator door may seem like a small detail, but it plays a crucial role in keeping your food fresh and your appliance running efficiently. Proper maintenance can extend the gasket’s lifespan and ensure it continues to seal tightly. Below are practical tips to maintain your refrigerator gasket and keep it functioning optimally over time.
1. Clean Regularly to Prevent Buildup
- Frequency: Clean the gasket at least once every month or as needed if you notice visible debris.
- Cleaning Solution: Use a mild dish soap mixed with warm water for safe cleaning. Avoid harsh chemicals that can degrade the rubber.
- Dampen a soft cloth or sponge with the soapy water mixture.
- Wipe down the entire gasket, focusing on folds or grooves where dirt tends to hide.
- Rinse with clean water using another cloth and dry thoroughly.
2. Inspect for Damage
- Look for visible signs of damage such as splits or peeling edges.
- Run your fingers along the seal to feel for inconsistencies.
- Place a dollar bill between the door and fridge frame; close the door on it. If you can easily pull out the bill while closed, this indicates a weak seal.
If you notice significant damage or poor sealing performance during these checks, consider replacing the gasket.
3. Keep It Dry
- Always wipe down excess moisture after cleaning.
- If condensation builds up around the seal (common in humid environments), use an absorbent towel to keep it dry.
4. Reduce Strain on Your Gasket
- Avoid slamming refrigerator doors shut; repeated impact can cause misalignment or damage.
- Ensure you’re not over-packing your fridge so food items don’t press against the door when closing.
Table: Quick Do’s and Don’ts for Refrigerator Gasket Maintenance
| Do’s | Don’ts |
| Clean regularly with mild soap | Use abrasive cleaners |
| Inspect for cracks periodically | Ignore signs of wear |
| Keep it dry after spills | Leave moisture behind |
| Close doors gently | Slam doors shut |
5. Lubricate Occasionally (If Needed)
- Use petroleum jelly sparingly by applying a thin layer along foldable edges of older seals.
- This helps prevent cracking while keeping the rubber pliable.
By following these maintenance tips consistently, you’ll help maximize energy efficiency, preserve food quality longer, and avoid premature repairs related to faulty seals—all while extending your fridge’s overall performance lifespan.
Tips for Maintaining Your Refrigerator Gasket
The rubber seal, or gasket, on your refrigerator door plays a critical role in maintaining the appliance’s efficiency. A well-maintained gasket ensures a proper seal, keeping cold air inside and warm air out. Neglecting this part of your refrigerator can lead to energy inefficiency and even spoilage of food. Below are practical tips for keeping the gasket in excellent condition and extending its lifespan.
Inspect the Gasket Regularly
- Look for cracks or tears: These can weaken the seal and reduce efficiency.
- Check for dirt buildup: Dust and grime can accumulate over time, preventing the gasket from sealing tightly against the door frame.
- Feel for dryness or brittleness: A dry gasket may crack or lose its elasticity, compromising its ability to function properly.
If you notice any of these signs, take prompt action to avoid further damage.
Clean the Gasket Monthly
- Prepare a cleaning solution: Mix warm water with a few drops of mild dish soap or white vinegar.
- Use a soft cloth or sponge: Avoid abrasive scrubbers that could damage the rubber.
- Wipe down all sides of the gasket: Be thorough, ensuring all folds and crevices are cleaned.
- Dry with a microfiber cloth: Ensure no moisture remains after cleaning to prevent mold growth.
This monthly routine will help keep your gasket free from debris that might inhibit its performance.
Apply a Protective Treatment
- Use food-safe silicone grease or petroleum jelly sparingly along the surface of the clean gasket.
- Apply with a soft cloth or fingertip for even distribution.
- Wipe off any excess product to avoid attracting dust.
This step not only extends the life of your gasket but also improves its elasticity.
Avoid Overloading Your Fridge Door
- Store lightweight items like condiments in door shelves instead of heavier objects like milk jugs or large juice bottles.
- Regularly reorganize shelf contents to reduce strain on both hinges and gaskets.
By preventing unnecessary pressure on your refrigerator door, you’ll help maintain an even seal along the edges.
Address Issues Promptly
| Problem | Suggested Solution |
| Cracks/Tears | Replace only affected parts if possible |
| Persistent Dirt/Mold | Deep clean using specialized cleaning agents |
| Poor Fit | Consult an appliance technician for adjustments |
Timely action reduces energy waste and ensures your fridge operates effectively.
Maintaining your refrigerator’s gasket doesn’t take much effort but offers significant benefits in terms of energy savings and food preservation. With consistent care using these tips, you’ll improve both performance and longevity while avoiding costly repairs down the line.
Tips for Maintaining Your Refrigerator Gasket
Regular Inspection
- Check for Visible Damage: Inspect the gasket regularly for cracks, tears, or signs of wear. Damaged spots compromise sealing ability and may require replacement.
- Test the Seal: Place a piece of paper or thin card between the door and refrigerator frame. Close the door and see if you can pull it out easily. If the paper slides out without resistance, it may indicate a weak seal.
Keep It Clean
- Wipe Weekly: To prevent buildup of grime, wipe down the gasket weekly using a damp cloth and mild soap solution. Avoid abrasive cleaners that can damage the rubber.
- Target Crevices: Use an old toothbrush or a soft-bristle brush to clean hard-to-reach folds in the gasket where dirt often collects.
Lubricate to Prevent Drying Out
Rubber gaskets can dry out over time, leading to cracks or loss of elasticity. Periodically apply a small amount of petroleum jelly or food-safe silicone lubricant along the surface to keep it flexible and soft.
| Lubricant Options | Usage Instructions | Frequency |
| Petroleum Jelly | Apply sparingly with your finger along clean edges | Every 2 months |
| Food-Safe Silicone Oil | Use a cloth to spread evenly across rubber surface | Every 4–6 months |
Maintain Consistent Temperature
- Avoid frequent temperature fluctuations inside your refrigerator as this can strain the gasket by causing it to expand and contract frequently. Try not to leave doors open unnecessarily.
Address Spills Promptly
Spilled liquids can seep into gasket crevices and lead to mold growth over time. – Wipe up spills immediately with warm water and mild soap. – Dry thoroughly with a clean cloth after cleaning.
Replace When Necessary
If your refrigerator door still doesn’t close properly after cleaning and lubricating the gasket—or if you notice extensive damage—it’s best to replace it entirely rather than risking energy inefficiencies or spoiled food.
By following these steps regularly, you’ll extend not only the life of your refrigerator’s seal but also enhance its performance overall in keeping cool air where it belongs—inside your fridge!
Tips for Maintaining Your Refrigerator Gasket
Proper care and maintenance of your refrigerator gasket are essential to prolonging its lifespan and ensuring your appliance functions efficiently. The gasket, or rubber seal around the door, plays a crucial role in maintaining a secure seal that keeps cold air inside and warm air out. Over time, wear-and-tear, dirt buildup, and improper handling can compromise its performance. Below are actionable tips to keep your refrigerator gasket in optimal condition.
1. Clean the Gasket Regularly
- Use a mild cleaning solution: Mix warm water with a few drops of dish soap. Avoid harsh chemicals like bleach that may degrade rubber.
- Soft tools only: Use a soft cloth or sponge to gently scrub away dirt. For hard-to-reach crevices, try using an old toothbrush.
- Dry thoroughly: After cleaning, use a dry towel or microfiber cloth to remove any moisture from the gasket.
2. Inspect for Damage
- Tears or cracks: Check if any part of the rubber appears brittle or damaged.
- Warping: Ensure that the gasket sits flush against the refrigerator frame without gaps.
- Mold or mildew spots: These can signal excess moisture buildup and need immediate attention.
If you notice significant damage like large tears or complete loss of elasticity, consider replacing the gasket promptly.
3. Keep It Moisturized
- Apply a thin layer of petroleum jelly along the surface of the gasket every few months.
- Use silicone-based lubricants specifically designed for rubber components if you prefer an alternative.
These steps help maintain elasticity and prevent premature aging.
4. Adjust Refrigerator Door Alignment
- Closing it slowly and observing if it meets resistance at certain angles.
- Checking for uneven gaps between the door and frame when closed.
If misaligned, consult your refrigerator’s manual for adjustment steps or call a professional technician.
5. Avoid Overloading Shelves
- Distribute weight evenly across shelves instead of storing heavy items (like gallon containers) exclusively in door compartments.
Maintaining proper balance ensures prolonged effectiveness of both hinges and gaskets.
Quick Reference Table: Do’s & Don’ts
| Do’s | Don’ts |
| Clean regularly with mild soap | Use abrasive scrubbing tools |
| Dry thoroughly after cleaning | Leave moisture trapped in folds |
| Apply petroleum jelly periodically | Pull excessively on rubber edges |
| Inspect for tears every few months | Ignore signs of warping or cracking |
6. Maintain Proper Temperature Settings
- Keep internal temperature settings between 37°F (3°C) and 40°F (4°C) in refrigerators.
- Ensure proper freezer settings around 0°F (-18°C).
Stable temperatures reduce unnecessary wear while maximizing energy efficiency.
By following these maintenance practices consistently, you’ll not only extend your refrigerator gasket’s lifespan but also enhance overall appliance performance while reducing energy costs over time.