Why Do I Need to Clean My Toothbrush Holder
Clean My Toothbrush Holder
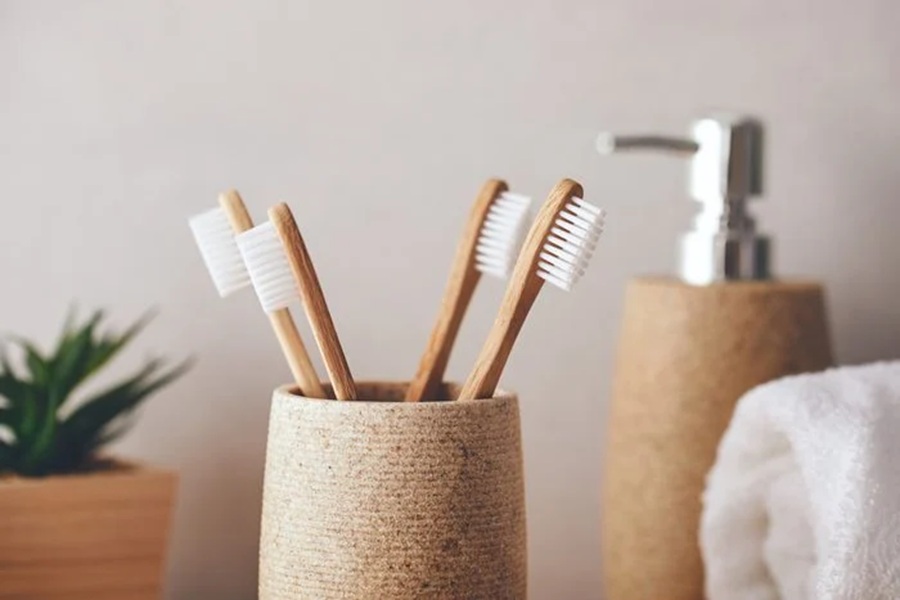
Keeping your toothbrush holder clean is an essential part of maintaining proper oral hygiene and ensuring a healthy bathroom environment. Often overlooked, this small yet vital accessory can harbor germs, bacteria, and even mold over time if not cleaned regularly. Understanding why cleaning your toothbrush holder matters can help you make it a regular part of your cleaning routine.
Preventing Germ Build-Up
Toothbrush holders are constantly exposed to water and moisture from your toothbrush, as well as from the general humidity in a bathroom. This creates an ideal environment for bacteria, mold, and mildew to thrive. Over time, these microorganisms can build up on the surfaces of the holder and potentially transfer back onto your toothbrush—and subsequently into your mouth—leading to health concerns such as gum infections or illnesses.
- Saliva residue dripping from the toothbrush.
- Water pooling at the base of the holder.
- Airborne particles in bathrooms (especially near toilets).
Ensuring Better Oral Hygiene
Your toothbrush is one of the tools you rely on daily for maintaining oral hygiene. However, storing it in an unclean holder negates its purpose by exposing it to harmful contaminants. Regular cleaning ensures that your brush remains sanitary between uses, directly contributing to better overall oral health.
Avoiding Lingering Odors
An unclean toothbrush holder often develops unpleasant odors due to stagnant water or decaying organic matter left behind by toothpaste residue or saliva. Cleaning helps eliminate odors while keeping your bathroom fresh-smelling.
Prolonging Durability of Your Holder
Frequent cleaning also ensures that dirt and grime don’t corrode or stain materials like plastic, ceramic, or metal over time. This is particularly relevant if you’re using a high-quality or decorative toothbrush holder that you’d like to keep in pristine condition.
How Does Moisture Contribute?
| Source | Effect | Preventative Action |
| Water Drips | Forms pools at base | Empty water frequently after use |
| Bathroom Steam | Adds humidity | Improve ventilation with exhaust fan |
| Damp Brushes | Keeps area wet longer | Shake excess water before storing |
By reducing excess moisture around your toothbrush holder through better habits and design (like opting for ventilated models), you can prevent problems caused by stagnant environments.
Key Takeaways
- A dirty toothbrush holder can compromise both personal hygiene and overall health due to bacteria build-up.
- Moist environments act as breeding grounds for harmful microorganisms.
- Cleaning ensures that lingering odors are minimized while extending the life of your bathroom accessory.
How to Clean a Toothbrush Holder
Cleaning your toothbrush holder regularly is essential for maintaining hygiene and preventing the buildup of germs, mold, and grime. Toothbrush holders can accumulate toothpaste residue, water stains, and even bacteria from the bathroom environment. Below is a simple yet effective guide to ensure your toothbrush holder stays clean and safe for daily use.
1. Gather Necessary Supplies
Before you start cleaning, you’ll need the right tools and materials to get the job done efficiently:
– Mild dish soap or antibacterial cleaner
– Warm water
– A small brush (such as an old toothbrush) or pipe cleaner
– Microfiber cloth or paper towels
– White vinegar (optional, for deep cleaning)
– Baking soda (optional, for odor removal)
Having these items ready will make the process both easier and more effective.
2. Remove All Contents
Start by emptying your toothbrush holder completely: – Take out all toothbrushes or other items stored in it. – If there are detachable parts (e.g., lids, trays), disassemble them. This ensures you can clean every nook and cranny.
3. Wash with Soap and Water
For routine cleaning:
1. Fill a basin or sink with warm water mixed with a few drops of dish soap or antibacterial cleaner. 2. Submerge the toothbrush holder in soapy water if it’s made of durable materials like plastic or ceramic. 3. Use a small brush or sponge to scrub both the inside and outside surfaces gently. 4. Pay extra attention to any grooves or compartments where grime might accumulate.
For electric toothbrush holders with non-detachable electronics: – Use a damp microfiber cloth to wipe down exterior surfaces. – Avoid submerging any electrical components in water.
4. Address Stubborn Residue
If there are stubborn stains or buildup:
– White Vinegar Solution: Soak the holder in a solution made of equal parts white vinegar and warm water for about 15–20 minutes before scrubbing it again. This helps dissolve hard-water stains and kill bacteria naturally. – Baking Soda Paste: Create a paste using baking soda and water, apply it to problem areas, then scrub gently until residues lift off.
5. Rinse Thoroughly
Once cleaned: 1. Rinse the toothbrush holder thoroughly under running water to remove any soap residue. 2. Ensure that no cleaning agents are left behind—they can contaminate your toothbrushes later.
6. Dry Completely
Moisture is one of the main contributors to mold growth in bathroom accessories: – After rinsing, dry the holder thoroughly using a microfiber cloth or let it air dry completely on a clean surface before reassembling its parts. – For electric holders, ensure no moisture enters electronic components during this step.
7. Sanitize Periodically (Optional)
For an added layer of cleanliness: – Disinfect your toothbrush holder weekly by wiping it down with rubbing alcohol or disinfectant wipes after regular washing.
Use this step especially if someone in your household has been sick recently to prevent bacterial spread.
Quick Table: Cleaning Frequency Based on Material
| Material | Recommended Frequency | Special Tips |
| Plastic | Weekly | Avoid abrasive scrubbing that may scratch surface |
| Ceramic/Glass | Weekly | Handle with care; avoid sudden temperature changes |
| Stainless Steel | Weekly | Wipe immediately after rinsing to prevent rust |
| Electric Components | Every Few Days (Exterior Only) | Use only damp cloth—no submersion |
By following these steps consistently, you’ll maintain not only the cleanliness of your toothbrush holder but also promote better oral health by minimizing exposure to harmful germs around your dental tools.
How to Clean an Electric Toothbrush Holder
Cleaning an electric toothbrush holder requires a slightly different approach compared to standard toothbrush holders due to the design and electrical components often involved. Proper maintenance not only ensures hygiene but also prolongs the life of your device. Here’s a step-by-step guide to help you effectively clean your electric toothbrush holder while avoiding damage to its functional parts.
Why It’s Different From Regular Toothbrush Holders
Electric toothbrush holders are often designed with compartments or attachments for charging, making them more complex than simple plastic or ceramic holders. Dirt, moisture, and toothpaste residue tend to collect in small crevices or around charging ports, which can lead to mold growth or electrical issues if not cleaned properly.
Materials You’ll Need
- Warm water
- Mild dish soap or antibacterial cleaner
- A soft-bristled brush (like an old toothbrush)
- Microfiber cloth or lint-free towel
- Cotton swabs for tight spaces
- Disinfectant wipes (optional)
Avoid using abrasive materials like steel wool as they may scratch or damage delicate surfaces.
Step-by-Step Cleaning Instructions
- Unplug the Holder:
If your electric toothbrush holder is connected to a power source, be sure to unplug it before cleaning. This ensures safety and prevents accidental damage from water exposure. - Check if your electric toothbrush holder has removable parts such as trays, caps, or inserts.
- Remove detachable pieces for easier access during cleaning.
- Rinse any non-electrical parts under warm water to loosen debris like dried toothpaste.
- Use mild dish soap for greasy residue buildup.
- Scrub Gently:
Using a soft-bristled brush or old toothbrush: - Clean each part thoroughly, paying special attention to corners and crevices where grime tends to accumulate.
- For particularly stubborn spots, allow parts to soak in soapy water for 10–15 minutes before scrubbing again.
- Wipe Electrical Components:
For portions that cannot be submerged due to electrical components: - Dampen a microfiber cloth with lightly soapy water.
- Wipe down these areas carefully without letting excessive moisture seep into openings such as charging ports.
- Tight Spaces and Charging Ports:
Use cotton swabs dipped in soapy water (or disinfectant wipes) to clean tight spaces like grooves around the base of the charger. - Rinse Non-Electrical Parts:
After scrubbing, rinse off all soap residue under running water from removable trays or other parts that are safe for rinsing. - Sanitize If Needed (optional):
Apply disinfectant spray on non-electrical surfaces after drying if additional sterilization is desired. - Dry Completely:
Allow all components—both removable and non-removable—to air dry completely before reassembling them back together. Use a towel for faster drying if needed but ensure no lingering moisture remains near electronic sections. - Reassemble and Reconnect:
Once fully dry, reattach all parts and plug your electric toothbrush holder back into its power source.
Additional Tips for Maintaining Your Electric Toothbrush Holder
- Keep it in a well-ventilated area away from constant humidity (e.g., avoid placing it near shower steam).
- Allow your toothbrush and accessories to dry completely before storing them in the holder.
- Consider using a protective case if your setup includes multiple pieces prone to splatter buildup.
- Clean up spills immediately—especially toothpaste drips—to prevent residue hardening over time.
By incorporating these steps into your routine care practices, you can keep your electric toothbrush holder both hygienic and functional without risking damage during cleaning sessions!
How Often Should You Clean It
Maintaining a clean toothbrush holder is an essential part of your oral hygiene routine. While many people pay close attention to the cleanliness of their toothbrushes, the holder often gets overlooked. However, this small accessory can quickly become a haven for bacteria, mold, and mildew due to its frequent exposure to water and toothpaste residue. Knowing how often to clean it ensures you create a hygienic environment free from harmful microorganisms.
Factors That Determine Cleaning Frequency
The frequency with which you should clean your toothbrush holder depends on several factors:
– Household Size: In households with multiple users sharing a single holder, cleaning may need to be more frequent since there’s more moisture and bacterial buildup.
– Type of Holder: Some holders, such as open designs or wall-mounted options, accumulate less grime compared to enclosed ones that trap moisture and debris inside.
– Environmental Conditions: High humidity levels in bathrooms can lead to faster mold growth within holders. If you live in a humid climate or don’t have proper bathroom ventilation, consider cleaning more often.
General Guidelines for Cleaning Frequency
| Type of Holder | Recommended Cleaning Frequency |
| Open-Air Toothbrush Holders | Once per week |
| Enclosed Toothbrush Holders | Twice per week |
| Electric Toothbrush Holders | Weekly (or after each battery recharge) |
Signs It’s Time to Clean Your Toothbrush Holder
Even if you follow the suggested cleaning schedules, there may be situations where extra attention is needed. Look out for these signs that indicate it’s time for immediate cleaning:
– Visible discoloration inside or around the holder caused by toothpaste residue or mold growth.
– Foul odors emanating from the holder due to bacterial buildup.
– Pooled water at the bottom of enclosed holders, which creates a breeding ground for germs.
Tips To Make Regular Cleaning Easier
To maintain a healthy routine and keep the task manageable:
1. Set Reminders: Use calendar alerts or phone alarms as gentle nudges weekly or bi-weekly.
2. Incorporate into Bathroom Cleaning: Clean your toothbrush holder while wiping down bathroom surfaces—it saves time and effort when done together.
3. Use Quick Rinses Daily: After brushing your teeth, give the holder a quick rinse under running water to remove fresh debris before it builds up.
By following these practices and understanding how frequently to clean based on your specific situation, you can ensure your toothbrush holder stays sanitary while extending its lifespan as part of a healthy oral hygiene routine.
Step-by-Step Guide to Cleaning a Toothbrush Holder
Cleaning a toothbrush holder may seem like a minor task, but it plays an essential role in maintaining oral hygiene and preventing the accumulation of bacteria. Follow this step-by-step guide to ensure your toothbrush holder is spotless and sanitary.
Step 1: Gather Your Supplies
- A small brush or old toothbrush (useful for scrubbing crevices)
- Optional: White vinegar or baking soda for deep cleaning
Step 2: Empty the Toothbrush Holder
Remove all items from the holder, including toothbrushes, toothpaste, and other accessories. This ensures that you can clean every part of the holder thoroughly without obstructions. Take this opportunity to examine your toothbrushes and replace any that look worn or frayed.
Step 3: Rinse Off Debris
Rinse the toothbrush holder under warm running water to remove any loose debris, toothpaste residue, or soap scum. Hold it at an angle so that any trapped water inside drains out completely.
Step 4: Wash with Soap or Cleaner
- Fill a sink or basin with warm water.
- Add a few drops of mild dish soap or antibacterial cleaner. Mix until sudsy.
- Submerge the toothbrush holder and let it soak for about five minutes if it’s heavily soiled.
- Use a small brush or an old toothbrush to scrub both the interior and exterior surfaces, paying attention to corners and slots where buildup often occurs.
Step 5: Deep Clean (Optional)
If your toothbrush holder has stubborn stains or smells: – For white vinegar: Mix equal parts vinegar and warm water in a bowl. Let the holder soak for about 15 minutes before scrubbing it clean. – For baking soda: Sprinkle baking soda onto damp areas of the holder and scrub gently with your brush for extra cleaning power.
These natural cleaners are excellent at breaking down mineral deposits, stains, and lingering odors.
Step 6: Rinse Thoroughly
After scrubbing, rinse the entire holder under warm running water until no soap residue remains. Any leftover cleaner can attract dirt over time if not rinsed properly.
Step 7: Dry Completely
Use a microfiber cloth to dry the toothbrush holder thoroughly, especially inside any compartments where moisture tends to collect. Alternatively, air-dry it upside down on a dish rack to ensure all excess water drains out completely.
Step 8: Replace Items Carefully
Once dry, return your toothbrushes and other items to their places within the clean holder. To avoid contamination: – Ensure your brushes are rinsed off before being placed back inside. – Position brushes upright so they can air-dry between uses.
| Cleaning Frequency | Suggested Timeframe |
| Quick rinse | Every couple of days |
| Full cleaning | Weekly |
| Deep cleaning | Once every two weeks |
Maintaining this routine will prevent grime from building up and keep your bathroom environment healthier overall.
Common Mistakes to Avoid When Cleaning
Even with the best intentions, cleaning a toothbrush holder can sometimes go wrong if not approached correctly. To ensure you maintain proper hygiene and avoid damaging your toothbrush holder, it’s important to steer clear of certain common mistakes. Below are some of the key missteps people often make along with tips on how to avoid them.
1. Not Cleaning It Often Enough
- The Mistake: Neglecting regular cleaning allows bacteria, mold, and mildew to build up in your toothbrush holder.
- Why It Matters: A dirty toothbrush holder can harbor harmful germs that may transfer to your toothbrush and then to your mouth.
- How to Avoid: Schedule a thorough cleaning at least once a week, or more frequently if the environment is particularly humid.
2. Using Harsh Chemicals
- The Mistake: Opting for strong chemical cleaners like bleach or ammonia without considering the material of the toothbrush holder.
- Why It Matters: These chemicals can damage holders made from plastic, ceramic, or stainless steel and leave behind residues that may be unsafe.
- How to Avoid: Use mild dish soap, white vinegar, or baking soda for most materials. Always check manufacturer guidelines if available.
3. Ignoring Hard-to-Reach Areas
- The Mistake: Focusing only on visible parts of the holder while neglecting small nooks, crevices, or drainage holes where water stagnates.
- Why It Matters: These areas are prime spots for bacteria and mold growth due to trapped moisture and grime buildup.
- Use a small brush (like an old toothbrush) or cotton swabs for tight spaces.
- Rinse thoroughly after cleaning.
4. Skipping the Drying Process
- The Mistake: Reassembling or using the toothbrush holder immediately after washing without ensuring it’s completely dry.
- Why It Matters: A damp environment promotes bacterial growth and negates the benefits of cleaning.
- After washing, wipe down all surfaces with a clean towel.
- Allow components to air-dry fully before reassembly.
5. Overlooking Material-Specific Care Instructions
- The Mistake: Treating all toothbrush holders as though they require identical cleaning methods.
- Why It Matters: Materials like stainless steel need different care compared to ceramic or plastic to maintain their longevity and finish.
- How to Avoid:
- Use mild soap and water; dry immediately with a microfiber cloth to prevent water spots.
- Avoid abrasive scrubbers; use gentle cleaners safe for ceramics.
- Stick with non-abrasive sponges; avoid hot water that might warp the plastic.
6. Not Disinfecting Regularly
- The Mistake: Failing to incorporate any disinfecting step into your routine cleaning process.
- Why It Matters: While general washing removes dirt, it doesn’t necessarily kill germs lingering on surfaces.
- Once cleaned with soap and water, wipe down with a vinegar solution (1 part white vinegar : 2 parts water) or use disinfectant wipes safe for household items.
Summary Table of Common Mistakes & Fixes
| Common Mistake | Why It’s Important | How To Fix |
| Not Cleaning Often Enough | Prevents bacteria buildup | Clean weekly |
| Using Harsh Chemicals | Can damage materials | Use mild soap/vinegar |
| Ignoring Hard-to-Reach Areas | Bacteria/mold thrive there | Use brushes/swabs |
| Skipping Drying | Moisture encourages germs | Wipe & air dry fully |
| Overlooking Material-Specific Care | Shortens product lifespan | Follow care instructions |
| Not Disinfecting | Doesn’t kill remaining germs | Incorporate disinfectant step |
By avoiding these common pitfalls when caring for your toothbrush holder, you’ll ensure it stays clean longer while promoting better oral hygiene practices overall.
Common Mistakes to Avoid When Cleaning
Cleaning a toothbrush holder may seem like a straightforward task, but there are common mistakes people often make that can reduce its effectiveness or even lead to hygiene issues. Below are some of the most common oversights and how you can avoid them.
1. Neglecting to Clean the Holder Regularly
- Mistake: Many people wait too long between cleanings, allowing bacteria, mold, and residue to build up.
- Why It’s a Problem: Prolonged neglect can lead to unpleasant odors, discoloration, and unhealthy bacteria near your oral hygiene products.
- Solution: Schedule a regular cleaning routine—ideally once a week or at least every two weeks—to prevent buildup.
2. Not Disinfecting Properly
- Mistake: Simply rinsing the holder with water or soap may not be enough to kill all germs and bacteria.
- Why It’s a Problem: Without proper disinfection, harmful microorganisms can thrive in the moist environment of the holder.
- Solution: Use disinfectants such as white vinegar, hydrogen peroxide, or antibacterial sprays after washing for deeper cleaning.
| Disinfectant | How to Use |
| White Vinegar | Soak the holder in diluted vinegar (50/50 solution) for 10–15 minutes before rinsing thoroughly. |
| Hydrogen Peroxide | Rinse the holder with hydrogen peroxide and let it air-dry completely for maximum effect. |
3. Forgetting Hard-to-Reach Areas
- Mistake: Overlooking crevices or tight corners where residue tends to accumulate is a frequent error.
- Why It’s a Problem: These hidden areas often harbor grime and bacteria that are difficult to remove without proper attention.
- Solution: Use tools like small brushes (e.g., an old toothbrush) or cotton swabs to scrub narrow spaces effectively.
4. Using Harsh Cleaning Products
- Mistake: Employing abrasive cleaners, such as bleach or strong chemical solutions, without checking compatibility with your holder material (e.g., plastic or stainless steel).
- Why It’s a Problem: Harsh chemicals can damage finishes, causing discoloration or cracks in plastic holders over time. They may also leave behind residues harmful for health if not rinsed thoroughly.
- Check manufacturer guidelines for safe cleaning methods.
- Opt for gentle yet effective cleaners like dish soap mixed with warm water.
5. Skipping Drying After Cleaning
- Mistake: After washing the toothbrush holder, many people forget to dry it fully before reassembling or placing items back inside.
- Why It’s a Problem: Leaving moisture inside creates an ideal breeding ground for bacteria and mold growth.
- Use a clean towel to wipe all surfaces dry after cleaning.
- Allow additional air-drying time before putting your toothbrushes back in place.
6. Ignoring Your Toothbrush While Cleaning the Holder
- Mistake: Some focus solely on cleaning the holder but fail to inspect their toothbrushes for cleanliness at the same time.
- Why It’s a Problem: Contaminated toothbrushes defeat the purpose of maintaining hygiene around your oral care tools.
- Soak toothbrushes briefly in mouthwash or hot water while you clean their holder.
- Replace old toothbrushes regularly as recommended by dental professionals (every three months).
By understanding these common mistakes and how they impact hygiene, you’ll be better equipped to maintain your toothbrush holder effectively without compromising on cleanliness standards. Small adjustments in your routine can go a long way toward ensuring both your oral health tools and their storage environment remain sanitary over time!