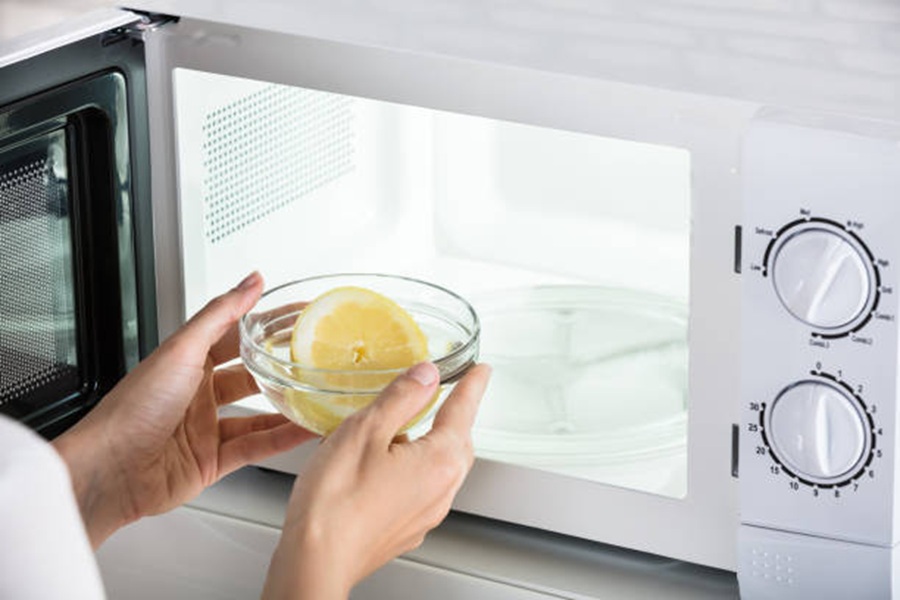
Cleaning the Microwave
Why Use Lemon for Microwave Cleaning?
- Natural degreaser: The citric acid in lemons cuts through stubborn grease and food residue.
- Odor eliminator: Lemons neutralize strong food smells like garlic or curry.
- Chemical-free solution: No need for harsh chemicals that can leave residual fumes.
Step-by-Step Guide to Clean Your Microwave with Lemon
- 1 lemon (medium to large)
- 1 cup of water
- A microwave-safe bowl
- A clean cloth or sponge
- Cut the lemon in half and squeeze the juice into the bowl of water.
- Drop the squeezed lemon halves into the bowl for added cleaning power.
- Place the bowl in your microwave.
- Heat on high power for 3–5 minutes until the water begins to boil and steam fills the interior.
- Allow the bowl to sit inside with the door closed for another 5 minutes. This helps loosen dried-on food particles.
- Carefully remove the hot bowl using oven mitts or a towel.
- Use a damp cloth or sponge to wipe down all surfaces inside the microwave, including walls, ceiling, turntable, and door.
- For extra shine on glass doors, dip a corner of your cloth into any remaining lemon-water mixture before wiping.
Tips for Best Results
- If stains are particularly stubborn, sprinkle a small amount of baking soda onto your damp sponge before wiping.
- For regular upkeep, clean your microwave with this method once every two weeks or after cooking particularly messy foods like tomato sauce.
Maintenance Table
| Frequency | Task |
| After each use | Wipe spills immediately to prevent hardening |
| Bi-weekly | Perform full steam-clean routine with lemon |
| Monthly | Inspect vents and exterior; clean if necessary |
By incorporating this simple cleaning hack into your routine, you’ll keep your microwave not only spotless but also free of lingering odors—all without relying on synthetic products.
Scrubbing Sinks
Sinks, whether in the kitchen or bathroom, are one of the most frequently used areas in a home, and inevitably, they can accumulate grime, stains, and unpleasant odors. Lemon is an excellent natural cleaning agent that not only cleans effectively but also leaves a fresh and zesty scent behind. Here’s how you can use lemon to scrub your sinks until they shine.
Why Lemon Works for Sink Cleaning
Lemons contain citric acid, which is effective at breaking down grease and dissolving mineral deposits like lime and calcium. Additionally, lemons have mild antibacterial properties that help to sanitize surfaces, making them an ideal choice for cleaning sinks where germs tend to gather.
Materials You’ll Need
- A fresh lemon
- Baking soda
- A soft sponge or cloth
- Warm water
- Optional: salt for extra scrubbing power
Step-by-Step Guide to Scrubbing Sinks with Lemon
- Prepare the Surface
Remove any dishes or items from the sink and rinse it thoroughly with warm water to loosen debris. - Cut a Lemon in Half
Slice a fresh lemon in half. If you’re dealing with heavily stained areas or stubborn grime, sprinkle a generous layer of baking soda directly onto the cut surface of the lemon. The combination of citric acid from the lemon and the mild abrasiveness of baking soda makes for an excellent natural scrub. - Scrub the Sink
Using the cut side of the lemon (with or without baking soda), begin scrubbing the sink surface in circular motions. Focus on areas around drains, faucets, and corners where grime tends to build up. For extra dirty spots, sprinkle some salt on top of those areas before scrubbing with the lemon. - Rinse Thoroughly
Once you’ve scrubbed every part of the sink, rinse it thoroughly with warm water to remove residue from both the lemon juice and any loosened grime. - Polish Chrome Fixtures (Optional)
If your sink has chrome fixtures such as handles or faucet spouts, rub them lightly with a lemon half to remove water spots and give them a brilliant shine. - Dry and Buff
Use a clean microfiber cloth to dry off all surfaces after rinsing. This not only prevents water spots but also enhances shine.
Tips for Maintaining a Clean Sink
- To prevent buildup between cleanings, pour some leftover squeezed lemon juice into your drain weekly—it helps disinfect while neutralizing odors.
- Use this method regularly (once every 1–2 weeks) to keep your sinks hygienic without needing harsh chemicals.
- For stainless steel sinks specifically: After scrubbing with lemon, lightly coat them with olive oil using a soft cloth for added protection against streaks and stains.
| Material | Benefits |
| Lemon | Removes stains; disinfects naturally |
| Baking Soda | Gentle abrasive; lifts tough residue |
| Salt (optional) | Adds extra scrubbing power |
Using lemons to scrub your sinks is not only efficient but also eco-friendly—a simple way to maintain cleanliness while avoiding chemical-laden cleaners in your home environment. With consistent care using these natural methods, you’ll enjoy sparkling clean sinks every day!
Cleaning Cutting Boards
Cutting boards are among the most frequently used kitchen tools, and they require proper cleaning to maintain hygiene and longevity. Lemon, with its natural acidity and antibacterial properties, is a powerful yet eco-friendly solution for cleaning cutting boards. By using lemon, you can effectively sanitize both wooden and plastic cutting boards without resorting to harsh chemicals.
Why Use Lemon?
- Natural Sanitizer: The citric acid in lemon helps kill bacteria and neutralize odors.
- Stain Removal: Lemon is effective at removing stubborn stains caused by foods like beets or turmeric.
- Environmentally Friendly: Unlike chemical cleaners, lemon is biodegradable and safe for the environment.
Effective Steps to Clean Cutting Boards with Lemon
- Start by rinsing the cutting board under warm water to remove food particles.
- Use a brush or sponge for tougher residues.
- Sprinkle an even layer of coarse salt (such as kosher salt) across the surface of the board. Salt acts as a gentle abrasive that helps scrub away stains without damaging the material.
- Take a fresh lemon, slice it in half, and rub the cut side directly onto the salted surface of the board.
- Squeeze gently as you scrub to release juice while applying pressure to lift stains and disinfect simultaneously.
- For areas with noticeable stains or odors (e.g., garlic or onion smells), apply extra pressure with the lemon half.
- Let the acidic juice sit on those spots for about 5 minutes before scrubbing again.
- Rinse off all salt and lemon residue under warm water.
- Ensure no traces of lemon remain if using a wooden cutting board to prevent drying out over time.
- Pat dry immediately with a clean towel.
- For wooden cutting boards, allow them to air dry upright in an area with good ventilation.
Tips for Wooden vs. Plastic Cutting Boards
| Board Type | Cleaning Considerations |
| Wooden Cutting Boards | Avoid soaking in water as this can cause warping; apply mineral oil occasionally to prevent drying out |
| Plastic Cutting Boards | Can be easier to sanitize; may benefit from additional use of baking soda alongside lemon |
Preventative Maintenance
- Avoid using harsh detergents that can degrade natural wood fibers over time.
- Regularly treat wooden boards with food-grade mineral oil after cleaning sessions involving acidic ingredients like lemons.
- Rotate between multiple cutting boards designated for specific tasks (e.g., raw meat vs vegetables) to avoid cross-contamination.
Using lemons is not only effective but also aligns well with sustainable home practices, making it an excellent choice for maintaining clean and fresh-smelling cutting boards while being kind to both your health and the planet.
Cleaning Cutting Boards
Cutting boards are an essential kitchen tool, but they can quickly accumulate stains, odors, and bacteria from the foods we prepare. Lemon is a natural and effective way to clean cutting boards while leaving them fresh and sanitized. Here’s how you can use lemon to maintain your cutting boards, whether they’re wooden or plastic.
Why Lemon Works for Cutting Boards
Lemons are rich in citric acid, which breaks down grease, eliminates odors, and acts as a natural antibacterial agent. This makes lemon ideal for cleaning surfaces that come into contact with raw meats, garlic, onions, and other strong-smelling foods.
Steps to Clean Your Cutting Board With Lemon
- Scrape off any food particles or residue using a spatula or dish scraper.
- Rinse the board under warm running water.
- Slice a fresh lemon in half.
- For added effectiveness on tough stains, sprinkle coarse salt or baking soda onto the surface of the board.
- Use one half of the lemon as a scrubber.
- Press it firmly onto the cutting board while rubbing in circular motions.
- The combination of citric acid and abrasive salt (or baking soda) helps lift stains and remove odors.
- For deep cleaning or stubborn spots, let the lemon juice sit on the surface for 5–10 minutes to break down grime further.
- Wash the board under warm water to remove any residue.
- For wooden boards, avoid soaking them in water to prevent warping; instead, wipe them dry immediately with a clean towel.
- If you’re cleaning a wooden cutting board, consider applying food-grade mineral oil after drying to restore its finish and prevent cracking over time.
Additional Tips for Maintaining Cutting Boards
- Avoid using harsh chemicals on cutting boards since they can seep into porous materials like wood.
- To avoid cross-contamination between different food types (e.g., raw meat vs. vegetables), clean your cutting boards thoroughly after each use.
- Regularly sanitize your cutting boards by incorporating lemon cleaning into your weekly routine.
| Material | Best Cleaning Approach with Lemon |
| Wooden | Use lemon + coarse salt; avoid soaking |
| Plastic | Use lemon + baking soda; safe to rinse thoroughly |
By integrating this simple yet effective method of cleaning your cutting boards with lemon, you’ll not only maintain their cleanliness but also ensure that your kitchen remains a safe space for preparing meals.
De-Griming Glass Coffee Pots
Glass coffee pots can accumulate stubborn stains and oils over time, particularly from prolonged exposure to brewed coffee. These residues not only affect the appearance of your coffee pot but can also influence the flavor of your coffee. Fortunately, lemons provide a natural, eco-friendly way to break down oils and remove stains without relying on harsh chemicals.
Why Use Lemon for Cleaning Glass Coffee Pots?
Lemon’s natural acidity makes it a powerful cleaning agent. Its citric acid effectively cuts through grease, mineral buildup, and tannin stains left behind by coffee. Additionally, lemon is safe to use on glass and won’t leave behind harmful residues or odors that might impact future brews.
Step-by-Step Guide to Clean a Glass Coffee Pot with Lemon
- Rinse the Pot:
Empty any remaining coffee or water from the pot and give it a quick rinse with warm water. - Slice one fresh lemon into quarters.
- Squeeze the juice directly into the pot.
- Add the lemon quarters into the pot for extra scrubbing power.
- Pour in about ½ cup of coarse salt (such as sea salt) as an abrasive agent.
- Fill the pot halfway with warm water.
- Scrub Gently:
Swirl the solution around in circular motions, allowing the salt and lemon pieces to scrub against the interior surface of the glass. Pay extra attention to heavily stained areas. - Let It Sit:
For tough stains, let the mixture sit in the pot for 10-15 minutes. The citric acid will help break down any stubborn deposits during this time. - Rinse Thoroughly:
Empty out the solution and rinse thoroughly with warm water until all residue is gone. - Dry Completely:
To prevent water spots or streaks on your glass coffee pot, dry it immediately using a clean microfiber cloth.
Tips for Maintaining a Sparkling Coffee Pot
- Daily Rinsing: After each use, rinse your coffee pot with warm water to remove any fresh residue before it hardens or stains.
- Weekly Refreshing: Perform this lemon cleaning routine once per week if you drink coffee regularly.
- Avoid Abrasive Tools: Never use steel wool or harsh scrubbers on glass surfaces as they may cause scratches over time.
- Prevent Mineral Buildup: For areas with hard water, consider boiling equal parts white vinegar and water in your coffee machine every month (without brewing), followed by multiple rinses.
Comparing Natural Lemon Cleaning vs Commercial Cleaners
| Feature | Lemon-Based Cleaning | Commercial Cleaners |
| Eco-Friendly | Yes | No (many contain harsh chemicals) |
| Safe for Food Surfaces | Yes | Sometimes |
| Cost | Low | Moderate to High |
| Residue-Free Finish | Yes | Depends on product |
Using lemons isn’t just effective—it’s also an environmentally conscious choice that helps reduce reliance on chemical products while delivering great results for your home items like glass coffee pots.
Cleaning Grout
Why Lemon Works for Grout
- Natural acidity: Lemon juice contains citric acid, which helps dissolve stains and mineral deposits.
- Antibacterial properties: The natural compounds in lemon can help kill bacteria and inhibit mold growth.
- Eco-friendly alternative: Unlike chemical cleaners, lemon juice is non-toxic and safe for you and your family.
Tools You’ll Need
- Fresh lemons or bottled lemon juice
- Baking soda (optional)
- A small scrub brush or old toothbrush
- Microfiber cloth or sponge
- Warm water
Step-by-Step Cleaning Process
- Squeeze fresh lemon juice into a bowl.
- For tougher stains, mix equal parts of lemon juice and baking soda to form a thick paste.
- Use a sponge or cloth to apply the lemon juice directly onto the grout lines.
- If using the paste mixture, spread it onto the grout with your fingers or a small spoon.
- Allow the solution to sit on the grout for about 10–15 minutes. This gives the acid time to break down stubborn stains.
- Take a small scrub brush or an old toothbrush and gently scrub along the grout lines in circular motions.
- Pay extra attention to areas with heavy staining or discoloration.
- Use warm water and a clean microfiber cloth to wipe away residue from the grout.
- Rinse repeatedly until all traces of lemon juice or baking soda paste are removed.
- Pat dry with another clean cloth as moisture left behind could encourage mold growth.
Tips for Ongoing Grout Maintenance
- Regularly wipe down tiled surfaces with diluted lemon water to prevent grime buildup.
- To tackle deeply embedded stains or severely discolored grout, consider repeating this process weekly until results improve.
- For added protection against future staining, seal your grout after cleaning.
| Lemon Cleaning Benefits | Chemical Cleaners Comparison |
| Safe for skin contact | Can cause irritation |
| Biodegradable | Harmful to environment |
| Leaves fresh scent | May leave chemical odors |
By incorporating lemons into your cleaning routine for grout maintenance, you not only achieve sparkling results but also create a healthier home environment free from harsh chemicals. This simple yet effective approach ensures that keeping your tiles looking their best doesn’t have to compromise sustainability or safety.
Cleaning Grout
Grout is a porous material that easily accumulates dirt, grime, and mold, especially in areas exposed to moisture like bathrooms and kitchens. Cleaning grout can feel like a daunting task, but using lemon as a natural cleaning agent is not only effective but also eco-friendly. Lemons’ natural acidity works wonders in breaking down grime while leaving behind a fresh citrus scent.
Why Choose Lemon for Grout Cleaning?
- Natural disinfectant: Lemon contains citric acid, which acts as an antimicrobial agent to kill bacteria and mildew.
- Eco-friendly alternative: Unlike harsh chemical cleaners, lemon is safe for the environment and your home.
- Deodorizing properties: Its fresh scent eliminates unpleasant odors caused by mold or mildew in grout lines.
Supplies You’ll Need
To clean grout with lemon, you’ll need some basic supplies: – Fresh lemons (or bottled lemon juice for convenience) – Baking soda (optional for tougher stains) – An old toothbrush or small scrub brush – A spray bottle (filled with warm water) – A microfiber cloth or sponge
Step-by-Step Guide to Cleaning Grout with Lemon
- Squeeze the juice of one or two lemons into a bowl.
- For extra cleaning power on stubborn stains, mix equal parts lemon juice and baking soda to form a paste.
- Using either a spoon or your fingers (with gloves if desired), apply the lemon juice or paste directly onto the grout lines.
- Ensure all areas are evenly covered.
- Allow the solution to sit on the grout for 10–15 minutes. This gives the citric acid time to break down grime and any buildup.
- Use an old toothbrush or scrub brush to gently scrub along the grout lines in circular motions. Pay extra attention to discolored areas.
- Spray warm water over the cleaned area using your spray bottle.
- Wipe away any residue with a microfiber cloth or sponge.
- For heavily stained grout, repeat these steps until you achieve the desired level of cleanliness.
Tips for Maintaining Clean Grout
- Regularly wipe down tiled surfaces after use to prevent dirt buildup and discoloration.
- Once cleaned, seal your grout with a protective sealant to minimize future staining.
- Use diluted lemon juice mixed with water as part of your weekly cleaning routine to keep grout looking fresh.
| Materials | Purpose |
| Lemon juice | Cleans and disinfects |
| Baking soda | Acts as an abrasive for scrubbing |
| Old toothbrush | Targets small crevices effectively |
| Microfiber cloth | Wipes away residue without scratching tiles |
Lemon provides an easy yet powerful solution for tackling grimy grout while avoiding exposure to harmful chemicals often found in commercial cleaners. With its natural capabilities combined with simple tools you likely already have at home, achieving sparkling clean grout has never been easier.