Start with Cleaning the Bathroom First
Cleaning your home in an effective and efficient manner begins with tackling the bathroom. The bathroom is often one of the dirtiest areas in the house due to its daily use, moisture accumulation, and potential for bacterial growth. Starting here ensures that you address one of the most challenging spaces first, creating a sense of accomplishment early on and preventing dirt from being tracked into other parts of your home.
Why Start With the Bathroom?
- High Moisture Levels: Bathrooms are prone to mold and mildew due to constant exposure to humidity. Neglecting this space can lead to unpleasant odors and even health risks over time.
- Bacteria Hotspot: Toilet seats, sinks, faucets, and showerheads are breeding grounds for germs. Cleaning them first minimizes the spread of bacteria to other areas of your home during your cleaning routine.
- Tough Cleaning Job: By completing a labor-intensive task like bathroom cleaning early on when you have more energy, it’s easier to maintain momentum for other tasks ahead.
Steps for Efficient Bathroom Cleaning
- Gather Your Supplies
Before beginning, make sure you have all necessary supplies on hand: - Gloves
- Disinfectant spray or multipurpose cleaner
- Glass cleaner
- Scrubbing brushes or sponges (use separate ones for toilets)
- Microfiber cloths or paper towels
- Mop (if applicable)
- Remove items from countertops, shelves, or shower caddies. This allows you to clean without obstruction and prevents dust or grime from spreading to personal items.
- Start With High-Traffic Areas
Focus on areas that people touch frequently: - Wipe down sink faucets with disinfectant spray. A gentle scrub will remove hard water stains as well as bacteria buildup.
- Clean mirrors using a streak-free glass cleaner and microfiber cloths for a polished look.
- Address Toilets Last
Toilets require extra care due to their role in harboring bacteria: - Clean both inside and outside surfaces thoroughly using a strong toilet bowl cleaner paired with a dedicated brush.
- Don’t forget less obvious spots like under the seat hinges or near floor seams where grime accumulates.
- Tackle Floors at the End
Finish by sweeping loose debris before mopping floors with a mild solution suitable for tiles or linoleum surfaces commonly found in bathrooms.
Pro Tips for Maintaining a Clean Bathroom
- Ventilate properly after every shower or bath by running an exhaust fan or opening windows briefly if possible.
- Consider keeping disinfectant wipes nearby so household members can quickly clean up spills or toothpaste residue as they occur.
- Use washable mats around sinks or tubs instead of carpets that retain moisture.
By starting with the bathroom first during your cleaning routine, not only do you eliminate one of the hardest chores early on but also set yourself up for an orderly workflow throughout the rest of your home cleaning process.
Up Next is Dusting and Organizing
Once the bathrooms are tackled, it’s time to shift focus to dusting and organizing. This step is crucial for maintaining a clean and orderly home while preventing the spread of dirt and allergens. Dusting and organizing serve as a foundation for the later stages of mopping, vacuuming, or deep cleaning, as you’ll remove loose dust particles and clutter before they settle elsewhere.
Why Dusting Should Be a Priority
Dust accumulates quickly in most homes, often carrying allergens like pollen, pet dander, and tiny debris that can affect air quality. Tackling dust early ensures these particles don’t circulate when you clean other areas of your home.
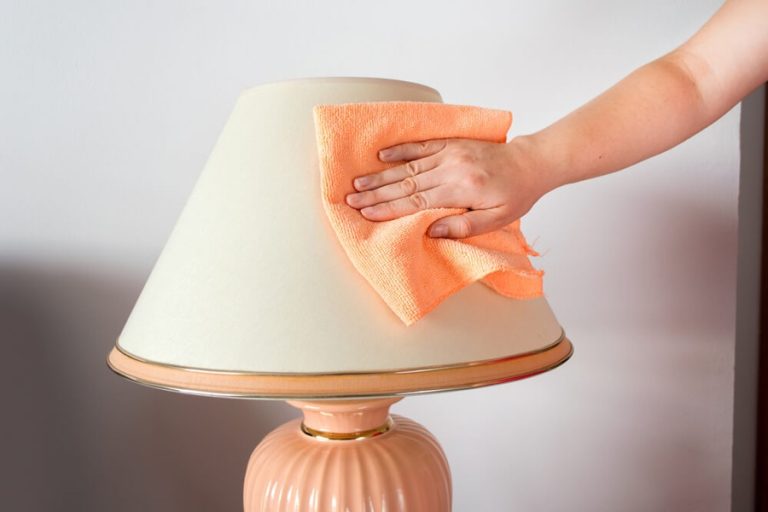
Here’s how to approach dusting effectively: – Start High: Begin with ceiling fans, light fixtures, shelves, or any high surfaces. Gravity will bring dust down to lower levels as you clean. – Work Top to Bottom: Move downward systematically—this prevents cleaned surfaces from being re-dusted by particles from above. – Use Proper Tools: Utilize microfiber cloths or electrostatic dusters for optimal results. Avoid feather dusters since they often just redistribute dirt rather than trapping it. – Don’t Forget Hidden Areas: Pay attention to overlooked spaces like behind furniture, window sills, baseboards, and blinds.
Practical Tips for Effective Organizing
While you’re already moving through each room for dusting, this is also the perfect opportunity to tackle clutter. Organized spaces not only look cleaner but also make day-to-day living smoother.
Steps for efficient organizing include: 1. Declutter First: Remove items that no longer serve a purpose or bring value. Consider donating unused possessions. 2. Group Similar Items Together: Store related objects in designated spots (e.g., all remote controls in one basket; books stacked on a specific shelf). 3. Use Storage Solutions: – Clear bins allow visibility into their contents while maintaining tidiness. – Drawer dividers help separate smaller items like office supplies or kitchen utensils. – Wall-mounted hooks can free up floor or counter space in entryways or bedrooms. 4. Label Where Necessary: Especially useful in shared households to ensure everyone knows where things belong.
Balancing Dust-Free Surfaces with Organized Spaces
To streamline your efforts: – Combine tasks where possible—for instance, reorganize shelves as you are dusting them. – Use this time as an opportunity to inspect belongings for cleaning needs (e.g., dusty books may need wiping down individually).
| Task | Tools Needed | Time Estimate |
| Dust High Shelves | Microfiber cloth | 10 minutes/room |
| Wipe Baseboards | Damp cloth | 5 minutes/room |
| Sort & Declutter Drawers | Storage bins/dividers | 15–20 minutes/area |
Final Thoughts on This Step
By handling both dusting and organizing simultaneously, you’ll prepare your home for deeper cleaning stages such as vacuuming without needing additional rounds of tidying up later on. Stay consistent with these habits on a weekly basis to maintain order and reduce buildup over time.
Move on to Mopping and Vacuuming
One of the most critical steps in cleaning your home effectively is tackling the floors, as they accumulate dirt, dust, and debris throughout the day. Mopping and vacuuming should happen after you’ve completed tasks like dusting and organizing to prevent cleaned surfaces from becoming dirty again. Here’s how to approach these tasks systematically for spotless results.
Why Mopping and Vacuuming Should Come After Dusting
- Dust settles downward: When you dust furniture, shelves, or other surfaces, particles that don’t stick to your cleaning cloth fall onto the floor. Cleaning the floors too early means you’ll likely have to clean them again later.
- Avoid cross-contamination: Dust from other areas of your house or contaminants from other surfaces can transfer onto freshly cleaned floors if tackled too soon.
- Maximize efficiency: By waiting until the latter part of your routine, you ensure that all other cleaning tasks won’t undo your hard work on the floors.
Steps for Effective Vacuuming
Vacuuming is essential for removing dirt, crumbs, pet fur, and allergens. Follow these steps for optimal results: 1. Prepare the Area
– Remove small furniture such as chairs or side tables to access all corners. – Pick up loose items like toys or cables that might get caught in the vacuum. 2. Vacuum High-Traffic Areas First
– Focus on regions with heavy foot traffic (e.g., entryways, living rooms) since they collect more dirt than less-used spaces. 3. Use Attachments for Detail Work
– Use a crevice tool for edges and corners where dirt tends to accumulate. – A brush roll attachment is ideal for rugs or carpets with embedded debris. 4. Work in Systematic Patterns
– Use overlapping straight lines to ensure no section is missed. 5. Empty the Vacuum Bag/Canister
– Regularly empty it during longer cleaning sessions to maintain suction capabilities.
| Surface Type | Recommended Settings/Attachments |
| Carpets | High-power setting; rotating brush |
| Hardwood Floors | Low-power setting; no rotating brush |
| Tile Flooring | Standard power; crevice tool for grout |
Best Practices for Mopping
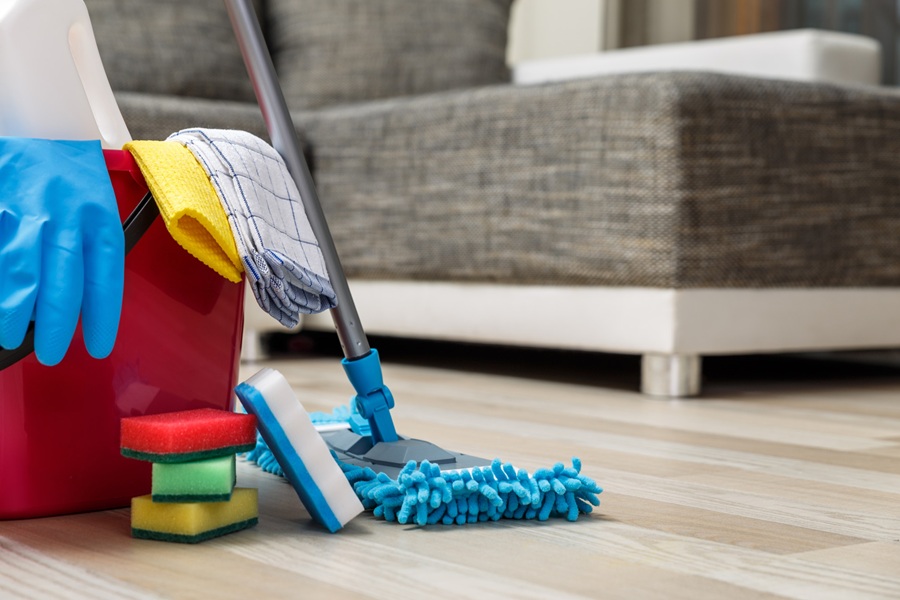
Mopping removes spills, sticky residues, and fine particles left behind after vacuuming. Here’s how to mop effectively: 1. Choose the Right Mop Type – For tiled flooring: Use a microfiber mop or string mop with a bucket system. – For hardwood: Opt for a damp microfiber mop instead of soaking wet tools. 2. Use Appropriate Cleaning Solutions – Wood-safe cleaners should be used on hardwoods to avoid damage or warping. – A mild detergent mixed with warm water works well on tiles and laminate flooring. 3. Follow These Techniques – Start in one corner of the room and work backward toward an exit point so you don’t step over wet areas. – Rinse your mop frequently in clean water to avoid spreading dirt around rather than removing it.
When Should You Combine Mopping and Vacuuming?
In some cases—such as when dealing with heavily soiled floors—it may be beneficial to perform both tasks simultaneously using a vacuum-mop hybrid appliance or steam mop systems designed for multi-surface cleaning.
By following these strategies and incorporating systematic mopping and vacuuming into your routine after organizing spaces above ground level (dust-prone furniture), you’ll achieve a cleaner living environment without doubling back on prior steps.
Cleaning the Kitchen Should Be Your Final Stop
Steps for Cleaning the Kitchen
- Remove unnecessary items or appliances from counters.
- Return utensils, plates, cups, and pots to their designated storage spots.
- Empty trash bins before deep cleaning begins to reduce odors.
- Use a multi-surface or degreasing cleaner for countertops and backsplashes.
- Pay attention to areas prone to grime buildup, such as behind appliances.
- Clean cabinet exteriors and knobs where fingerprints accumulate.
- Clean Appliances Thoroughly
Focus on major kitchen appliances:
| Appliance | Cleaning Method |
| Refrigerator | Wipe down shelves with warm soapy water; check for expired food items |
| Stove/Oven | Scrub burners or stovetop; use oven cleaner if necessary |
| Microwave | Heat a bowl of water with lemon slices inside for 2 minutes; wipe interior down |
| Dishwasher | Run an empty cycle with vinegar to eliminate odors |
Address the Sink Area
The sink often becomes a breeding ground for germs due to lingering food particles:- Clear out dishes completely before scrubbing.
- Use baking soda or specialized sink cleaner for stainless steel surfaces.
- Don’t forget to clean faucet handles and spouts.
- Sweep and Mop Floors Last
After addressing all counters and vertical surfaces, focus on cleaning the floors:- Sweep thoroughly under tables, cabinets, and appliances where crumbs collect.
- Mop using a solution that’s safe for your flooring type (tile, hardwood, linoleum).
Tips for Maintaining a Clean Kitchen
- Daily Wipe-Downs: Take two minutes after meals to clear crumbs off counters and stovetops.
- Organize Weekly: Check pantry shelves regularly to prevent clutter from accumulating.
- Empty Trash Frequently: Avoid unpleasant smells by taking out garbage daily or as needed.
By saving your kitchen cleanup until last in your routine, you ensure it stays spotless without reintroducing mess from other parts of your home.
Move on to Mopping and Vacuuming
After dusting and organizing, mopping and vacuuming are the next essential steps in achieving a truly clean home. These tasks work together to remove dirt, debris, and allergens from your floors while ensuring every surface is left spotless. Here’s how to approach them effectively for the best results.
Why Order Matters for Mopping and Vacuuming
Mopping and vacuuming are most effective when done after dusting because particles inevitably fall onto the floor while cleaning surfaces. If you vacuum or mop before this step, you may find yourself needing to repeat the process unnecessarily. By following an intentional sequence, you’ll save time and effort while achieving a more thorough clean.
Step-by-Step Guide to Mopping
- Before mopping, clear any clutter or movable furniture from the area.
- Sweep or vacuum loose debris such as crumbs or pet hair so your mop won’t spread them around.
- For hardwood or laminate floors: Use a damp microfiber mop with minimal water to avoid damaging the surface.
- For tile or stone: A traditional mop with warm soapy water works well.
- Use cleaners designed specifically for your floor type.
- Avoid overly harsh chemicals that could harm flooring finishes.
- Always start at one end of the room and work toward an exit to avoid stepping on wet floors.
- Mop in small sections using overlapping motions for even coverage.
- Open windows or use fans if needed to speed up drying.
- Avoid walking on wet floors until they are completely dry to prevent streaks or accidents.
How to Vacuum Efficiently
- Upright vacuums are ideal for carpets.
- Canister vacuums work best on hard surfaces like wood or tile.
- Handheld vacuums are great for stairs, furniture, or hard-to-reach areas.
- Set vacuum height based on your flooring type (low-pile mode for carpets; higher settings for hardwood).
- Vacuum slowly in straight lines to allow enough suction time per area.
- Overlap strokes slightly to ensure no spots are missed.
- Don’t Forget Edges & Corners:
Attachments like crevice tools can help clean along baseboards where dust accumulates over time. - Empty Dust Bins Regularly:
Maintaining airflow by emptying filters prevents reduced performance during cleaning sessions.
Combining Both Tasks
To maximize efficiency:
– Start with vacuuming if large amounts of debris need removal prior to mopping (e.g., pet hair).
– For smaller spaces with minimal debris after sweeping/dusting, begin directly with mopping instead of doubling up unnecessarily on effort/time spent per room type/floor finish requirement balance unique factors-clean goal result cleaner harmonious living space overall .
Using this approach ensures not only hygienic maintenance conditioning homes efficient methods cleaner longer durations cleaner improvements satisfaction-level
Cleaning the Kitchen Should Be Your Final Stop
The kitchen is often one of the busiest and most frequently used areas of any home. It’s a hub for cooking, eating, and socializing, which makes it prone to dirt, grease buildup, and clutter. For this reason, leaving the kitchen as your final cleaning task ensures other household chores don’t undo your hard work. By tackling it last, you’ll achieve a clean slate to maintain as you move forward in your cleaning routine.
Why Clean the Kitchen Last?
- Avoid Cross-Contamination: Cleaning other areas first reduces the chance of spreading bathroom or dust-related debris into food preparation spaces.
- Practicality: Cooking or preparing meals mid-cleaning is common. By saving the kitchen for last, you won’t need to redo surfaces when spills occur.
- Efficiency: Mopping or vacuuming other rooms before handling greasy or wet kitchen floors avoids tracking debris across freshly cleaned spaces.
Step-by-Step Kitchen Cleaning Guide
- Remove items such as small appliances, utensils, and decorative pieces from countertops.
- Wipe down and organize these items before returning them to their designated spots.
- Load all dirty dishes into the dishwasher or wash them by hand.
- Scrub and rinse out your sink with a disinfectant cleaner to remove residue.
- Use an all-purpose cleaner or a mix of soap and water for counters and cabinet doors.
- Pay extra attention to high-touch spots like handles and knobs.
- Microwave: Remove splatters with a damp cloth after microwaving a bowl of water with lemon juice for steam cleaning.
- Refrigerator: Toss expired items and wipe shelves with a mild cleaner.
- Oven & Stove Top: Use degreaser on burned-on spills; scrub grates if applicable.
- Sweep Before Mopping Floors
Dust tends to fall during countertop cleaning, so sweeping ensures no particles are left behind before mopping. - Take Out Trash
Empty trash bins throughout this process as needed but finish by taking out all garbage from the day’s cleaning efforts once everything else is completed.
Tips for Maintaining a Clean Kitchen
- Wipe spills immediately after they occur on counters or floors.
- Establish habits such as returning used dishes directly to the sink.
- Perform quick daily tasks like wiping down high-use appliances (e.g., refrigerator handles).
| Task | Frequency | Tools Needed |
| Countertop Wiping | Daily | All-purpose cleaner |
| Appliance Cleaning | Weekly | Degreaser/microfiber cloth |
| Floor Sweeping | Daily/As Needed | Broom/Dustpan |
| Deep Floor Mopping | Weekly | Mop/Bucket |
By consistently addressing small messes promptly while following an effective end-of-cleaning routine like this one, your kitchen can stay fresh longer without becoming overwhelming during larger cleanups.
Cleaning the Kitchen Should Be Your Final Stop
The kitchen is often the hub of a home, and because it’s one of the most frequently used spaces, it requires special attention during cleaning. Leaving the kitchen as your final stop when tidying your home ensures you’ve tackled all other dust and dirt that might make its way into this area during earlier steps in the cleaning process.
Why Clean the Kitchen Last?
Cleaning the kitchen last has several advantages:
– Containment of Dirt: As you clean other parts of your home, debris or dust may inadvertently drift into the kitchen. By saving it for last, you avoid having to redo work.
– Food Safety: Kitchen surfaces often come into contact with food. Cleaning at the end ensures everything is sanitized properly before cooking or eating again.
– Efficient Workflow: It allows you to focus solely on this high-traffic space without feeling rushed or distracted by unfinished tasks elsewhere in your home.
Step-by-Step Approach to a Thorough Kitchen Cleaning
- Remove any dishes, utensils, and appliances left out on countertops.
- Put unused items back in their designated places to create a clear workspace.
- Empty trash bins and recycling containers.
- Wipe down the interior and exterior of bins if needed to remove odors or spills.
- Wash dishes or load them into the dishwasher.
- Scrub down your sink with disinfectant, paying close attention to faucet handles where germs tend to collect.
- Wipe Down Surfaces:
Focus on countertops, cabinet doors, backsplash tiles, and other high-touch areas: - Use an all-purpose cleaner or surface-specific solution (e.g., granite-safe cleaner for stone countertops).
- Pay attention to sticky spots near stovetops or areas where food prep happens.
- Clean Appliances:
Spend time making sure frequently-used appliances are clean inside and out: - Microwave: Wipe down interior walls with a mix of water and baking soda for stubborn stains.
- Refrigerator: Remove old food items; wipe shelves with a damp cloth.
- Stovetop/Oven: Focus on grease buildup using degreasers designed for ovens.
- Tidy Floors Last: Once counters are spotless:
- Vacuum or sweep up crumbs from hard floors around counters.
- Mop thoroughly using a warm water solution that’s safe for your flooring type (e.g., tile-safe cleaners).
| Task | Frequency Suggestion |
| Declutter Countertops | Daily |
| Wipe Down Surfaces | After Cooking/Meals |
| Deep Clean Appliances | Weekly |
| Empty Trash/Recycling | 2-3 Times Weekly |
Additional Tips for Maintaining a Clean Kitchen
- Place a small dish soap dispenser near your sink for quick access after meals.
- Use drawer dividers or organizers inside cabinets to keep items easily retrievable while reducing clutter.
- Keep cleaning supplies like microfiber cloths, gloves, and spray bottles under the sink but well-labeled for convenience.
By following this structured approach to cleaning your kitchen last, you ensure that this essential space not only looks immaculate but also remains hygienic long after cleaning day is over.