How to Clean a Glass Oven Door on the Outside
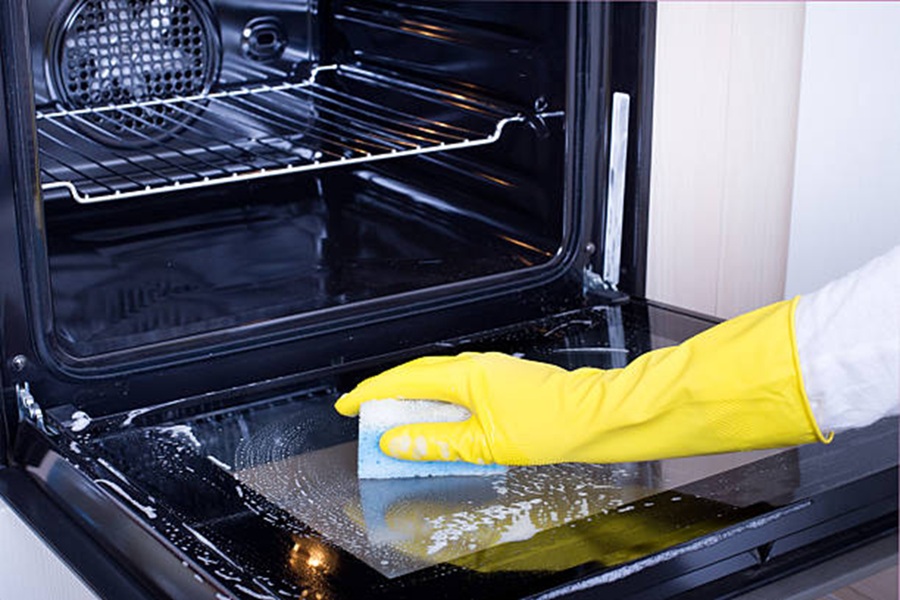
Keeping the outside of your glass oven door clean is essential for maintaining the overall appearance of your kitchen. It’s often the first thing you notice, and a spotless surface can make your oven look as good as new. Below, you’ll find effective methods tailored to remove smudges, grease, and fingerprints without damaging the glass.
Tools and Materials You’ll Need
Gathering the right supplies beforehand makes cleaning easier and more efficient. Here are some materials you may need:
– Glass cleaner or a homemade vinegar solution (1 part white vinegar to 2 parts water)
– A microfiber cloth or lint-free rag
– Baking soda (optional, for stubborn stains)
– Spray bottle (if using a homemade solution)
– Soft sponge or non-abrasive scrub pad
Steps to Clean the Outside of Your Glass Oven Door
- Remove Surface Dust and Debris: Start by wiping down the surface with a dry microfiber cloth to eliminate loose dust or crumbs. This prevents scratching during cleaning.
- Apply Cleaning Solution: Spray a generous amount of glass cleaner or your homemade vinegar solution directly onto the glass surface.
- Let it Sit: Allow the cleaning solution to sit on the glass for about 30 seconds to dissolve grease and grime effectively.
- Wipe in Circular Motions: Use a microfiber cloth to wipe away dirt in small circular motions, ensuring no areas are missed. Avoid pressing too hard as this may leave streaks on the surface.
- Handle Stubborn Spots with Baking Soda: If there are tough stains such as baked-on grease spots, sprinkle baking soda onto a damp sponge and gently rub those areas in circular motions until they lift away. Do not use abrasive pads that could scratch the glass.
- Buff for Shine: Once you’ve removed all dirt and smudges, buff the surface with a dry microfiber cloth for a streak-free shine.
Preventing Future Smudges
A clean oven door is easier to maintain when simple preventative measures are taken:
– Wipe down after every use once it has cooled completely. – Keep greasy hands away from the oven door by using handles instead of touching glass surfaces. – Use mild cleaners regularly rather than waiting until heavy buildup occurs.
| Problem | Solution |
| Fingerprints | Wipe with vinegar spray |
| Greasy stains | Use baking soda paste |
| Streaks | Dry-buff with microfiber |
By incorporating regular maintenance into your routine, your oven door will stay spotless with minimal effort over time.
How to Clean Your Oven Window on the Inside
Cleaning the inside of your oven window can feel like a daunting task, but with the right tools and techniques, it’s manageable and rewarding. Over time, grease, grime, and burned-on food can accumulate on the interior surface of the glass, obstructing visibility and detracting from the appearance of your oven. This step-by-step guide will help you restore clarity to your oven window while maintaining its condition.
Gather Your Supplies
- Baking soda (a natural abrasive cleaner)
- Optional: A handheld vacuum or brush to remove debris
Step-by-Step Cleaning Process
- Ensure that the oven is completely turned off and cooled before starting. Working with a hot oven can be dangerous and may cause burns.
- Open the oven door fully to access the glass surface easily. Use a handheld vacuum or brush to sweep away any crumbs or loose particles from both the door and surrounding edges.
- Mix baking soda with water in a small bowl until it forms a thick paste. A ratio of 3 parts baking soda to 1 part water typically works well for this purpose.
- Spread an even layer of baking soda paste across the inside surface of the glass using a soft cloth or your fingers (wear gloves if preferred). Be sure to cover stubborn stains thoroughly.
- Allow the paste to sit on the glass for 15–20 minutes. This resting period gives it time to break down grease and baked-on residue effectively.
- Use a damp microfiber cloth or sponge soaked in warm water to wipe away the paste, along with loosened grime. Rinse out your cloth frequently during this process.
- For particularly tough spots, use a silicone spatula or plastic scraper at a gentle angle to lift away residue without scratching the glass.
- Dampen another clean microfiber cloth with white vinegar and wipe down the glass to remove streaks and leave behind a streak-free shine.
Pro Tips for Maintenance
- Wipe spills as soon as they occur inside the oven (once cool). Fresh spills are easier to clean than baked-on messes.
- Avoid using metal scrapers or abrasive pads that could scratch or damage tempered glass.
- Clean regularly—at least once every few months—to prevent buildup from becoming more difficult over time.
- Consider using an oven liner at the base of your appliance; this helps catch drips before they bake onto surfaces like your door window.
By following these steps consistently, you can maintain a crystal-clear view into your oven while prolonging its lifespan without harsh chemicals damaging its finish over time.
How to Clean Between the Glass on Your Oven Door
Cleaning between the glass panels of an oven door might seem like a daunting task, but with the right approach and tools, it can be accomplished efficiently. This area often collects grease, grime, and streaks that can detract from the overall appearance of your oven. Below is a step-by-step guide to cleaning this hard-to-reach area.
Why Does Debris Accumulate Between the Glass?
Before diving into the cleaning process, it’s helpful to understand why this issue occurs. Oven doors typically consist of two or more glass panes separated by a small gap for insulation. Over time, spills, grease splatters, and condensation can seep in through vents or edges, leading to buildup.
Materials Needed
- A microfiber cloth
- A slim cleaning tool (such as a long dowel rod or straightened wire hanger)
- A rubber band or tape
- Glass cleaner or a vinegar-water solution (1:1 ratio)
- A screwdriver (if disassembly is required)
- Soft-bristled brush (optional)
1. Determine Access Points
- Most modern ovens have ventilation slots at the top or bottom of the oven door that allow access between the glass panes.
- Check your oven’s user manual for specific instructions on disassembly if direct access through vents isn’t possible.
2. Create a Cleaning Tool
- Wrap a microfiber cloth securely around one end of a dowel rod or wire hanger.
- Use rubber bands or tape to hold it in place so it doesn’t shift during cleaning.
3. Clean Through Ventilation Slots
- Gently insert your prepared tool into one of the vent openings.
- Slowly move it back and forth along both pieces of glass to wipe away grime.
- Reapply your chosen cleaning solution as needed by spraying it onto the cloth rather than directly onto the glass.
4. Disassemble (If Necessary)
If debris cannot be cleaned through vents: – Carefully remove screws at the edges of your oven door using a screwdriver. – Once disassembled, clean each pane individually with your cleaning solution and dry them thoroughly before reassembling.
Important Note: Only attempt disassembly if you feel confident in reattaching everything securely; improper reassembly could impact performance.
Tips for Effective Cleaning
- Safety First: Before starting any cleaning process, ensure your oven is turned off and cool to prevent burns.
- Avoid Harsh Chemicals: Stick to mild cleaners like vinegar solutions to prevent damage to delicate surfaces inside your oven door.
- Prevent Future Build-Up: Wipe spills immediately after cooking and reduce splatters by covering dishes with lids or foil while baking.
| Problem | Solution |
| Stubborn stains | Apply vinegar directly onto tough spots and let sit briefly before wiping. |
| Smudged finish | Use a dry microfiber cloth for streak-free drying after cleaning. |
| Difficult-to-reach areas | Opt for soft brushes attached to rods for added precision. |
Consistent maintenance will save you time on deep cleanings later while ensuring your appliance remains visually appealing and functional for years. By following these strategies carefully, you’ll restore clarity between those glass panes without unnecessary frustration or risk of damage.
How to Clean Between the Glass on Your Oven Door
Cleaning between the glass panels of an oven door can feel like a daunting task, but it’s entirely manageable with the right tools and steps. Over time, grease, dust, and food particles can make their way into this space, leaving streaks or residue. Below is a step-by-step guide to help you clean between the glass on your oven door effectively and safely.
Tools You’ll Need
- Phillips screwdriver (or the one compatible with your oven door screws)
- Dish soap or all-purpose glass cleaner
- A narrow cleaning tool, like a yardstick or ruler wrapped in cloth
- Rubber gloves for protection
Step-by-Step Guide
- Check your user manual to understand how the oven door is assembled. Many modern ovens allow you to remove the door entirely for better access.
- Look for screws near the top or sides of the door that hold it together.
- If possible and safe, detach the entire oven door by unlocking any hinges as directed by your manual.
- Place it on a flat surface covered with towels to prevent scratches or damage.
- Using your screwdriver, carefully remove any screws holding the inner and outer glass panels together.
- Gently pull apart the sections to access the space between them. Make sure you keep track of where each screw belongs.
- Dip a microfiber cloth in warm soapy water or use an appropriate glass cleaner.
- Wrap this cloth around a thin tool like a yardstick or ruler for better reach into tight spaces.
- Wipe thoroughly between each panel, ensuring you cover edges where grime tends to accumulate.
- Use another dry microfiber cloth attached to your cleaning tool to remove moisture and prevent streaks.
- Allow parts to air dry completely before reassembly.
- Once all parts are clean and dry, align them properly before securing screws back into place.
- Reattach the oven door if removed earlier.
Tips for Maintaining Cleanliness
- Avoid spraying excessive amounts of cleaner directly onto your oven window; instead, apply it onto a cloth first.
- Wipe down spills immediately after they occur during cooking sessions.
- Ensure proper ventilation while cooking greasy foods that tend to create smoke deposits inside ovens.
| Problem | Solution |
| Stubborn grime | Use baking soda paste as a gentle scrub |
| Streaks after cleaning | Buff with dry microfiber cloth |
By following these practical steps regularly, you’ll maintain clarity in your oven’s glass panels over time without unnecessary buildup affecting visibility or cleanliness levels during use.
How to Clean Between the Glass on Your Oven Door
Cleaning between the glass panes of your oven door may seem challenging, but with a bit of patience and the right approach, you can restore that crystal-clear look. This area often collects stubborn grease, dust, and grime over time, as it isn’t typically addressed during routine cleaning. Follow this step-by-step guide to access and clean between the glass panels safely.
Tools and Materials You’ll Need:
- A screwdriver (check your oven manual for specific types)
- A microfiber cloth or soft cleaning rag
- A long, thin cleaning tool (e.g., a yardstick or a ruler)
- Rubber bands or tape
- Glass cleaner or a vinegar-water solution
- Cotton swabs (for tight corners)
Step-by-Step Guide
- For safety purposes, ensure the oven is completely switched off and unplugged before beginning any disassembly tasks. If recently used, allow it to cool.
- Refer to your appliance’s manual for specific instructions on accessing the glass panes. Each oven model is slightly different, so understanding how your door is constructed is crucial.
- Remove the Oven Door (If Necessary)
- Many ovens allow you to detach the door entirely for easier access. Look for hinge locks—typically located at the base of the door—and carefully release them using a screwdriver (if needed). Gently lift and remove the door.
- Once removed, place the oven door on a flat surface covered with a soft cloth to prevent scratches.
- Use your screwdriver to unscrew bolts or fasteners holding the inner glass in place. Be cautious during this process to avoid damaging any components.
- Wrap a microfiber cloth around one end of your long cleaning tool (yardstick or ruler) and secure it with rubber bands or tape.
- Spray your chosen cleaner—either commercial glass cleaner or an equal mix of white vinegar and water—onto the microfiber cloth.
- Slide this tool into narrow gaps between glass panes and gently move it back and forth until debris is removed. For edges: Use cotton swabs dipped in cleaning solution to tackle grime in hard-to-reach corners.
- Using another clean microfiber cloth, thoroughly wipe down both inner panes after removing dirt to eliminate streaks or residue.
- Replace all screws back into their original positions once satisfied with your cleaning effort.
- Carefully reattach the oven door by aligning its hinges back into place according to manufacturer guidelines.
- After reassembling everything, inspect your work under good lighting conditions to ensure all smudges or debris have been cleared away effectively.
Tips for Preventing Future Build-Up:
- Regularly clean both inside and outside surfaces of your oven window after cooking sessions to prevent grease from seeping into crevices.
- Avoid using abrasive tools that could scratch delicate glass components during routine maintenance.
- Consider using baking trays with high sides when cooking foods prone to splattering grease (e.g., roasts).
By taking these steps periodically, you’ll maintain not only visibility through your oven window but also its overall durability over time without needing frequent deep cleans between panels.
How to Clean Between the Glass on Your Oven Door
Cleaning between the glass panels of an oven door might seem like a daunting task, but it’s manageable with the right tools and approach. Over time, grease, food splatters, and dust can accumulate between the glass panes, leaving streaks or smudges that are visible through the door. Unlike cleaning the outside or inside of the glass, this requires disassembling parts of your oven door carefully. Below is a step-by-step guide to help you clean between these panes effectively.
Tools You’ll Need
- Screwdriver (flathead or Phillips, depending on your oven model)
- Microfiber cloths or lint-free cloths
- Mild dish soap
- Warm water
- Non-abrasive sponge
- Thin cleaning tool (such as a yardstick or wire hanger wrapped in a microfiber cloth)
- Optional: Vacuum with narrow hose attachment for loose particles
Step-by-Step Instructions
- Refer to your oven’s user manual to understand how its door is designed. This will help you locate screws and learn how to safely remove the glass panel if needed.
- Open your oven door fully. Many ovens allow you to remove it entirely by unlocking hinges at its base (consult your manual for specifics). If unsure about this step, ask for assistance.
- Once removed, examine the edges of your oven door to locate screws holding the outer and inner panels together. Use a compatible screwdriver to loosen these screws gently.
- After loosening all screws, separate the front and back panels slowly without applying excessive pressure on glass sections.
- Mix warm water with mild dish soap in a small bowl.
- Wrap your thin cleaning tool (e.g., a yardstick) with a microfiber cloth soaked in this solution.
- Insert it carefully into tight spaces between panes and clean thoroughly.
- For stubborn grime, use gentle strokes with a non-abrasive sponge.
- Replace the soapy microfiber cloth with one dampened in plain water to remove any remaining soap residue from between panes.
- Use dry lint-free or microfiber cloths inserted in thin spaces to ensure no moisture is left behind before reassembling panels.
- Realign both glass panels carefully and screw them back into place securely without overtightening.
- Reattach the entire door onto its hinges following steps outlined in your manual.
Tips for Maintaining Cleanliness Between Oven Glass
- Wipe down any spills immediately after cooking before they harden or seep into crevices.
- Avoid using abrasive cleaners that could scratch surfaces around panel edges.
- Perform deep cleaning every few months based on usage frequency instead of waiting until visible dirt accumulates significantly.
By following these steps carefully and maintaining regular upkeep practices, you can keep even those hard-to-reach areas looking spotless while extending your appliance’s lifespan overall.
How to Clean Between the Glass on Your Oven Door
Cleaning between the glass panels of your oven door can feel like a daunting task, but with the right approach and tools, it’s manageable. Over time, grease, food splatters, and stains can find their way into this hard-to-reach area. Here’s how you can address this issue efficiently.
Why Cleaning Between the Glass is Important
- Improves Aesthetics: A clean oven door enhances the overall appearance of your kitchen.
- Ensures Visibility: Clear glass makes it easier to monitor food while cooking.
- Hygiene: Trapped grease or debris can harbor bacteria or unpleasant odors over time.
Tools You’ll Need
Before starting, gather these essential items:
– A screwdriver (type depends on your oven model)
– A microfiber cloth or soft cleaning rag
– A non-abrasive glass cleaner or a vinegar-water solution (equal parts)
– A long, thin cleaning tool (e.g., a yardstick wrapped in a soft cloth)
– Optional: Cotton swabs for tighter crevices
Step-by-Step Instructions
- Refer to the manufacturer’s instructions for guidance. Some ovens allow you to remove the door entirely for easier access, while others may provide specific instructions for disassembling the panels safely.
- Remove or Open the Oven Door (if applicable)
- Many ovens have hinges that allow you to detach or partially open the door for cleaning purposes. Locate these hinges and carefully follow any prescribed steps to remove or adjust them.
- Use a screwdriver to gently remove any screws holding the inner and outer glass panels in place (if possible). Place screws in a small container so they aren’t misplaced.
- If your oven design doesn’t allow full removal of panels, check if there are small vents or openings at the top/bottom of the door where tools can fit through.
- Mix equal parts white vinegar and water in a spray bottle.
- Spray this solution onto a microfiber cloth wrapped around a long cleaning tool (e.g., yardstick). Avoid directly spraying into openings as excess liquid might seep into unwanted areas.
- Carefully slide your tool into any gaps or vents along one edge of the panel and guide it back and forth across both surfaces of the inner glass.
- For stubborn grime, repeat with light pressure until all streaks are removed.
- Once cleaned, use a dry microfiber cloth wrapped around your tool to absorb moisture from between the panels fully.
- Reassemble the Oven Door (if applicable)
- Replace screws and secure all components tightly while following safety procedures outlined by your oven’s manual.
- To reduce buildup between cleanings:
- Wipe down both sides of exterior glass after each cooking session.
- Invest in an oven liner to minimize spills within your appliance.
Pro Tips for Success
| Tip | Description |
| Work In Bright Light | Good lighting will help reveal smudges missed during initial cleaning efforts. |
| Avoid Harsh Chemicals | Stick to gentle cleaners like vinegar-water mixes; harsh chemicals may damage sealants. |
| Be Patient | Cleaning between glass requires precision—take time to avoid scratching surfaces. |
By maintaining cleanliness between your oven’s glass panels regularly, you’ll save yourself considerable effort later while ensuring optimal functionality and aesthetics for years ahead.