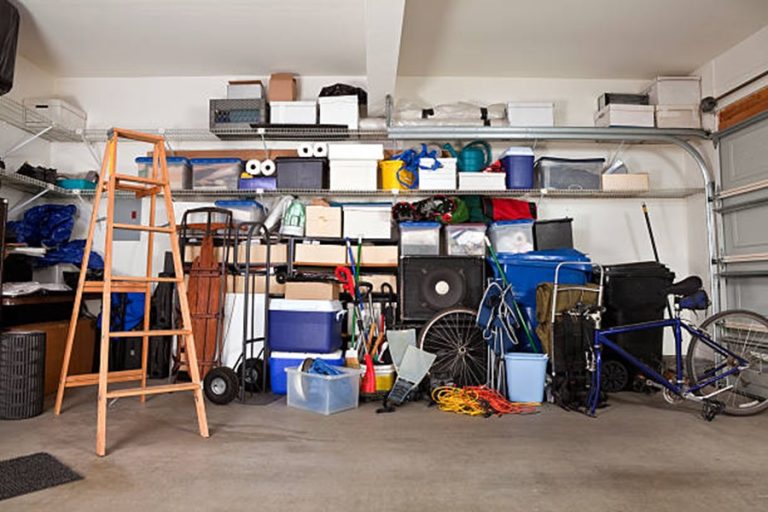
Skipping a Cleaning Plan and Checklist
A well-thought-out plan is the backbone of a successful spring cleaning session. Skipping this essential step can lead to wasted time, missed areas, and frustration. Homeowners often dive into cleaning without a clear direction, which may result in inefficiency and overlooked tasks.
Why You Need a Cleaning Plan
- Efficiency: A plan helps you prioritize tasks and allocate your time effectively.
- Thoroughness: Without a checklist, it’s easy to miss crucial spaces like baseboards or behind furniture.
- Stress Reduction: Knowing what needs to be done reduces overwhelm and keeps you focused.
How to Create an Effective Spring Cleaning Plan
- Assess Your Space
Walk through your home and identify the areas that need attention. Break them into categories like living areas, bedrooms, kitchen, bathrooms, etc. - Set Realistic Goals
Determine what can realistically be accomplished in your available time. Break larger projects into smaller tasks to avoid burnout. - Develop a Room-by-Room Checklist
A detailed checklist ensures nothing gets overlooked. Here’s an example for one room:
| Task | Supplies Needed | Estimated Time |
| Dust surfaces | Microfiber cloth | 15 minutes |
| Vacuum floors | Vacuum cleaner | 20 minutes |
| Wipe windows | Glass cleaner | 10 minutes |
Gather Your Supplies in Advance
Make sure you have all necessary tools and products before starting (e.g., cloths, sprays, vacuums). This prevents interruptions mid-cleaning.- Prioritize Tasks Based on Importance or Frequency of Use
Tackle high-traffic areas first (like the kitchen) while leaving lesser-used spaces (like storage rooms) for later.
Benefits of Having a Cleaning Checklist
- Keeps you organized during the process.
- Helps track progress as you check off completed tasks.
- Allows other household members to assist by assigning them specific duties from the list.
Avoiding Common Mistakes
Many homeowners make errors when creating their plans: – Overloading schedules with too many big tasks in one day. – Forgetting to account for breaks or distractions that may arise. – Starting without decluttering first (this is covered in more detail under another section header).
By dedicating time upfront to craft a cleaning plan and checklist, you’ll save yourself unnecessary stress while ensuring a more thorough job throughout your home.
Using the Wrong Cleaning Products for Surfaces
One of the most common mistakes homeowners make during spring cleaning is using the wrong cleaning products for various surfaces in their homes. Not only can this be ineffective, but it can also cause permanent damage to furniture, flooring, and other household surfaces. Understanding what works best for each material is essential for maintaining your home’s appearance and longevity.
Why It Matters
Using inappropriate cleaning products can lead to: – Surface Damage: Harsh chemicals might strip finishes, discolor materials, or corrode metal fixtures. – Reduced Effectiveness: A mismatched product may not remove dirt or grime effectively, leaving areas only partially clean. – Health Risks: Some cleaners release toxic fumes when used improperly or on incompatible surfaces.
Common Mismatches
Here are some typical product and surface mismatches that homeowners should avoid: | Surface Type | Common Mistake | Suggested Alternative | |———————-|———————————-|———————————————| | Hardwood Floors | Using water-based cleaners | Use pH-neutral wood floor cleaners | | Granite/Marble | Applying acidic solutions | Opt for a pH-balanced stone cleaner | | Stainless Steel | Abrasive powders or scrubbers | Use specialized stainless steel sprays | | Glass/Mirrors | Ammonia-based products | Select streak-free glass cleaners | | Upholstery/Fabrics | Overusing water and soap | Spot clean with fabric-specific solutions |
Tips for Choosing the Right Cleaning Product
- Check Labels: Always read the instructions on cleaning products to confirm they’re compatible with your surface. Look for words like “safe for wood,” “for sealed granite,” or “non-abrasive.”
- Test Before Using: Test any new cleaner on a small hidden area before applying it more broadly. This helps avoid noticeable damage in case of incompatibility.
- DIY Alternatives: For chemical-sensitive households, consider making your own natural cleansers using items like vinegar (for glass) or baking soda (as a gentle abrasive). However, avoid vinegar on porous materials like marble.
- Specialized Products Are Worth It: While all-purpose cleaners are convenient, some materials require tailored care. Invest in specialized solutions where necessary—for instance, leather conditioners for furniture or stainless steel polish.
Mistakes to Avoid
- Mixing different cleaning products without understanding their chemical reactions can be hazardous. For example, combining bleach with ammonia produces toxic gases.
- Over-saturating porous surfaces such as wood or upholstery may lead to water damage or mildew over time.
- Assuming “natural” cleaners are universally safe—some natural acids like lemon juice can still etch delicate surfaces.
By selecting appropriate cleaning products tailored to specific needs and being mindful of how you use them, you’ll protect your home’s finishes while ensuring a deep clean without unnecessary risks.
Cleaning Around Clutter Instead of Decluttering First
One of the most common spring cleaning mistakes homeowners make is attempting to clean around clutter rather than addressing the clutter itself. While it might feel like you’re saving time by jumping straight into scrubbing and dusting, ignoring clutter can actually make the cleaning process less efficient and more frustrating. A clean home starts with simplifying your space, so decluttering serves as an essential first step.
Why Decluttering Before Cleaning Matters
- Improves Efficiency: With fewer items in your way, surfaces are easier to clean thoroughly.
- Reduces Stress: An organized space creates a sense of calm and control before diving into the more intensive cleaning tasks.
- Prevents Recontamination: Clutter can collect dust, dirt, and allergens. If left untouched, it may undo much of your hard work after cleaning.
Steps to Declutter Effectively
- Start Small
Begin with one room or area at a time to avoid feeling overwhelmed. For example: - Focus on a single closet.
- Work through kitchen countertops or cabinets.
- Do I use this regularly?
- Does this item bring value or joy to my life?
- Is it worth the space it takes up?
- Sort Items Into Categories Designate containers or spaces for four categories:
- Keep: Items you use regularly or bring value.
- Donate/Sell: Items in good condition but no longer needed.
- Recycle: Items that can be repurposed instead of going to waste.
- Trash: Anything damaged beyond repair or unusable.
- Create Storage Solutions Organize what remains with storage bins, racks, or baskets that fit your needs. Label containers for easy access and maintain consistency in organization over time.
Cleaning After Decluttering
Once you’ve removed unnecessary items from your space, move on to cleaning tasks with greater efficiency: – Wipe down now-clear surfaces like shelves, countertops, and floors. – Access previously hidden areas such as under furniture or inside cabinets. – Deep-clean storage spaces before placing items back inside.
| Decluttering Benefits | Impact During Spring Cleaning |
| Fewer items in the way | Speeds up surface cleaning |
| Clearer workspace | Allows access to hidden dust |
| Improved organization | Reduces future accumulation |
Common Pitfalls When Skipping Decluttering
Failing to declutter before starting your spring cleaning can lead to: – Missing spots where dirt accumulates behind piles of items.
– Prolonged cleanup times due to working around cluttered areas repeatedly. – Emotional frustration caused by feeling like you’ve cleaned but still aren’t satisfied with the overall result.
Approaching spring cleaning with decluttering as a non-negotiable first step ensures that you’re not simply tidying temporarily but creating a functional and inviting environment that stays cleaner longer.
Forgetting High-Touch and Hard-to-Reach Areas
When undertaking a spring cleaning project, it’s easy to overlook the areas that aren’t immediately visible or don’t seem “dirty.” However, forgetting high-touch and hard-to-reach spots can leave your home less clean than you think, contributing to hidden dirt build-up and even impacting health in the long run. These spaces often harbor allergens, bacteria, and grime that require attention.
Why High-Touch Areas Matter
High-touch surfaces are areas constantly in contact with hands or frequently used objects. These surfaces are breeding grounds for germs, which can spread illness if not cleaned properly. Examples of high-touch areas include:
– Light switches
– Door handles
– Appliance handles (refrigerator, oven, microwave)
– Remote controls
– Keyboards and computer mice
Without regular cleaning during spring cleaning sessions, these items can accumulate invisible dirt despite appearing clean.
Addressing Hard-To-Reach Spots
Hard-to-reach spaces are equally important but often neglected because they require extra effort to access. Examples of these spots include:
– Ceiling fans: Dust collects on fan blades over time, dispersing particles into the air when in use.
– Tops of cabinets: Hidden from plain sight but an area where dust tends to settle heavily.
– Behind appliances: Dirt and crumbs often find their way behind the refrigerator or stove.
– Baseboards and moldings: These areas gather dust and grime but are frequently missed during routine cleaning.
Practical Tips for Cleaning High-Touch Surfaces
A systematic approach helps ensure no high-touch areas are forgotten:
1. Use disinfectant wipes or a microfiber cloth dampened with an appropriate cleaner (check surfaces for compatibility).
2. Create a checklist of all high-touch zones room by room to ensure thoroughness.
3. Clean remotes and electronics carefully—use alcohol-based wipes for effective germ removal without damaging sensitive materials.
Strategies for Tackling Hard-To-Reach Areas
Cleaning inaccessible spots doesn’t have to be overwhelming with the right tools and techniques:
1. Ceiling fans: Use an extendable duster specifically designed for fan blades or secure a microfiber cloth over a broom handle as a DIY option.
2. Tops of cabinets: Clear items off first if accessible; utilize a vacuum attachment or damp cloth to remove dust build-up effectively.
3. Behind appliances: Slide out movable appliances like refrigerators carefully—vacuum accumulated debris before mopping any sticky residue.
4. Baseboards: A handheld vacuum attachment followed by wiping down with warm soapy water works well here.
| Cleaning Area | Recommended Tool | Frequency |
| Ceiling Fans | Extendable duster/microfiber | Monthly |
| Remote Controls | Alcohol-based wipes | Weekly |
| Baseboards | Damp microfiber cloth | Bi-monthly |
Final Thoughts
By prioritizing these overlooked corners during your spring cleaning efforts, you’ll achieve a more hygienic home while addressing sources of hidden grime buildup often missed during routine cleanups throughout the year.
Using Dirty Tools to Clean Your Home
One of the most overlooked spring cleaning mistakes is using dirty or poorly maintained tools to clean your home. While it may seem like a minor detail, this practice can actually spread dirt, bacteria, and grime rather than removing it. To ensure your cleaning efforts are effective and your home remains truly clean, it’s essential to pay attention to the tools you use and their condition.
The Problem with Dirty Cleaning Tools
- Dusty vacuum filters reduce suction power and blow allergens back into the air.
- Dirty mop heads smear dirt around instead of lifting it.
- Old sponges harbor bacteria that can lead to cross-contamination.
How to Properly Maintain Cleaning Tools
1. Sponges and Dishcloths
- Replace sponges regularly (every 1-2 weeks) or when they develop an odor.
- Sanitize sponges by microwaving them damp for one minute or soaking in a bleach solution.
- Wash dishcloths after every use; machine-wash with hot water for best results.
2. Mops
- Detach and wash mop heads after each use in hot water with mild detergent.
- Air-dry completely before storing to prevent mildew growth.
- Replace mop heads periodically based on wear or if they smell even after washing.
3. Vacuum Cleaners
- Empty vacuum bags or dust bins after every use to maintain proper suction.
- Clean filters monthly (or as recommended by the manufacturer) by rinsing them under water or replacing disposable ones as needed.
- Check brush rolls for tangled hair and debris; remove buildup using scissors or hands.
4. Scrub Brushes
- Rinse scrub brushes thoroughly after each use.
- Soak them in a vinegar-water solution weekly for deodorizing and disinfection.
5. Microfiber Cloths
- Machine-wash microfiber cloths separately from other laundry using mild detergent—avoid fabric softeners as they reduce absorbency.
- Air-dry or tumble dry on low heat to preserve their quality over time.
Investing in Quality Tools
- Durable microfiber cloths resistant to frequent washing cycles
- Mops with washable pads instead of disposable alternatives
- HEPA vacuum cleaners to trap allergens effectively
A Schedule for Cleaning Your Tools
| Tool | Frequency of Maintenance | Recommended Action |
| Sponges | Every week | Replace or sanitize |
| Mop Heads | After each use | Wash thoroughly |
| Vacuum Filters | Monthly (or per manufacturer) | Wash or replace |
| Scrub Brushes | Weekly | Soak/disinfect |
| Microfiber Cloths | After every few uses | Machine-wash |
By routinely maintaining your cleaning equipment, you prevent the spread of grime while also saving time during future cleanings. This proactive habit ensures that all efforts during your spring-cleaning routine yield truly refreshing results throughout your home.
Cleaning isn’t just about effort—it’s about using the right approach with well-maintained tools for maximum efficiency.
Neglecting Carpets, Upholstery, and Air Vents
When it comes to spring cleaning, many homeowners focus on surfaces that are easily visible, such as countertops, floors, and windows. However, neglecting carpets, upholstery, and air vents can leave your home less clean than you think. These areas tend to accumulate dirt, allergens, and dust over time and require specific attention to maintain a healthy home environment.
Why Carpets, Upholstery, and Air Vents Matter
- Carpets: They act as magnets for dust mites, pet dander, pollen, and other allergens. Over time, these particles settle deep into the fibers of your carpet.
- Upholstery: Sofas and chairs absorb body oils, crumbs, spills, and dust. Left unchecked, they can harbor bacteria or unpleasant odors.
- Air Vents: Air vents can circulate dust and allergens throughout your home if not cleaned regularly. This not only lowers air quality but can also strain your HVAC system.
Common Mistakes in Cleaning These Areas
- Skipping Regular Maintenance: Many homeowners assume vacuuming is enough for carpets or forget about upholstery altogether.
- Using Improper Cleaning Methods: Harsh chemicals or excessive water on carpets or upholstery can damage them.
- Ignoring Air Vent Cleaning: Out of sight often means out of mind when it comes to air vents.
Practical Tips for Deep Cleaning
Carpets – Vacuum thoroughly with a vacuum cleaner that has a HEPA filter to capture fine dust particles. – Use a carpet cleaner or hire professionals for deep cleaning every 6–12 months. – Spot clean stains immediately using appropriate stain removers.
Upholstery – Use an upholstery attachment on your vacuum to remove surface dirt from furniture weekly. – Check fabric care tags before using any cleaners. For instance: – “W” means water-based cleaners are safe. – “S” requires solvent-based cleaners only. – “WS” allows both types of cleaners to be used. – “X” means vacuuming is the only safe option. – Consider steam cleaning for deeper sanitization if the fabric permits.
Air Vents – Remove vent covers carefully and wash them with warm soapy water. Let them dry completely before reinstalling. – Use a long-handled brush or vacuum attachment designed for vent cleaning to remove built-up dust inside ducts. – Replace HVAC filters every 1–3 months for better indoor air quality.
Table: Tools You’ll Need
| Area | Recommended Tools | Frequency |
| Carpets | Vacuum (with HEPA filter), carpet cleaner | Weekly (vacuum), Biannual (deep clean) |
| Upholstery | Upholstery vacuum attachment, correct cleaner | Weekly (light), Monthly (deep) |
| Air Vents | Long brush/vacuum attachment; soap & water | Every 3–6 months |
Additional Considerations
For pet owners or allergy sufferers: 1. Increase cleaning frequency—weekly deep cleans may be necessary for carpets and upholstery in homes with pets. 2. Consider using hypoallergenic filters in your HVAC system to reduce allergens circulated by air vents.
By dedicating time to maintaining carpets, upholstery, and air vents during spring cleaning—and throughout the year—you’ll promote better indoor air quality while extending the lifespan of these household components.
Trying to Do Everything at Once Instead of Creating a Routine
Spring cleaning can feel overwhelming, especially when you attempt to tackle your entire house in one day. Many homeowners make the mistake of diving in without a structured plan, thinking they’ll accomplish more quickly. However, this approach often leads to burnout, incomplete tasks, and unnecessary frustration. A better method is to create a manageable routine that breaks down the workload into smaller, focused sessions.
Why You Should Avoid Doing Everything at Once
Attempting to clean your entire home in one session can have several drawbacks: – Inefficiency: Without focus, you may skip important areas or waste time moving haphazardly from one task to another. – Fatigue: Cleaning requires both physical and mental energy. Overexertion can lead to poor results and reduced motivation. – Overlooked Details: Rushing through tasks often means missed spots like baseboards, ceiling fans, or detailed cleaning of appliances.
Instead of overwhelming yourself, adopt a systematic approach for better results.
How to Create an Effective Spring Cleaning Routine
- Break down your home into manageable sections such as the kitchen, bathroom(s), bedrooms, living room, etc.
- Focus on one zone per day or session.
- Plan how much time you can dedicate each day without overloading yourself.
- For example: | Time Available | Suggested Task Focus | |———————–|————————————–| | 1 Hour | Dusting and wiping surfaces | | 2-3 Hours | Deep cleaning carpets or upholstery | | Half-Day (4+ Hours) | Tackling an entire room |
- Address high-priority areas first (e.g., kitchen counters, bathrooms) before less urgent ones (e.g., guest rooms or storage spaces).
- Alternate between physically demanding tasks (e.g., scrubbing floors) and lighter activities (e.g., organizing drawers) so you don’t exhaust yourself too quickly.
Helpful Tips for Staying Consistent
To ensure that your cleaning routine runs smoothly: – Use a checklist: A visual guide helps track progress and provides satisfaction as items are completed. – Set reminders: Schedule specific times during the week dedicated solely to spring cleaning. – Involve others: If possible, delegate tasks among family members or roommates for faster progress.
Sample Weekly Cleaning Schedule
| Day | Area/Task Focus |
| Monday | Declutter living areas |
| Tuesday | Deep clean kitchen appliances |
| Wednesday | Dust high surfaces and shelves |
| Thursday | Clean bathrooms thoroughly |
| Friday | Vacuum carpets and mop floors |
| Saturday | Organize closets |
| Sunday | Rest or handle any missed tasks |
By spreading out the workload over several days, you’ll reduce stress while maintaining consistent progress toward a cleaner home.
The Benefits of a Routine
A structured approach ensures that no major area is neglected while allowing you time to reflect on what has been accomplished. This method not only simplifies spring cleaning but also fosters habits that promote year-round organization.