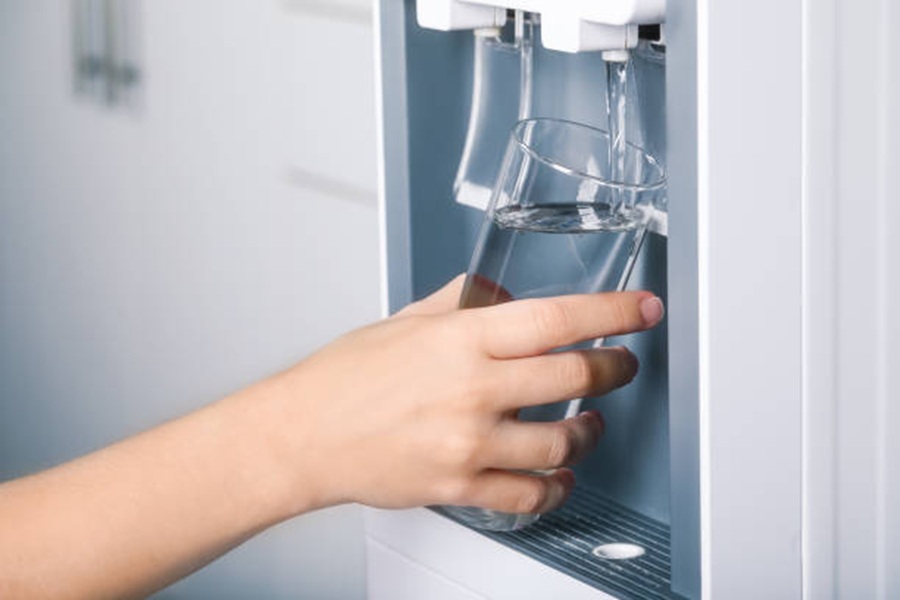
Types
1. Bottle-Fed Water Coolers
- These are the most recognizable water coolers, often seen in offices and homes.
- They use large, replaceable water bottles that are placed upside down on top of the dispenser.
- Cleaning these requires attention to both the internal dispenser components and the bottle cap area that connects to the cooler.
2. Point-of-Use (POU) Water Coolers
- These connect directly to a building’s plumbing system, eliminating the need for bottled water.
- They typically include filters to ensure clean drinking water at all times.
- Regular cleaning focuses on both internal parts and external surfaces due to continuous use.
3. Countertop Water Coolers
- Compact units designed for smaller spaces like kitchens or offices with limited space availability.
- These can be bottle-fed or connected directly to a water line.
- Maintenance involves cleaning smaller internal tanks as well as external surfaces.
4. Hot and Cold Water Dispensers
- Designed to provide both hot and cold options instantly, these coolers feature additional heating elements.
- Extra care is needed when cleaning heating components and ensuring proper sterilization of hot water pathways.
5. Portable/Compact Water Coolers
- Lightweight options ideal for outdoor events or travel.
- These require frequent cleaning since they are often exposed to varying environments.
Table: Cleaning Considerations by Cooler Type
| Cooler Type | Cleaning Frequency | Special Notes |
| Bottle-Fed | Every 4–6 weeks | Ensure caps and bottle necks are wiped thoroughly |
| Point-of-Use (POU) | Bi-monthly | Inspect filters during routine cleaning |
| Countertop | Monthly | Limited space may require disassembling parts |
| Hot/Cold Dispensers | Monthly | Sanitize heating components carefully |
| Portable/Compact | After each use | Focus on mobility-related dust or debris |
Key Considerations When Cleaning Different Types
- Material Sensitivity: Always check whether your cooler has sensitive components like plastic interiors or stainless steel tanks before choosing a cleaning solution (e.g., vinegar vs bleach). Some materials may corrode if exposed too frequently to harsh chemicals.
- Drip Trays: Many models come with detachable trays where excess water collects—these should be cleaned thoroughly regardless of type.
- Filters: For POU systems in particular, filters must be inspected regularly as part of cleaning since clogged filters compromise drinking quality.
- External Surfaces: Dust and grime tend to build up over time on any cooler’s surface; wipe down with a microfiber cloth soaked in mild soap solution.
By identifying your specific type of cooler from this list, you can ensure that it receives appropriate care suited for its design while prolonging functionality over time.
How Often to Clean
Maintaining a clean water cooler is essential to ensure the safety and purity of the water you consume. A well-maintained cooler not only delivers fresh-tasting water but also prevents the buildup of harmful bacteria, mold, and mineral deposits. By understanding how often to clean your water cooler, you can establish a routine that supports both hygiene and functionality. Here’s a detailed guide on determining cleaning frequency and why it matters.
Factors Affecting Cleaning Frequency
- Type of Water Cooler:
Different coolers require different cleaning schedules. For instance: - Bottled Water Coolers: These typically need cleaning every 3-4 months or when replacing bottles, as they are more prone to contamination when bottles are swapped.
- Point-of-Use (Bottleless) Coolers: Since these connect directly to a filtered water line, they generally require cleaning every 6 months but may need attention sooner if filters are neglected.
- Environment:
If your cooler is located in a high-traffic or dusty environment (e.g., offices or shared spaces), it may collect contaminants more quickly and require more frequent cleaning. - Water Quality:
If the water source has high mineral content (hard water), limescale buildup can occur faster, necessitating more regular deep-cleaning sessions. - Usage Frequency:
In homes or offices with heavy usage, residue from hands touching taps or spouts can accumulate faster compared to occasional use settings.
General Cleaning Guidelines
| Type of Cleaning | Suggested Frequency |
| Basic exterior wipe-down | Weekly |
| Deep internal sanitization | Every 3-6 months |
| Replacing filters | As per manufacturer advice (typically every 6 months) |
Signs Your Cooler Needs Immediate Cleaning
- Odd Taste or Odor: If the water tastes metallic, stale, or has an unusual smell, this could indicate bacteria or algae growth inside the cooler.
- Visible Residue or Mold: Check for slime around spouts or in hidden crevices.
- Sluggish Flow Rate: Scale buildup might be clogging internal components.
- Water Discoloration: Unclear or tinted water signals potential contamination.
Practical Tips for Staying On Schedule
- Set reminders on your phone or calendar for quarterly deep-cleaning sessions.
- Keep necessary supplies — like food-grade sanitizer, brushes, and microfiber cloths — handy for easy access.
- Train employees (in office settings) on proper daily care routines such as wiping down surfaces after spills.
By adhering to an effective cleaning timeline tailored to your specific cooler’s needs and environment, you’ll ensure safe hydration for everyone who uses it while also prolonging the lifespan of your appliance.
Instructions
Cleaning your water cooler regularly is essential to ensure it functions properly and provides safe, fresh water. Follow these step-by-step instructions to clean your water cooler effectively and maintain optimal hygiene.
Materials Needed
- Clean rubber gloves
- A soft sponge or microfiber cloth
- Mild dish soap or unscented detergent
- White vinegar or an approved water cooler cleaning solution
- Bottle brush (for hard-to-reach areas)
- Paper towels or a drying cloth
- Bucket or large container for draining water
Step 1: Unplug the Cooler
For safety, always unplug the water cooler before beginning any cleaning process. This prevents electrical hazards and ensures you can clean all parts thoroughly without interference.
Step 2: Drain the Water Reservoir
Place a bucket under the spout and drain out all remaining water from both the hot and cold taps. If your model has a drain plug at the back, open it carefully to release any trapped liquid in the reservoir. Be sure to close it securely once drained.
Step 3: Disassemble Removable Parts
- The drip tray
- Water guard (if applicable)
- Faucet spouts (if they’re removable)
Wash these parts separately using warm soapy water. For thorough sanitization, soak them in a mixture of one part white vinegar to three parts water for 10–15 minutes. Rinse with clean water afterward and allow them to air dry on a clean surface.
Step 4: Clean Interior of Reservoir
- White Vinegar Solution: Combine two tablespoons of white vinegar with one liter of warm water.
OR - Commercial Cleaner: Follow instructions on an approved cooler-cleaning product.
Pour your solution into the reservoir. With gloved hands, use a soft sponge or cloth to scrub all interior surfaces gently but thoroughly. Pay extra attention to crevices where sediment may accumulate over time.
Drain this cleaning solution through both taps (hot and cold), ensuring it flushes out residues inside the pipelines.
Step 5: Rinse Thoroughly
Rinse out any remaining cleaner by filling the reservoir with fresh, lukewarm tap water. Let it sit for five minutes before releasing it through both taps into a bucket or sink. Repeat this rinsing process until no traces of soap, vinegar, or cleaner remain – typically two or three rounds should suffice.
Tip: Ensure there are no lingering odors from cleaning agents by sniff-testing after rinsing.
Step 6: Wipe Exterior Surfaces
- The body of the cooler
- Buttons/taps
- Outer edges around openings
Dry everything thoroughly using paper towels to prevent smudging or streaks on glossy finishes.
Step 7: Reassemble Components & Refill
- Position drip tray in place.
- Secure faucet attachments firmly.
- Insert bottle snugly onto its receptacle (if applicable).
Finally, refill your cooler with fresh drinking water and plug it back into its power source if needed.
By following these straightforward steps regularly—ideally every two months—you’ll ensure your water cooler remains sanitary while prolonging its lifespan effectively without compromising hydration quality at home or workspaces!
Instructions
Cleaning your water cooler is essential to ensure safe and hygienic drinking water. Proper maintenance prevents bacteria, mold, and mineral build-up that could contaminate the unit. Below is a step-by-step guide to effectively clean your water cooler.
Materials You’ll Need
- White vinegar or unscented household bleach (for sanitizing)
- Soft-bristled brush or bottle brush (for small components)
- Access to clean, warm water
If your cooler has a hot water option, handle it carefully to avoid burns.
Step 1: Disconnect the Cooler
- Turn off the power supply if your model is electric. This prevents any risk of electrical accidents during cleaning.
- Unplug the unit from the outlet for added safety.
Step 2: Drain Any Remaining Water
- Dispense any remaining water through both taps (hot and cold) into a bucket or sink. This helps empty internal reservoirs.
- If your model has a removable reservoir or drip tray, take them out for separate cleaning.
Step 3: Clean External Surfaces
- Use a damp microfiber cloth with mild dish soap to wipe down external surfaces like the top, sides, and front panel of the cooler. Focus on areas that are frequently touched—such as the buttons and tap handles—to remove grime and bacteria buildup.
Step 4: Clean Internal Components
- Remove any detachable parts like the drip tray, nozzles, caps, or reservoir (depending on your model). Soak these in warm soapy water for about 10–15 minutes.
- For stubborn dirt in small parts or crevices, use a soft-bristled brush.
- Rinse thoroughly with clean water and set them aside to air-dry completely.
Step 5: Sanitize the Interior Reservoirs
Using White Vinegar Solution:
1. Mix one part white vinegar with three parts clean warm water. 2. Pour this solution into both reservoirs (cold and hot compartments if applicable). Let it sit for about 15 minutes. 3. Use a soft sponge to gently scrub inside reservoirs if accessible. 4. Drain completely through both taps into a bucket.
Using Bleach Solution: (Alternative Sanitizer)
1. Combine one tablespoon of unscented bleach with one gallon of warm water. 2. Follow steps similar to those listed above but ensure extra rinsing since bleach residue can affect taste.
Tip: After draining sanitizer solutions, rinse multiple times with fresh clean water until no residue remains.
Step 6: Reassemble & Test
- Reattach removable parts securely.
- Plug in your unit if it’s electric and turn on power settings as needed.
- Run fresh drinking water through all taps before regular use to flush any lingering cleaning agents.
Maintenance Reminder for Future Cleaning Cycles
To maintain pristine conditions between deep cleanings: – Wipe down exposed surfaces weekly. – Empty drip trays regularly to prevent mold growth.
Additional Tips
To ensure your water cooler remains in excellent condition and continues to provide fresh, clean drinking water, there are a few additional maintenance tips and practices to keep in mind. These strategies go beyond basic cleaning routines and can help you prolong the lifespan of your cooler while maintaining hygiene.
Use High-Quality Water
- Always opt for filtered or purified water when refilling your cooler to minimize sediment buildup or contamination from low-quality water sources.
- Avoid using unfiltered tap water unless absolutely necessary, as it may contain minerals or impurities that can contribute to scaling and microbial growth.
Regularly Inspect for Wear and Tear
- Check the cooler’s components — such as the taps, drip tray, and seals — for signs of damage or wear.
- Replace worn-out taps to avoid leaks.
- Ensure rubber seals are intact to prevent contamination.
- If you notice cracks in the reservoir or dispenser area, consider replacing those parts promptly.
Position Your Cooler Correctly
- Place your cooler on a flat surface to prevent tipping or uneven operation.
- Keep it away from direct sunlight, which can promote algae growth inside transparent reservoirs.
- Avoid positioning it near heat sources like stoves or radiators that may affect cooling efficiency.
Sanitize Accessories
- Wash reusable cups with hot soapy water daily.
- Disinfect bottle caps if you’re refilling bottles manually.
- Clean any trays or holders used for accessories at least once a week.
Be Mindful of Storage Conditions
If you’re storing your water cooler for an extended period: – Empty all remaining water from the tank and dry thoroughly before storage. – Wrap smaller components like taps in clean cloths to protect them from dust accumulation.
Use a breathable cover if storing in areas prone to humidity.
Set a Cleaning Reminder
- Use calendar reminders on your phone or mark scheduled dates on a physical calendar for thorough cleaning sessions (e.g., every 4 weeks).
- For office settings, designate an employee responsible for overseeing maintenance tasks to ensure no steps are missed.
| Cleaning Frequency | Task |
| Daily/After Use | Wipe down surfaces |
| Weekly | Wash drip tray & exterior |
| Monthly | Perform deep cleaning |
Avoid Cross Contamination
- Encourage users not to touch the spout directly with their hands or mouth while dispensing water.
- Provide sanitizing wipes near the unit for quick wipe-downs between uses if placed in shared spaces (e.g., offices).
By following these tips alongside routine cleaning instructions, you’ll ensure that both cleanliness and functionality remain top-notch over time without compromising health standards.
Additional Tips
To ensure the longevity and proper functioning of your water cooler, incorporating a few additional maintenance practices can make a significant difference. Beyond regular cleaning, these tips can help maintain hygiene standards and improve the overall quality of your drinking water.
1. Monitor Water Quality Regularly
- Inspect for changes in taste or odor: If you notice any off-putting flavors or smells, it may indicate contamination or mineral buildup inside the cooler.
- Use filtered water: Starting with clean, purified water can reduce sediment deposits in the reservoir and spouts.
- Consider testing water periodically for pH levels and contaminants if you’re not using pre-filtered water.
2. Use Proper Cleaning Supplies
- Avoid harsh chemicals like bleach that might leave behind harmful residues; instead, opt for natural disinfectants such as white vinegar or baking soda.
- Use soft brushes to clean hard-to-reach areas like spouts without causing abrasions that could harbor bacteria.
| Cleaning Supply | Why It’s Recommended |
| White vinegar | Naturally kills bacteria and deodorizes |
| Baking soda | Removes grime and neutralizes odors |
| Microfiber cloth | Gentle on surfaces; effectively removes dirt |
| Soft bottle brush | Reaches narrow areas like spouts without scratching |
3. Prevent Mold and Bacteria Growth
- Keep the area dry: Wipe down external surfaces after every use to prevent excess moisture, which can encourage mold growth.
- Regularly inspect drip trays and empty them frequently to avoid standing water.
- Store unused bottles in a cool, dry place to minimize microbial contamination before use.
4. Handle Bottles Safely
When replacing or handling new bottles:
– Wash your hands thoroughly before touching bottle caps or openings.
– Clean bottle tops with a disinfectant wipe before placing them into the cooler to prevent introducing contaminants.
5. Place Your Cooler Strategically
The location of your cooler plays an essential role in its cleanliness:
– Avoid direct sunlight exposure—it can lead to algae growth inside transparent parts of the cooler system.
– Keep it away from heat sources like ovens or radiators, as excessive warmth may foster bacterial growth in standing water areas.
6. Schedule Deep Cleaning Sessions
To complement routine cleaning efforts: – At least once every three months, conduct a thorough internal cleaning—detaching parts like spigots and reservoirs (if possible) for separate washing. – Sanitize internal components by soaking them in a mix of warm water and vinegar (or any food-safe cleaning solution).
By following these additional tips consistently, you’ll be able to maintain not just the cleanliness but also the functionality of your water cooler over time while ensuring safe drinking water for everyone who uses it.
Instructions
Cleaning your water cooler is an essential task to ensure the water remains fresh, free from contaminants, and safe to drink. Neglecting this routine can lead to a buildup of bacteria, mold, or mineral deposits that may compromise the quality of the water. Follow these step-by-step instructions to maintain your water cooler properly.
Step 1: Gather Cleaning Supplies
- Soft cloth or sponge (non-abrasive)
- Dish soap (mild, unscented variety)
- White vinegar or unscented household bleach
- Clean bucket or large bowl
- Toothbrush or small cleaning brush for hard-to-reach areas
- Paper towels or clean microfiber cloths for drying
- Gloves (optional but recommended)
Step 2: Turn Off and Unplug the Cooler
Safety should always come first. Ensure the cooler is turned off and unplugged from its power source before you start cleaning. This will protect both you and the appliance.
Step 3: Drain All Water
Remove any remaining water in the machine by draining it through both taps (hot and cold). Some coolers may have a back drain plug; if so, use this to empty any residual liquid from internal tanks.
Step 4: Disassemble Removable Parts
- Drip tray
- Spigot/tap handles
- Water bottle cap adapter (if applicable)
Place these parts aside for individual cleaning.
Step 5: Clean Removable Parts
Wash all disassembled components with warm, soapy water. For stubborn dirt or buildup, soak them in a mixture of white vinegar and warm water for about 10–15 minutes before scrubbing gently with a sponge. Rinse thoroughly with clean water and let them air dry on a clean towel.
| Cleaning Solution | Use Case | Notes |
| Mild dish soap | General grime removal | Safe for most materials |
| Vinegar solution | Mineral deposit removal | Effective against limescale |
| Bleach solution | Disinfecting surfaces | Use sparingly; rinse thoroughly |
Step 6: Sanitize Interior Reservoirs
Option A: Mix one tablespoon of unscented bleach in one gallon of water.
Option B: Use two cups of white vinegar mixed with one gallon of warm tap water for a natural alternative.
Pour this solution into the reservoir inside the cooler where the bottled water usually sits. Let it sit for about five minutes to kill bacteria and neutralize odors.
Step 7: Scrub Interior Surfaces
Using a soft cloth or sponge soaked in your cleaning solution, wipe down all interior surfaces thoroughly. Pay special attention to corners and crevices where dirt can accumulate over time.
For hard-to-reach areas like spigots or corners, use a small toothbrush dipped in the cleaning mixture.
Step 8: Rinse Thoroughly
Drain out any remaining sanitizing solution through both taps until completely empty. Refill the reservoir with fresh tap water and repeat this process until there’s no residual taste or smell from vinegar/bleach left behind.
Step 9: Wipe Down External Surfaces
While waiting for internal parts to dry fully, clean external surfaces using a damp cloth dampened with mild dish soap diluted in warm water. Avoid harsh chemicals that could damage finishes or leave harmful residues behind.
Focus on high-touch areas like buttons, levers/taps, and bottle neck placement points where fingerprints accumulate frequently.
Step 10: Reassemble & Restart
- Reattach all removable parts carefully.
- Place a fresh bottle on top.
- Plug back into power outlet after proper assembly.
- Allow sufficient time (usually between half an hour–an hour) for cold/hot reservoirs reach desired temperatures again before usage resumes comfortably again .
By following these steps diligently every few months ensures healthier drinking habit safer hydration overall.