Why Do Freezers Need to Be Cleaned?
Freezers are essential appliances in most households, but they are often overlooked when it comes to regular cleaning. Keeping your freezer clean is not just about maintaining appearances—it plays a significant role in food safety, energy efficiency, and the longevity of the appliance itself. Below are key reasons why regular freezer cleaning is so important.
Over time, spills from frozen foods or leaking packaging may accumulate in your freezer. These spills can harbor bacteria or mold that could contaminate other items stored nearby. Cleaning your freezer ensures that your food remains safe to consume and free from harmful contaminants.
Odors can develop in a freezer if spoiled food is left inside or if liquids spill and freeze on surfaces. While freezing temperatures slow bacterial growth, they don’t eliminate it entirely. Regular cleaning helps remove any residue causing foul smells and keeps the interior fresh.
A dirty or unorganized freezer can make the appliance work harder than necessary to maintain its cold temperature. Frost buildup on the walls, for example, creates insulation that forces the freezer to consume more energy. Cleaning the appliance reduces frost accumulation and ensures optimal efficiency.
| Issue | Impact |
| Frost buildup | Increased energy usage |
| Spills/Residue | Bacterial growth & contamination |
| Clutter | Reduced airflow & uneven cooling |
A well-maintained freezer is less likely to experience mechanical issues over its lifetime. Dirty coils, excessive frost buildup, or blocked vents can lead to appliance strain and even costly repairs or replacement down the line.
Frozen foods should be stored at a consistent temperature of 0°F (-18°C). A poorly maintained freezer may struggle to maintain this ideal environment due to issues like frost buildup or blocked air vents caused by clutter or residue.
Best Practices for Preventing Dirt Accumulation
- Use airtight containers for storing items prone to leaking.
- Wipe off packages before placing them in the freezer.
- Label and organize food items by categories (e. g. , meats on one shelf, vegetables on another) for easier access.
- Check for expired or spoiled items during monthly grocery restocks.
Regularly cleaning your freezer not only promotes healthier food storage but also contributes positively toward efficient usage of energy and prolongs your appliance’s life span—a win-win for you and your household budget!
What Cleaning Products and Supplies Should You Use in Your Freezer?
When cleaning your freezer, selecting the correct cleaning products and supplies is essential for safety, efficiency, and maintaining the appliance’s performance. Using improper supplies can damage the freezer’s interior or leave behind harmful residues. Below is a guide to the best products and tools for achieving a thorough clean.
Recommended Cleaning Products
- Mild Dish Soap: A simple solution of mild dish soap mixed with warm water works well for removing grease, stains, and small spills.
- White Vinegar: A natural disinfectant that effectively eliminates odors and bacteria without leaving harmful chemical traces.
- Baking Soda: Acts as a gentle abrasive cleaner to scrub away stubborn stains while deodorizing the freezer.
- Commercial Freezer Cleaner (Optional): If you prefer store-bought options, look for non-toxic cleaners labeled safe for use in food storage areas.
Note: Avoid using harsh chemicals like bleach or ammonia inside your freezer. These can damage the appliance’s interior lining and may contaminate food if not rinsed properly.
Essential Cleaning Supplies
| Supply | Purpose |
| Soft Sponge or Cloth | Gentle scrubbing of surfaces without leaving scratches |
| Microfiber Towels | Effective for wiping down surfaces and drying thoroughly |
| Plastic Scraper | For removing ice buildup or dried-on residue without damaging surfaces |
| Bucket or Bowl | To mix cleaning solutions conveniently |
| Toothbrush | Useful for reaching small crevices where dirt might accumulate |
Steps to Prepare Your Cleaning Supplies
- For vinegar: Combine equal parts white vinegar with warm water in a spray bottle.
- For baking soda: Create a paste by mixing baking soda with a small amount of water.
- Gather all necessary supplies before beginning so you won’t need to pause mid-task.
- Test any new product in an inconspicuous area of the freezer before wider application.
Additional Tips
- Always unplug your freezer when using liquid-based cleaning solutions to avoid electrical hazards.
- Use eco-friendly cloths or reusable sponges instead of disposable wipes to reduce waste.
- If dealing with strong odors, consider storing an open container of baking soda inside after cleaning to absorb smells over time.
By carefully selecting gentle, effective products alongside proper tools, you’ll not only ensure a pristine interior but also preserve your freezer’s longevity.
What Cleaning Products and Supplies Should You Use in Your Freezer?
Cleaning a freezer effectively requires the right tools and products. Using appropriate supplies ensures that your appliance is cleaned thoroughly without causing any damage to its surfaces or functionality. Below is a detailed guide on what to use when cleaning your freezer.
Essential Cleaning Products
- Mild Dish Soap: A gentle dishwashing liquid helps remove dirt, grease, and food residues without harsh chemicals that could harm the freezer’s interior.
- White Vinegar: A natural cleaning agent that is effective in removing odors and disinfecting surfaces.
- Baking Soda: Ideal for tackling stubborn stains and lingering smells, baking soda serves as a mild abrasive for scrubbing.
- Commercial Kitchen Cleaners(optional): If you prefer store-bought products, choose ones labeled food-safe and free from ammonia or bleach.
Supplies Needed
| Item | Purpose |
| Microfiber Cloths | Gentle on the interior surface; reusable |
| Soft-Scrub Sponges | For scrubbing tougher stains |
| Old Toothbrush | Great for cleaning small crevices |
| Spray Bottle | To apply diluted cleaners like vinegar |
| Plastic Scraper | Useful for removing ice chunks or residue |
| Towels | For drying surfaces after cleaning |
Why Avoid Harsh Chemicals?
Many freezers come with plastic linings or aluminum components that can be damaged by strong acids or bases. Bleach, ammonia, and other corrosive chemicals should not be used inside your freezer as they may degrade materials over time or leave harmful residues behind. Opting for natural alternatives like vinegar or baking soda ensures safety while maintaining effectiveness.
Step-by-Step Preparation of Cleaning Solutions
- Mix one part white vinegar with one part water in a spray bottle.
- Shake well before using.
- Combine 3 tablespoons of baking soda with 2 tablespoons of warm water to form a paste.
- Use this for spot-cleaning tough areas.
- Add a few drops of mild dish soap to a bowl of warm water.
- Stir until sudsy; use this mixture for general cleaning purposes.
Additional Tips
- Use only warm—not hot—water when preparing solutions to avoid cracking cold freezer surfaces.
- Always test new products on a small area before applying widely.
- If you’re unsure about any chemical interaction, consult the user manual provided by your freezer’s manufacturer.
By using these carefully selected products and supplies, you’ll be equipped to clean your freezer effectively while protecting its integrity. Ensuring safe practices during the cleaning process will prolong the appliance’s life and maintain proper hygiene levels for stored food items.
Do You Need to Defrost Your Freezer to Clean It?
Whether or not you need to defrost your freezer before cleaning largely depends on the type of freezer you own, the level of frost buildup, and the method you plan to use for cleaning. Below, we’ll explore when defrosting is necessary, how to do it safely, and alternatives if you’re short on time or don’t want to defrost your freezer entirely.
When Defrosting Is Necessary
Defrosting becomes essential in certain situations: – Thick Frost Buildup: If there is significant ice accumulation (more than 1/4 inch thick), cleaning without defrosting may be difficult or ineffective.Manual Defrost Freezers: These freezers typically require manual defrosting at least once or twice a year.Deep Cleaning: For a thorough clean that reaches every corner and crevice of the freezer, defrosting is often necessary.
How to Safely Defrost a Freezer
If you determine that defrosting is required before cleaning, follow these steps for a smooth process: 1.Turn Off the Power: Unplug the freezer or turn off its power supply at the circuit breaker. This not only ensures safety but also stops energy consumption during cleaning. 2.Remove All Items: Transfer food to a cooler with ice packs or another freezer to keep items at safe temperatures while you work. 3.Protect Surroundings: Place towels around the base of the freezer to absorb any water from melting ice. 4.Allow Ice to Melt Naturally: Prop open the door and let warm air enter. This will speed up melting without damaging internal components. 5.Use Warm Water for Tough Ice: To accelerate melting in stubborn areas, place bowls of warm (not boiling) water inside the freezer or gently wipe icy spots with a cloth soaked in warm water.
Tip: Avoid using sharp tools like knives or screwdrivers to chip away at ice; this can damage your freezer and void warranties.
Alternatives If You Don’t Want to Fully Defrost
In some cases, fully defrosting isn’t practical—for example, if time is limited or frost buildup isn’t severe.Spot Cleaning Frost-Free Models: Modern frost-free freezers are designed to reduce ice buildup over time. For these models, you can unplug them briefly while wiping down shelves and walls without fully defrosting.Partial Defrost for Quick Cleaning: – Unplug for only 20–30 minutes so some frost softens enough for easy removal. – Use plastic scrapers or silicone tools for gentle scraping during this short downtime.Clean While Frozen Items Stay Inside (Minimal Frost): – Shift frozen food from one section of the freezer as you work on another part. – Use microfiber cloths soaked in diluted vinegar solution (see more under “How To Clean Your Freezer With Vinegar”) for effective surface cleaning.
Common Mistakes When Skipping Defrosting
If skipping a full defrost process: – Avoid using overly wet cleaning methods; excess water can refreeze quickly and create new issues. – Be cautious not to trap moisture in seals or vents as it may affect performance later.
A well-maintained freezer will not only perform efficiently but also extend its longevity significantly—whether you opt for full defrosting during each deep clean session or utilize time-saving alternatives when necessary.
How to Clean Your Freezer with Vinegar
Cleaning your freezer with vinegar is an effective, eco-friendly, and affordable method to ensure a hygienic and odor-free appliance. Vinegar’s natural acidity makes it a powerful cleaner, capable of cutting through grime, eliminating bacteria, and neutralizing stubborn odors. Below is a step-by-step guide to using vinegar for cleaning your freezer.
Why Vinegar is Ideal for Cleaning Freezers
- Eco-Friendly:Vinegar is free from harsh chemicals, making it safer for both the environment and your household.
- Non-Toxic:Unlike chemical cleaners, vinegar leaves no harmful residue near food storage areas.
- Odor Neutralizer:It effectively eliminates unpleasant smells trapped in the freezer.
- Antimicrobial Properties:Its acidity can help reduce bacteria or mold presence.
Step-by-Step Guide to Cleaning Your Freezer with Vinegar
1. Gather Supplies Before you begin, collect everything you’ll need: – White distilled vinegar – Warm water – A spray bottle – Microfiber cloths or sponges – A bowl or bucket – Optional: Baking soda (for additional odor removal)
2. Empty the FreezerClear out all contents from the freezer: – Transfer frozen foods to a cooler or insulated bag to keep them cold during cleaning. – Discard expired or freezer-burnt items.
3. Unplug the FreezerFor safety and energy efficiency: – Turn off and unplug the appliance if possible. – If you’re dealing with frost buildup, allow the ice to melt naturally (or place towels around for water collection).
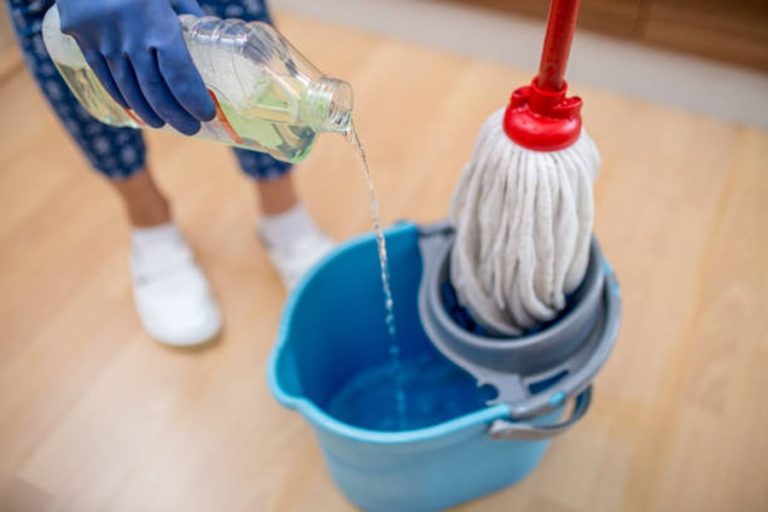
4. Prepare Your Cleaning SolutionMix your cleaning solution in a spray bottle or bowl: – Combine equal parts white distilled vinegar and warm water (e. g. , 1 cup each).
For tougher stains: Add 1 tablespoon of baking soda per cup of water for extra scrubbing power.
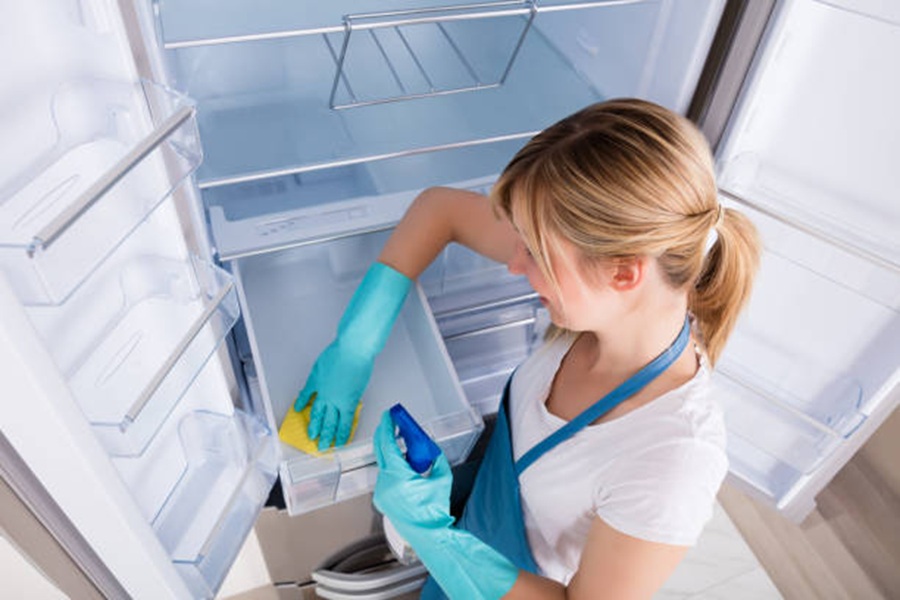
5. Spray and WipeUse your vinegar solution on all surfaces: – Generously spray shelves, walls, drawers, and seals inside the freezer. – Let it sit for 5–10 minutes to loosen dirt and odors.
Wipe surfaces with a damp cloth or sponge: – Use circular motions for stuck-on grime.
Pay special attention to door seals (gaskets), as these often trap spills or debris: – Dip an old toothbrush in the solution for hard-to-reach grooves.
6. Address Stubborn OdorsIf persistent smells remain after wiping down: – Place an open dish of baking soda inside the empty freezer for several hours; this will absorb lingering odors.
7. Dry ThoroughlyTo prevent moisture buildup (which can lead to frost), dry all surfaces using a clean microfiber cloth before plugging the freezer back in.
Additional Tips
| Problem | Solution |
| Sticky Residues | Use pure vinegar on sticky spots before wiping clean. |
| Hard Water Stains | Apply undiluted vinegar directly; scrub gently if necessary. |
| Deodorizing | Place cotton balls soaked in vinegar overnight inside unit. |
Using vinegar not only simplifies maintenance but also ensures safe food storage conditions without introducing unnecessary chemicals into your kitchen environment. Repeat this process regularly based on how often you clean your freezer (referencing appropriate schedules) or whenever necessary after spills occur within it.
Tips for Cleaning a Freezer After a Power Outage
Cleaning a freezer after a power outage can be a daunting task, especially if the items inside have thawed. A prolonged lack of power may lead to odors, leaks, or even bacterial growth. This section provides practical tips on how to restore cleanliness and hygiene to your freezer effectively.
Assess the Situation
- Inspect the contents: Check for items that have completely defrosted or spoiled. When in doubt about food safety, throw it out.
- Check for leaks: Look for any liquids that may have seeped from thawing food and pooled at the bottom of the freezer.
- Evaluate the odor: Lingering smells often indicate spoiled food or bacteria buildup.
Gather Necessary Supplies
You’ll need the following tools and cleaning materials: – Rubber gloves (to protect your hands) – Trash bags (preferably heavy-duty and sealable) – Cleaning cloths or sponges – Absorbent paper towels – A bucket of warm water – Mild dish soap – White vinegar or baking soda (for odor removal) – Plastic scraper (if needed to remove stuck debris)
Step-by-Step Guide to Cleaning
- Always disconnect power before cleaning your appliance for safety purposes. This step also prevents accidental freezing of cleaning solutions.
- Dispose of spoiled items immediately in sealed trash bags.
- Salvage items that are still cold but safe by transferring them to another working freezer or cooler with ice packs.
- Use paper towels or absorbent cloths to soak up any liquid pooled at the bottom of the freezer.
- If there’s a significant amount, you may need a small handheld vacuum designed for wet areas.
- Create a solution with mild dish soap and warm water.
- Wipe down all surfaces, including shelves, walls, and drawers, with this solution using a sponge or cloth.
- Spray directly onto affected areas and wipe clean after 5–10 minutes.
- Alternatively, sprinkle baking soda on tough spots before scrubbing gently with a damp sponge.
- Shelves, bins, and drawers should be removed where possible.
- Wash these parts in warm soapy water, rinse thoroughly, and let them air dry before putting them back into the freezer.
- Before plugging your freezer back in, ensure all surfaces are completely dry to prevent ice buildup once it’s operational again.
- Leave doors open if necessary: For lingering odors after cleaning, leave the door open for several hours (while unplugged) to air out naturally.
Preventing Future Issues During Power Outages
To minimize cleanup efforts after future outages: – Keep your freezer well-stocked; frozen items help maintain cold temperatures longer during power loss. – Invest in an appliance thermometer to monitor safe temperatures during outages (freezers must remain at 0°F/-18°C). – Avoid opening the door frequently during an outage; keeping it closed helps preserve internal temperatures longer.
Quick Reference Table: Cleaning Solutions Comparison
| Solution | Best For | How To Use |
| Warm soapy water | General cleaning | Wipe surfaces thoroughly |
| Vinegar-water mixture | Odor neutralization | Spray on surface & wipe off |
| Baking soda paste | Stubborn stains/odors | Apply paste & scrub gently |
By following these steps promptly after an outage occurs, you can maintain both cleanliness and freshness within your freezer while preventing further issues from arising.
Tips for Cleaning a Freezer After a Power Outage
Cleaning a freezer after a power outage requires special care to manage potential spoilage, eliminate odors, and sanitize the appliance. A prolonged loss of electricity can lead to melted ice, leaking fluids, and spoiled food, so addressing the issue promptly is crucial for both hygiene and safety. Follow these practical tips to restore your freezer to proper working order.
Assess the Condition of the Freezer and Food
Before starting the cleaning process, evaluate whether any food items can be salvaged and determine if there are spills or lingering odors.
- If the freezer temperature rose above 40°F (4°C) for more than 2 hours, most perishable items like meat, dairy products, or seafood should be discarded.
- Items that are still partially frozen or have stayed below this temperature may be safe to refreeze or consume.
- Discard spoiled items responsibly:
Dispose of any spoiled food in sealed bags to minimize odor and avoid attracting pests. Check local guidelines for disposal of large quantities of food waste.
Clear Out Melted Ice and Water
After a power outage, melted ice from freezer walls or ice trays can create puddles. Taking care of excess moisture early prevents further mess.
- Remove any movable shelves or drawers for easier access.
- Use towels to absorb standing water inside the freezer.
- Wipe down the interior with absorbent cloths or sponges until dry.
Deodorize and Clean Thoroughly
Once you’ve removed all spoiled food and moisture, focus on eliminating odors caused by decomposition as well as sanitizing your appliance.
- A mixture of baking soda and warm water (2 tablespoons per quart/liter) works well to clean surfaces.
- Alternatively, use white vinegar diluted with water for its natural deodorizing properties.
- Scrub interior walls, shelves, drawers, door seals (gaskets), and corners with your chosen solution using a soft cloth or sponge.
- Pay extra attention to areas where spills occurred.
- Combat strong odors:
If smells persist after cleaning: - Place an open box of baking soda inside the freezer.
- Activated charcoal bags or bowls filled with coffee grounds can also help neutralize lingering scents.
| Cleaning Solution | Purpose | Application |
| Baking Soda + Water | Cleans stains & deodorizes | Wipe interior & shelves |
| Vinegar + Water | Removes tough odors | Spray & clean surfaces |
| Coffee Grounds | Absorbs persistent smells | Leave in small containers |
Sanitize After Cleaning
- Use a mild bleach solution (1 tablespoon bleach per gallon/liter of water) as a final rinse after general cleaning. Avoid harsh chemicals that could damage internal components.
- Rinse thoroughly with clean water afterward and dry all surfaces completely before turning on the freezer again.
Prevent Future Issues
- Keep thermometers in your freezer; this allows you to monitor temperature changes during outages.
- Consider investing in insulated coolers or backup power sources if you live in areas prone to frequent blackouts.
- Always label stored foods with dates so you can quickly identify older items that may need disposal first during an emergency.
By following these steps carefully after a power outage, you’ll not only restore cleanliness but also maintain peace of mind knowing your freezer is safe and ready for continued use.