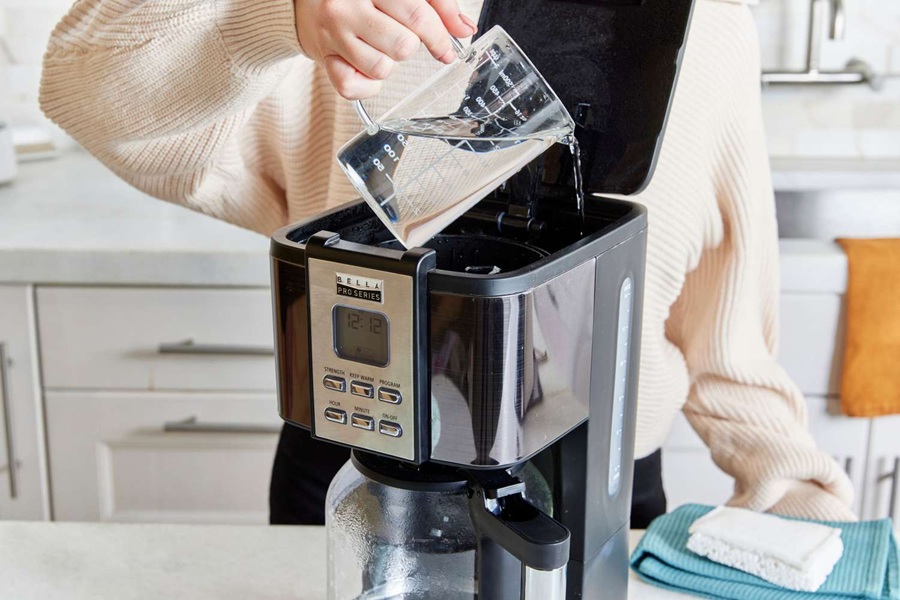
Why You Should Clean Your Coffee Maker Regularly
Coffee makers are indispensable appliances for many of us, providing that crucial cup of morning energy. However, without regular cleaning, they can harbor harmful bacteria, mold, and mineral deposits that not only impact the flavor of your coffee but can also pose potential health risks. Understanding why regular cleaning is essential will motivate you to maintain a cleaner coffee maker and enjoy better-tasting brews every time.
Preventing Bacteria and Mold Growth
- Coffee makers provide a warm and moist environment, the perfect breeding ground for bacteria and mold.
- Studies have found that the water reservoir and other damp components of coffee machines can contain higher levels of germs than some bathroom surfaces.
- Regular cleaning ensures these harmful microorganisms don’t contaminate your coffee or affect your health.
Enhancing Coffee Flavor
- Old coffee oils and residues from previous brews can build up in your coffee maker over time. This results in stale or even bitter-tasting coffee.
- Mineral deposits from hard water can further alter the flavor by clogging the machine’s components or obstructing water flow.
- Cleaning removes these residues, ensuring each cup tastes fresh, robust, and true to its intended flavor profile.
Extending Machine Lifespan
- Coffee makers are an investment, and regular maintenance helps protect that investment.
- Mineral buildup (also known as limescale) can damage internal components like the heating element or water pump if left unchecked.
- Keeping your machine clean prevents wear and tear caused by clogs or inefficient operation.
Promoting Efficient Performance
- A clean coffee maker works more efficiently. When mineral deposits accumulate, they restrict water flow or cause uneven heating. This not only affects brewing quality but also increases energy consumption.
- Routine cleaning keeps all parts functioning smoothly, so your machine operates at peak performance with every use.
How Often Should You Clean Your Coffee Maker?
To keep your coffee maker in top condition:
- Daily Maintenance: Rinse all removable parts (e.g., carafe, filter basket) after each use to prevent residue buildup.
- Weekly Cleaning: Wash removable components with warm soapy water or run them through a dishwasher if safe.
- Monthly Deep Clean: Use a natural cleaner like baking soda or lemon juice to descale the machine’s interior.
| Frequency | Cleaning Task |
| Daily | Rinse carafe, filter basket; empty grounds |
| Weekly | Wash removable parts thoroughly |
| Monthly | Descale interior using non-vinegar solutions |
Regular cleaning offers numerous benefits beyond just hygiene; it enhances the quality of your morning ritual while ensuring your machine lasts for years to come. Small efforts made consistently will safeguard both your health and enjoyment of every brew.
How to Clean a Coffee Maker with Baking Soda
Cleaning your coffee maker is an essential task to maintain the quality of your coffee and ensure your machine remains in good condition. If you’re looking for an alternative to vinegar, baking soda is an excellent, gentle, and effective option. It’s natural, inexpensive, and widely available. Here’s how you can use baking soda to clean your coffee maker properly.
Why Use Baking Soda?
- Non-Toxic: Safe for both you and the environment.
- Odor Neutralizer: Removes lingering odors from previous brews.
- Mild Abrasive: Effectively removes stains and mineral buildup without damaging delicate components.
- Cost-Effective: Much cheaper than specialty cleaners.
Materials Needed
- 1/4 cup of baking soda
- Warm water
- A soft sponge or brush
- A clean microfiber cloth
- Access to running water
Step-by-Step Cleaning Process
- Remove any leftover coffee grounds from the basket.
- Ensure the carafe is empty.
- Mix 1/4 cup of baking soda with 1 liter (approximately 4 cups) of warm water in a bowl. Stir until fully dissolved.
- Pour the baking soda solution into the water reservoir of your coffee maker.
- Turn on your machine and let it run through a brewing cycle as if you were making coffee.
- Once finished, discard the solution from the carafe.
- Refill the reservoir with fresh water and run another brewing cycle to rinse out any remaining residue or baking soda taste.
- Repeat this process one or two more times to ensure thorough rinsing.
- Remove components like the filter basket and carafe.
- Wash these parts separately using warm soapy water or some leftover baking soda paste (a mixture of baking soda and a few drops of water).
- Use a damp microfiber cloth dipped in a little baking soda solution to wipe down exterior surfaces gently.
- Rinse with plain water if needed and dry with a clean cloth.
Table: Quick Reference for Cleaning Steps
| Step | Action | Purpose |
| Empty Machine | Remove coffee grounds & rinse carafe | Prepares machine for cleaning |
| Baking Soda Solution | Mix 1/4 cup baking soda with warm water | Creates cleaning agent |
| Brew Cycle | Run solution through machine | Cleans internal components |
| Plain Water Flush | Run fresh water cycles | Removes residue |
| Clean Parts | Wash removable items separately | Ensures all areas are cleaned |
| Wipe Exterior | Clean outer surfaces with damp cloth | Maintains appearance |
Additional Tips for Effective Cleaning
- For stubborn stains inside your carafe, sprinkle some dry baking soda directly onto a sponge or brush before scrubbing.
- Don’t exceed the recommended amount of baking soda as too much can cause clogging during the brew cycle.
- Regularly clean your machine every 1–2 weeks depending on usage frequency.
By incorporating these steps into your routine maintenance schedule, you’ll keep your coffee maker functioning smoothly without relying on harsh chemicals like vinegar.
How to Clean a Coffee Maker with Baking Soda
Baking soda is a versatile and natural cleaning agent that can effectively remove dirt, residue, and odors from your coffee maker. Using baking soda as an alternative to vinegar is particularly appealing if you’re sensitive to the strong smell of vinegar or simply don’t have it on hand. This section will provide a step-by-step guide on how to use baking soda for cleaning your coffee maker efficiently.
Why Choose Baking Soda for Cleaning?
- Non-toxic: Baking soda is safe, eco-friendly, and free from harsh chemicals.
- Odor-neutralizing: It eliminates unpleasant smells without leaving behind a strong or lingering scent.
- Gentle yet effective: Baking soda cleans residue without damaging the coffee maker’s components.
Materials You’ll Need
- 1/4 cup of baking soda
- Warm water
- A soft sponge or microfiber cloth
- A small brush (optional, for hard-to-reach areas)
Step-by-Step Instructions
- Mix 1/4 cup of baking soda with approximately one cup of warm water in a bowl. Stir until fully dissolved.
- Pour the baking soda solution into the coffee maker’s water reservoir. Ensure it’s filled up enough to run at least half a brewing cycle.
- Turn on the coffee maker as if you were brewing coffee. Allow the machine to complete one full cycle with only the baking soda solution running through it.
- After completing the brew cycle, discard any remaining liquid in the carafe and rinse it out.
- Refill the reservoir with clean water and run another full brewing cycle to flush out any remaining baking soda residue.
- Dampen a soft sponge or microfiber cloth with warm water.
- Wipe down external surfaces such as buttons, handles, or lids.
- Use a small brush to scrub harder-to-reach areas like crevices around buttons or seams in removable parts.
- If there are still visible mineral deposits or stains inside the coffee maker, create a more concentrated paste by mixing equal parts baking soda and water.
- Apply this paste directly onto problem areas using your soft sponge or brush.
- Let it sit for five minutes before scrubbing gently and rinsing thoroughly.
Tips for Best Results
- Always allow all parts of your coffee maker (carafe, filter basket, etc.) to dry completely after cleaning to prevent mold growth.
- Repeat this cleaning process every 2–3 weeks if you use your coffee machine daily.
- Avoid using excessive amounts of baking soda as it may leave behind residue that requires additional rinsing cycles.
| Component | Method | Frequency |
| Carafe | Rinse with warm soapy water | After each use |
| Filter basket | Scrub with diluted baking soda solution | Weekly |
| Water reservoir | Run full cleaning cycle | Every 2–3 weeks |
Incorporating this simple method into your regular kitchen routine ensures that your coffee tastes fresh while extending the lifespan of your appliance. With its affordability and efficiency, baking soda proves itself an excellent alternative cleaner for any household appliance not just your beloved coffee machine!
How to Clean a Coffee Maker with Baking Soda
Baking soda is an excellent alternative to vinegar when it comes to cleaning your coffee maker. It’s a natural, non-toxic cleaner that effectively removes odors, residue, and buildup without leaving behind a strong smell. Additionally, baking soda is gentle on your coffee maker’s components and is suitable for both traditional drip coffee machines and single-serve models.
Why Use Baking Soda for Cleaning?
- Non-Toxic and Safe: Baking soda is food-safe, making it ideal for cleaning appliances that handle consumables.
- Deodorizing Properties: It neutralizes odors that may linger from coffee oils or mineral deposits.
- Gentle Abrasive Action: Baking soda can help scrub away stubborn stains without damaging the surfaces of your machine.
Supplies Needed
Before you start the cleaning process, gather the following items:
- Baking soda (around 1/4 cup)
- Warm water
- A soft cloth or sponge
- A toothbrush (optional, for detailing)
- Clean water for rinsing
Step-by-Step Process to Clean Your Coffee Maker with Baking Soda
- Mix 1/4 cup of baking soda with 1 liter of warm water. Ensure the baking soda dissolves completely to avoid clogs in your machine.
- Pour the baking soda solution into the water reservoir of your coffee maker. Avoid overfilling it by only filling up to its maximum capacity.
- Turn on your coffee maker and run a brew cycle as though you were brewing coffee. This allows the solution to flow through all internal components, loosening any residue or buildup.
- For machines with heavy buildup, pause halfway through the brewing cycle and let the solution sit in the system for about 15 minutes before resuming.
- Once the cycle finishes, discard the used solution from both the carafe and reservoir.
- Rinse out any remaining baking soda by running two full cycles using clean, fresh water only. This ensures no residue remains in your machine or its components.
- Using a damp cloth or sponge dipped in warm water (and a pinch of baking soda if needed), clean the exterior parts of your machine such as buttons and handles.
- If stubborn stains persist inside removable parts like filters or carafes, make a paste with baking soda and water and gently scrub them using a soft brush or sponge.
Tips for Best Results
- Use filtered water instead of tap water during both cleaning cycles and regular use to reduce mineral buildup.
- Avoid leaving any wet parts in place after cleaning; allow removable pieces like filters and carafes to air dry completely.
- Repeat this process monthly or more frequently if you use your coffee maker daily.
| Frequency | Cleaning Action |
| Daily | Rinse carafe and filter basket after each use |
| Weekly | Wipe down exterior surfaces |
| Monthly | Perform deep cleaning with baking soda |
By incorporating this simple routine into your regular maintenance schedule, you can extend the lifespan of your coffee maker while ensuring better-tasting coffee every day without relying on vinegar-based solutions.
How to Clean a Drip Coffee Maker Without Vinegar
Cleaning a drip coffee maker without vinegar is entirely possible and can be just as effective with alternative methods. While vinegar is widely used for its natural descaling properties, many people prefer other options due to its strong smell or personal sensitivities. Below, we will outline an effective approach to clean your drip coffee maker using alternatives that are both safe and efficient.
Materials You’ll Need:
- Lemon juice (natural descaling agent) or citric acid powder
- Baking soda (odor neutralizer and gentle abrasive)
- Mild dish soap (for surface cleaning)
- Soft-bristled brush or bottle brush
- Microfiber cloth or sponge
- Clean water
Step-by-Step Process:
- Remove all removable parts, such as the carafe, filter basket, and any reusable filters.
- Rinse these components under warm water to remove coffee grounds or residue.
- Mix equal parts of lemon juice and water. For a medium-sized coffee maker, use approximately one cup of each. Lemon juice works as an excellent substitute for vinegar due to its natural acidity.
- Pour the lemon juice solution into the water reservoir of the coffee maker.
- Turn on the machine and start a regular brewing cycle but without adding any coffee grounds.
- Midway through the brewing process, turn off the machine and let it sit for 15–20 minutes to allow the solution to break down mineral deposits.
- After completing the first brew cycle, discard the lemon-water mixture.
- Run 2–3 more cycles using plain clean water to eliminate any remaining residue or citrus taste.
- Wash all removable parts with warm soapy water using mild dish soap.
- For stubborn stains on items like carafes or filter baskets, sprinkle baking soda onto a damp sponge and scrub gently in circular motions.
- Use a microfiber cloth dipped in soapy water to clean the exterior of your machine.
- Wipe again with a damp cloth free of soap to remove any leftover residue.
- Air Dry Thoroughly:
Lay all disassembled components out on a drying rack or clean towel before reassembling your coffee maker.
Tips for Enhanced Cleaning:
- If you notice persistent mineral buildup in hard-to-reach areas (e.g., inside tubes), dissolve 1–2 teaspoons of citric acid powder into water as an alternative cleaning solution.
- Using baking soda specifically for deodorizing reusable filters helps eliminate trapped odors from old coffee residues effectively.
- If your carafe has stubborn stains that don’t come off with light scrubbing, fill it with warm water mixed with one tablespoon of lemon juice and let it soak overnight.
Quick Comparison Table: Lemon Juice vs Vinegar
| Feature | Lemon Juice | Vinegar |
| Smell | Fresh citrus scent | Strong acidic smell |
| Natural Acidity | Mild yet effective | Stronger acidity |
| Taste Residue | Minimal aftertaste | May linger if rinsed poorly |
| Skin Sensitivity | Gentle on skin | Can irritate skin |
By following this guide, you’ll keep your drip coffee maker running smoothly without resorting to vinegar while maintaining excellent brew quality over time.
How to Remove Coffee Stains and Mineral Buildup from Your Machine
A coffee maker that is used regularly can develop coffee stains and mineral buildup over time. These not only affect the taste of your coffee but may also impact the performance and lifespan of your machine. Removing these residues is essential to maintain a clean machine. Below, we’ll explore simple techniques and effective methods for tackling stains and buildup without vinegar.
Why Do Coffee Stains and Mineral Deposits Form?
- Coffee Stains: These are caused by the natural oils, tannins, and pigments found in coffee that stick to surfaces over time.
- Mineral Buildup: Hard water contains minerals like calcium and magnesium that accumulate in your machine, clogging internal components.
Tools & Ingredients You May Need:
- Baking soda
- Lemon juice
- Dish soap (mild)
- Denture cleaning tablets
- A soft-bristled brush or sponge
- Microfiber cloth
- Filtered water
Methods for Removing Coffee Stains
- Create a paste using 2 tablespoons of baking soda mixed with a few drops of water.
- Apply the paste to stained areas such as the carafe or drip tray.
- Gently scrub using a soft sponge or brush until stains lift.
- Rinse thoroughly with warm water.
- Fill the carafe or other stained components with equal parts lemon juice and warm water.
- Let it soak for 30 minutes to dissolve stubborn stains.
- Use a gentle scrubber for any remaining discoloration, then rinse well.
- Wash removable parts with warm soapy water.
- Use a microfiber cloth or soft-bristled brush to clean areas where coffee tends to stain.
Methods for Removing Mineral Deposits
- Mix 1 part lemon juice with 2 parts water.
- Pour this solution into your machine’s reservoir until full.
- Run a brewing cycle without coffee grounds, letting the acidic solution break down mineral buildup inside.
- Dissolve denture cleaning tablets in warm water (follow package instructions).
- Pour this into your carafe or directly into removable parts like drip trays where buildup is visible.
- Let sit for about 20 minutes before rinsing thoroughly.
- Flushing System After descaling or cleaning:
- Run at least two cycles of plain filtered water through your machine to remove any residue.
| Cleaning Solution | Best For | Tips |
| Baking Soda Paste | Surface stains | Avoid scrubbing too hard on glass. |
| Lemon Juice | Stains + mineral deposits | Rinse thoroughly to remove citrus scent. |
| Denture Tablets | Tough mineral deposits | Great for drip trays & reservoirs. |
Maintenance Tips to Prevent Future Build-Up:
- Use filtered or distilled water when possible; this reduces mineral deposits caused by hard water.
- Clean removable parts such as the carafe and filter basket daily using mild dish soap.
- After every brew, wipe down any surfaces where spills occur before they dry out completely.
By incorporating these methods regularly, you’ll ensure that your coffee maker stays free of stains and buildup while delivering great-tasting coffee every day.
Tips for Keeping Your Coffee Maker Clean and Fresh Between Uses
1. Rinse Components After Each Use
Residue from coffee oils and grounds can build up quickly, so it’s important to rinse removable parts regularly:
- Carafe: Wash the carafe with warm, soapy water after every use to prevent stains or odors from developing.
- Filter Basket: Remove the filter basket (or reusable filter) and thoroughly rinse it under running water to eliminate any leftover coffee grounds.
- Lids and Spouts: Pay special attention to lids or spouts where residue may accumulate over time.
2. Empty Coffee Grounds Promptly
Leaving used coffee grounds in the machine for extended periods can result in unpleasant odors or even mold growth. Dispose of old grounds immediately after brewing, especially if you aren’t planning another pot soon.
3. Wipe Down Exterior Surfaces Regularly
The exterior of a coffee maker is often overlooked but can collect dust, spills, or fingerprints:
- Use a damp microfiber cloth to wipe down surfaces daily to maintain its appearance and prevent buildup of grime.
- For stubborn spots, use a small amount of mild dish soap diluted with water on the cloth.
4. Use Fresh Water for Each Brew
Using fresh, cold water not only improves the flavor of your coffee but also helps minimize mineral buildup that can occur when hard water is repeatedly used.
5. Avoid Overfilling Water Reservoirs
When filling the water reservoir, stick to the recommended level indicated by your coffee maker’s manufacturer:
- Overfilling can cause spillage into areas that are difficult to clean.
- This also minimizes potential moisture damage within sensitive components of the machine.
| Problem | Solution |
| Coffee oil residue | Rinse carafe/filter after every use |
| Mineral buildup | Use fresh water regularly |
| Odors | Empty old grounds immediately |
6. Keep an Eye on Filters
If you’re using disposable paper filters:
- Replace them with each brew, never reuse paper filters as they may break down or impart unwanted flavors over time. For reusable filters:
- Clean them thoroughly by soaking in warm soapy water weekly and brushing gently with a soft brush if required.
7. Descale Periodically (Even Without Vinegar)
While this header focuses on daily upkeep, periodic descaling is still essential for long-term maintenance:
- Alternatives like lemon juice or baking soda solutions are great options for removing hard-water deposits without vinegar.
- Aim to descale at least once every one to three months depending on usage.
8. Store Components Properly During Downtime
If you don’t use your machine daily:
- Ensure all parts are dry before storage as lingering moisture encourages bacteria or mildew growth.
- Store removable pieces like carafes upside-down in an open-air environment when possible.
By following these proactive tips consistently, you’ll save yourself time during deep cleaning sessions while ensuring every cup brewed from your machine remains delicious and safe for consumption!